
Materials:
Step 1: Position the ladder.
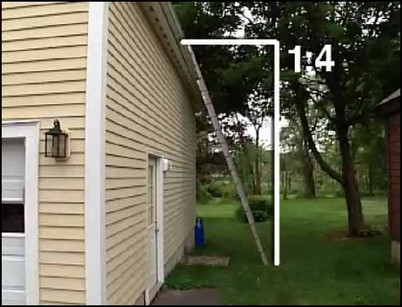
Care must be taken when working on a ladder. Be sure that the ladder is set on solid, level ground. There should be a 1:4 ratio between the height of the ladder to the distance the bottom of the ladder is to the house.
Safely position the ladder.
Step 2: Inspect and remove blockage.
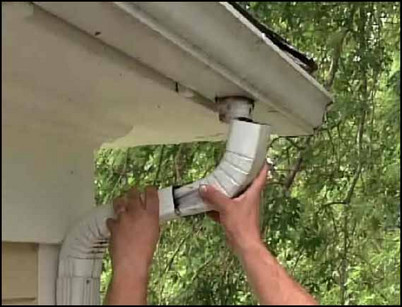
Old matted leaves and sticks can block drainage from the gutter. Clear these blockages from the gutter. Disassemble the first section of the downspout by removing the screws or rivets that hold it in place. Give the section a shake to remove blockage. Remove the bottom elbow of the downspout and clean it the same way. Re-fasten these two sections with self-tapping screws made of the same material as the gutters.
Remove and clean the first section of the gutter downspout.
Step 3: Inspect for and repair any holes.

Inspect the length of gutter for small holes. If you find one, cut a patch of scrap material about one inch larger than the hole on all sides. The patch should be the same material as the gutter. Clean and rough-sand the area around the hole. Use a stiff brush to spread gutter repair compound on the area around the hole. Press the patch into the compound, and then completely cover the patch with another layer of compound to make a good seal.
Press the patch into the compound.
Step 4: Repair cracks.
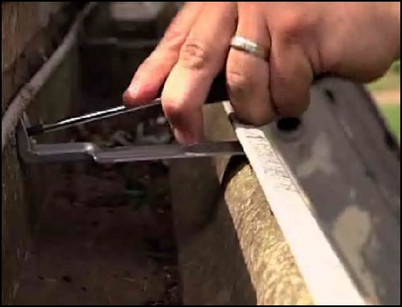
Look for cracks in the overlapping sections of gutter. If a loosening section or seam is found, first clean the area thoroughly. Drill two 1/8-inch holes into the bottom of the overlapping sections and one on each side as well. Use a pop riveter to pop rivet the sections together. Lay down a coat of gutter compound over the seam and all the rivets. Use a stiff brush to spread the compound over the entire seam, extending coverage up the side of the seam and out 1 inch from either side of the seam.
Pop rivet the sections together.
Step 5: Repair sags.
A gutter will perform best if water runs downhill from the end of the gutter to the downspout. Inspect the gutter for any sags that would prevent the free flow of water. These are most likely caused by a hanger that has bent, broken or slipped out of place. To repair a sag, simply replace or add a hanging bracket designed for your gutter system to the sagging section. This will bring it back to pitch with the rest of the gutter line. Your gutter should now operate properly.
Add a hanging bracket to fix the sag.


