
Materials:
Step 1: Project overview.
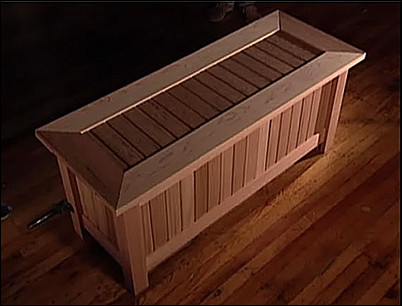
Part One of the western red cedar deck storage box project focuses on the construction of the storage box top. The top is built from two 8-foot 2 X 6s with lap miter joints. Three 8-foot pieces of tongue-and-groove boards are cut into sixteen 14-inch sections for the top. Western red cedar was chosen for this project because of its beauty and its natural ability to stand up to harsh weather for many years.
Part One focuses on the storage box top.
Step 2: Cut and mark the 2 X 6 boards.
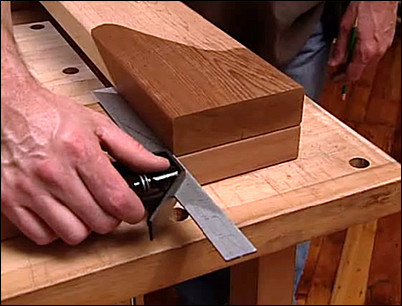
Cut the boards to length. Place one board over the other to form the first corner. Use a square to make sure the joints are square, and make a mark on the bottom board where the boards overlap.
Use a square.
Step 3: Draw a miter line.
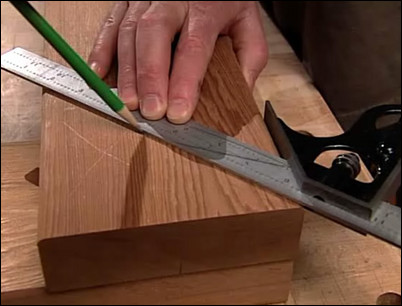
On the second board that forms the corner, draw a 45-degree line for the miter. Transfer this measurement down the side of the board. Flip the board over and carry the measurement across the bottom.
Draw a 45-degree line for the miter.
Step 4: Set your fence and router depth.
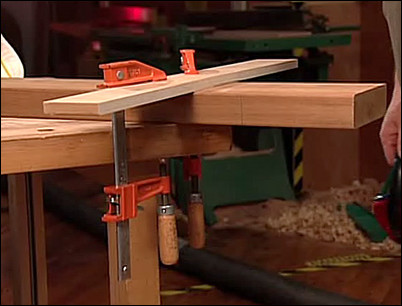
Set a fence in place so that the router will cut right to the marked 45-degree line. Set the depth of the router to 1/2 the thickness of the board. Be sure to wear eye and ear protection, as well as a respirator.
Set the fence in place.
Step 5: Cut away the stock with the router.
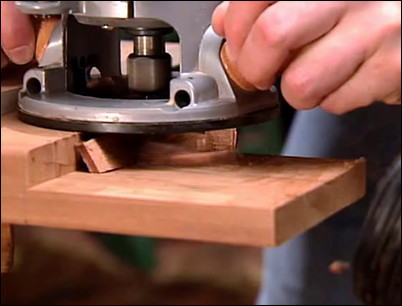
Starting on the outside of the board, cut away the stock using the router. Cut all the way to the marked line.
Use the router to cut away to the line.
Step 6: Mark a 45-degree line on the reverse side of the board.

Flip the routed board over and mark a 45-degree line for the miter joint.
Mark the line for the miter joint.
Step 7: Cut the board edge and transfer the angle.
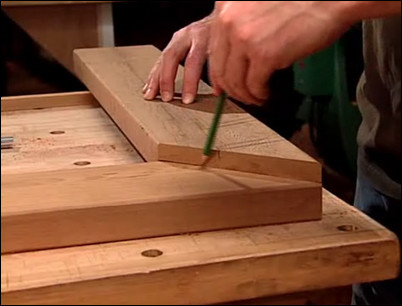
Cut the board at the marked line to form the 45-degree miter joint. Use the cut board as a template to transfer the angle to the other board.
Transfer the angle to the other board.
Step 8: Set the fence and route the other board.
Set the fence to route the other board. Route up to the marked 45-degree line.
Route the stock up to the line.
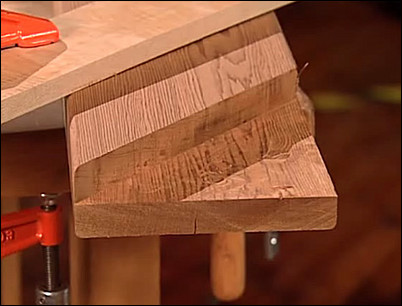
Step 9: Dry-fit the pieces together and repeat process.
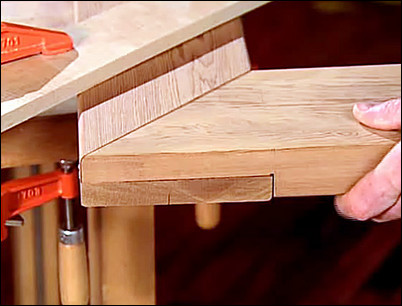
Dry-fit the lapped ends of the two mitered sections to form one corner of the storage box top. Repeat steps #3 to #8 to form the other three mitered lap joints.
Dry-fit the pieces together.
Step 10: Set the dado stack.
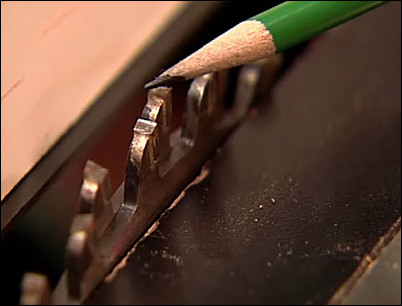
The stacked dado is comprised of two 1/8-inch table saw dado blades stacked side by side. Running a board through the stack will create a 1/4-inch groove. This slot will receive the tongue-and-groove cross pieces.
The stacked dado blades will create a 1/4-inch groove.
Step 11: Cut a groove into all four top edges.
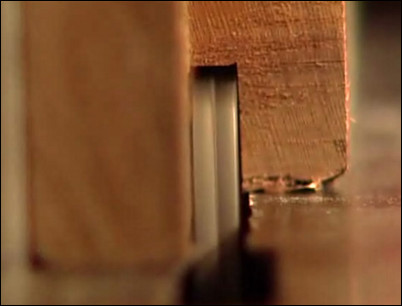
Using the stacked dado, cut the 1/4-inch groove into all four top edges. This groove will receive the cross pieces.
The groove will receive the cross-pieces.
Step 12: Cut a tongue into both ends of each slat.
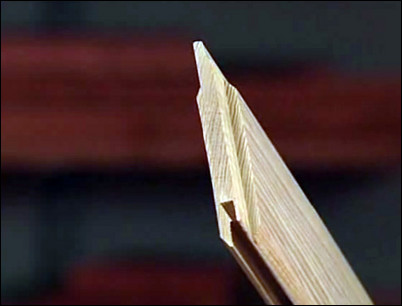
Use the same stacked dado to cut a 1/4-inch tongue into each end of the slats. Run each end through a stacked dado set built out to 5/8-inch.
Cut a 1/4-inch tongue into each end of the slat.
Step 13: Dry-fit all the pieces together.
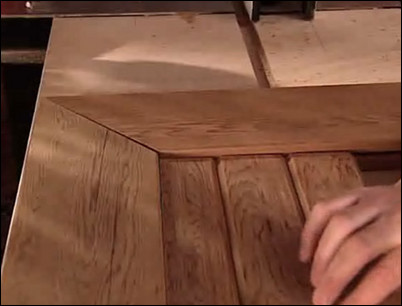
Dry-fit the mitered lap corners together and slide the tongue-and-groove slats into place. If everything fits, glue the each lap joint together, making sure the slats are all in place. Clamp the joints and let them dry overnight. Do not glue the slats.
Clamp the joints together and let dry overnight.
Step 14: Use screws for extra strength.
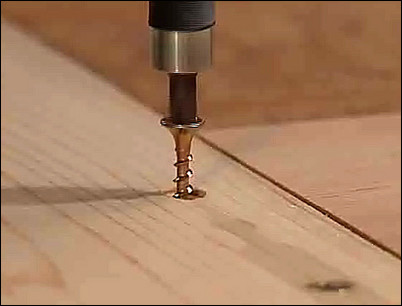
When the glue is dry, screw three 1-inch screws into each of the four corner lap joints for extra strength. The top is finished and you are now ready to work on the box.
Screw three screws into each corner.


