
The dovetail is both a decorative mark of fine woodworking and a strong and long-lasting joint. In a through dovetail, both of the pieces go entirely through one another, leaving the joint visible on the outside.
Now that the tails are laid out, it’s time to cut them. Remember to stay inside the lines. Always secure the board with a clamp and a piece of scrap wood.
Watch this Video!
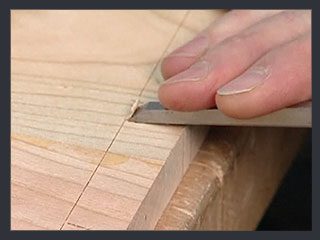
STEP ONE:
Make an initial small cut
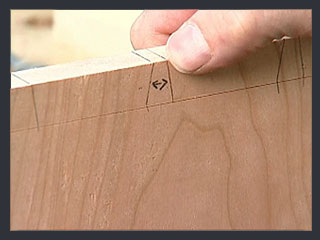
Position your thumb right up against the line. Rest the saw against your thumb to use it as a guide and make a small cut into the line to serve as a guide.
STEP TWO:
Cut along the guide line
Use the saw to cut along the line. Be sure to stay inside the line. It’s a good idea to cut at an angle so you aren’t cutting the outside face of the board initially.
STEP THREE:
Continue cutting
Cut down to the marking gauge line using steady movements with the saw. Check the other side of the board periodically to make sure you aren’t cutting through the marking gauge line. Cut along the guide line for each tail along the board.
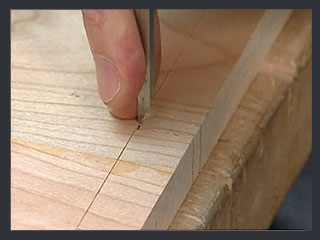
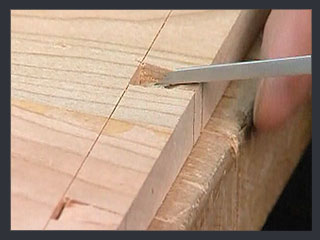
STEP FOUR:
Use a chisel to make a small cut
With the flat end of the chisel facing away, position a sharp chisel into the marking gauge line and apply downward pressure to make a small cut or indentation. Don’t use too much pressure.
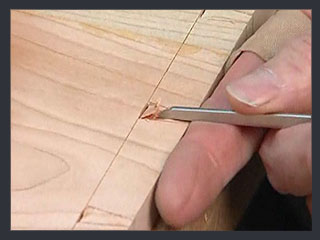
STEP FIVE:
Begin to remove waste
Using a narrower chisel gently remove a small layer of waste up to the indentation at the marking gauge line. Just chip away at the material slightly, holding the chisel down with pressure from your thumb.
STEP SIX:
Continue to remove the first layer of waste from the tails
Follow steps #4 and #5 down the board.
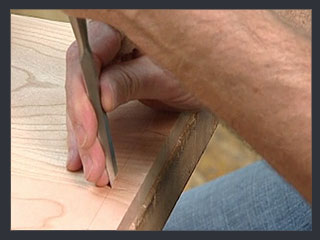
STEP SEVEN:
Use the chisel to chop
Repeat step #4, except now you will use a mallet to make a deeper chop into the wood. Again, don’t hit too hard, but the cut should be deeper than in step #4. Do this down the board.
STEP EIGHT:
Chisel out more material
Repeat step #5, except now you’ll be removing more material. Don’t start your chisel at the edge of the board. The chisel should start halfway between the edge and the marking gauge line.
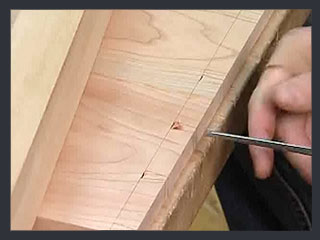
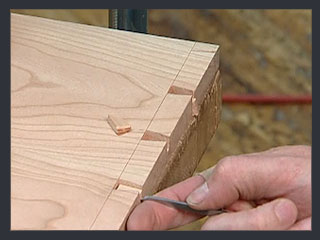
STEP NINE:
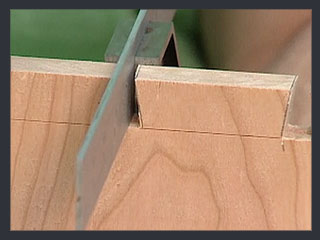
Continue to remove waste
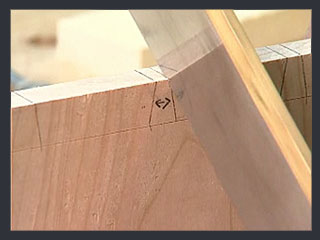
Repeat steps #7 and #8, using even more pressure to make your downward chop into the wood. Refer to the image to see the size of the hole.
STEP TEN:
Flip the board and chop the material
 >
>
Flip the board to work on the inside face. Secure it with a clamp. Follow step #4 to make a small initial cut in the wood with the chisel, along the marking gauge line.
STEP ELEVEN:
Take out a small chip
Follow step #5, using a small chisel to take out a tiny chip right up to the marking gauge line.
STEP TWELVE:
Repeat step #7

Just as you did on the other side use the mallet now to make a bigger chop in the wood.
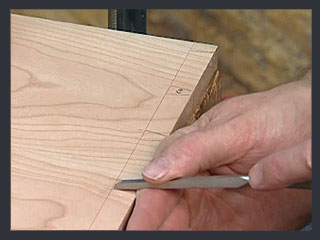
STEP THIRTEEN:
Remove material from the edge

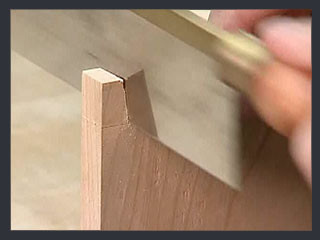
Position the narrow chisel against the board edge. Use a mallet to chop horizontally into the wood, removing material right up to the marking gauge line.
STEP FOURTEEN:
Repeat steps #12 and #13
Repeat steps #12 and #13, moving down the board and removing the rest of the material.
STEP FIFTEEN:
Clean out the hole up to the marking gauge line.

Use the chisel to slice out the wood from the hole, removing excess material around the inside corners.
STEP SIXTEEN:
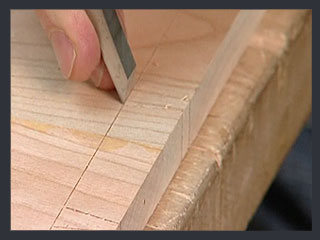
Check the level with a square
Use a square to ensure there are no bumps.
The tails are now cut. It’s time to fit the tails.


