 |
||
|
|
Over the years there have been different reasons to grow your own vegetables. In 1975 it was part of the back to the Earth, fun of farming movement. In 1985 the reasons were for a wider selection of better tasting vegetables, and less pesticide residue.
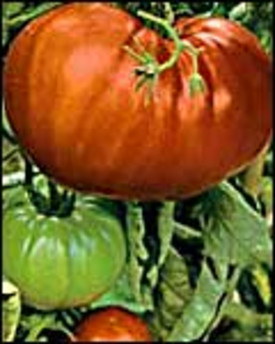
Now, despite better varieties and fewer pesticides in stores, all of the above are still valid. Add to them the possibility of diseases and unknown chemicals on produce from countries whose farming practices we can’t monitor. And our limited number of agriculture inspectors can’t possibly inspect all the billions of dollars worth of fruits and vegetables that come in from countries around the world.
Growing one’s own food is fun. No doubt about it. For non-experts start with the simple things that always produce a crop, loose leaf lettuce, tomatoes, a few herbs, bush beans, zucchini. Maybe raspberries. Perhaps experiment with some more difficult vegetables but don’t expect to start with bushels of carrots or huge heads of cabbage and enough potatoes to feed Ireland. To get that kind of a crop takes lots of sophistication.
Information on the basics of how to dig and what to add to the soil exists everywhere in excruciating detail so no point in repeating it here. Just a quick summary here. Dig a bed to a soft, fine “tilth”, add fertilizer and sow.
Start very early in the cool of spring with leaf lettuce and spinach. Sow a short row when the weather is right in your area. (Check with your agricultural station or newspaper.) Then sow another row two weeks later and finally after another two weeks, plant yet another row. If you have no luck and the seeds don’t grow, buy some plants at a nursery.
Harvest the spinach while it’s young, before the hot weather and insects ruin it. A scissors makes it easy. The easiest loose leaf lettuces to grow are varieties called Black Seeded Simpson and Oak Leaf. If you harvest the lower leaves, the top will continue to produce new leaves until it goes to seed in the heat of summer. Head lettuce is much harder, especially if the rabbits find it while you are waiting for it to mature.
As the season progresses and the weather warms up, prepare a nice soft bush bean bed and plant the seeds as per instructions on the package. Wait until after the last expected frost. If you soak the seeds first, for a an hour or two, they will sprout faster. Often takes just 5 days if the ground and air are warm. If an insect eats the sprouts, spray them every few days with insecticide until they have 4 leaves.
 |
||
|
|
As with the lettuce, make three successive sowings of beans about 10 days apart to prolong the harvest. When the green beans are ready, gently pinch them off. The plants will continue to produce additional green beans until fall. When they stay on too long, they turn yellow and the beans inside them get hard. Good for soup or planting the next year.
When the beans are starting up, buy tomato and herb plants at a nursery. While these can be grown from seed, if started early enough indoors, beginning gardeners won’t get plants as healthy and vigorous as those the local nurseries have to sell.
To get a good crop, fertilize regularly, always following the directions on the package. Scratch granular fertilizer into the surface of the soil, or use a liquid fertilizer when watering.
Regular water is essential. Ideally it should be flooded on the ground, not overhead, which promotes fungus. Make dikes of soil to hold water. In wet, heavy clay soils, make trenches between the rows of plants to hold water. In dry climates or sandy soil, make a depression in a circle around each plant, to hold the water at the roots. It conserves water.
Another way to conserve water is to place a gallon plastic milk container, with a hole in the bottom next to each plant. Then fill the container with water. The drip hole in the bottom will deliver the water right to the roots of that plant.
Preparing the soil before planting helps produce healthy plants. Old rotted manure, compost, and fertilizer can be dug in before planting. The more compost, the healthier the soil will be.
Manure is good for nitrogen loving plants like beans and lettuce, but not for tomatoes. Too much manure and there will be lots of leaves but few tomatoes. However, a light dusting of wood ashes will enhance the tomato set.
One little known fact is that if you want easy, fertile vegetable soil for about 3 years, pick a patch of sunny lawn (where herbicides have NEVER been used). Cover it with black plastic and wads of newspapers, rocks or boards on top. Wait until the grass smothers and dies, which takes several weeks or months depending on the weather. (One can do this in fall.)
When the grass is brown and rotting, cut “X”s in the plastic and put in plants. The composting dead grass makes the soil rich, though digging a hole in sod is a bit of a chopping chore. If necessary, use a pickaxe or certainly a pitchfork. It’s not necessary to turn the soil over, just to loosen it enough for the vegetable roots to be able to push through.
If you want to be rigidly risk-adverse, remove the newspaper after the grass is dead to keep the small amount of chemicals from colored ink from getting into the soil. If the sea of black plastic offends the eye, a wood chip mulch on top is cosmetic. This technique can be used to start a perennial garden as well.
Fertilize as you normally would. Granular fertilizer is scratched in under the plastic. Liquid fertilizer is watered in on top. Where rain water puddles, punch a hole to drain it into the ground above the vegetable roots. Although a black plastic mulch conserves soil moisture, attention to supplemental watering is still needed during dry spells.
After 3 years the soil will be spent and poor. You can return that bed to lawn (seed in late summer) and start vegetables in another spot the next year.
Credit: Mother’s Garden


