 |
Terraces can create several mini-gardens in your backyard. On steep slopes, terracing can make planting a garden possible. Terraces prevent erosion by shortening the long slope into a series of shorter, more level steps. This allows heavy rains to soak into the soil rather than run off and cause erosion.
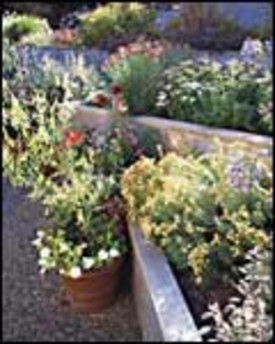
Materials for terraces
Numerous materials are available for building terraces. Treated wood is often used because of several advantages: it is easy to work with, blends well with plants, and is often less expensive than other materials. There are many types of treated wood on the market–from railroad ties to landscaping timbers. These materials will last for years. While there has been some concern about using these treated materials around plants, studies by Texas A&M University and the Southwest Research Institute concluded that these materials are not harmful to gardens or people when used as recommended. Other materials for terraces include bricks, rocks, concrete blocks, and similar masonry materials. Some masonry materials are made specifically for walls and terraces and can be more easily installed by a homeowner than other materials such as field stone and brick. Most stone or masonry products tend to be more expensive than wood.
Height of walls
The steepness of the slope often dictates wall height. Make the terraces in your yard high enough so the land between them is fairly level. Be sure the terrace material is strong enough and anchored well enough to stay in place through freezing and thawing, and heavy rainstorms. Do not underestimate the pressure of water-logged soil behind a wall. It can be enormous and cause improperly constructed walls to bulge or collapse. Many communities have building codes for walls and terraces. Large projects will need the expertise of a professional to make sure the walls can stand up to water pressure in the soil. Large terraces also need to be built with proper drainage and to be tied back into the slope properly. Because of the expertise and equipment required to do this correctly, you will probably want to restrict terraces you build yourself to no more than a foot or two high.
Building a terrace
The safest way to build a terrace is probably the cut and fill method. With this method, little soil is disturbed, giving you protection from erosion should a sudden storm occur while the work is in progress. This method will also require little, if any, additional soil.
- Contact your utility companies to identify the location of any buried utilities before starting to excavate.
- Determine the rise and run of your slope. The rise is the vertical distance from the bottom of the slope to the top. The run is the horizontal distance between the top and bottom. This will help you determine how many terraces you need. For example, if your run is 20 feet and the rise is 8 feet and you want each bed to be 5 feet wide, you will need 4 beds. The rise of each bed will be 2 feet.
- Start building beds at the bottom of your slope. You will need to dig a trench in which to place your first tier. The depth and width of the trench will vary depending on how tall the terrace will be and the specific building materials you are using. Follow the manufacturer’s instructions carefully when using masonry products. Many of these have limits to the number of tiers or the height that can be safely built. If using landscape timbers and your terrace is low (less than 2 feet), you only need to bury the timber to about half its thickness or less. The width of the trench should be slightly wider than your timber. Make sure the bottom of the trench is firmly packed and completely level. Place your timbers in the trench.
- For the sides of your terrace, dig a trench into the slope. The bottom of this trench must be level with the bottom of the first trench. When the depth of the trench is one inch greater than the thickness of your timber, you have reached the back of the terrace and can stop digging.
- Cut a timber to the correct length and place in trench.
- Drill holes through your timbers and pound long spikes or pipes through the holes and into the ground. A minimum of 18 inches pipe length is recommended; longer pipes may be needed for stability for higher terraces.
- Place the next tier of timbers on top of the first, overlapping corners and joints. Spike these together.
- Move soil from the back of the bed to the front of the bed until the surface is level. Add another tier as needed.
- Repeat, starting with step 2. In continuously connected terrace systems, the first timber of the second tier will also be the back wall of your first terrace.
- The back wall of the last bed will be level with the front wall of that bed.
- When finished, plant and mulch.
Other options for slopes
If terraces are beyond the limits of your time or money, you may want to consider other options for backyard slopes. If you have a slope that is hard to mow, consider using groundcovers other than grass. There are many plants adapted to a wide range of light and moisture conditions that require little care, but provide soil erosion protection. These include:
- Juniper (Juniperus horizontalis)
- Pachysandra (Pachysandra terminalis)
- Wintercreeper (Euonymus fortunei)
- Periwinkle (Vinca minor)
- Cotoneaster (Cotoneaster spp.)
- Potentilla (Potentilla spp.)
- Partridge berry (Gaultheria procumbens)
- Heathers and heaths
Stripcropping is another way to deal with long slopes. Rather than terracing to make garden beds level, plant perennial beds and strips of grass across the slope. Once established, many perennials are effective in reducing erosion. Mulch also helps reduce erosion. The erosion that may occur will be primarily limited to the garden area. The grass strips will act as filter strips and catch much of the soil that may run off the beds. Grass strips should be wide enough to mow across the hill easily as well as wide enough to effectively reduce erosion.


