 |
The preparation of a building site is a step-by-step process that includes analysis of water-table levels and soil make-up, how utilities are run into the home, zoning restrictions, curb-cut location regulations, and environmental concerns. Steps may vary depending on the town, state, or region, but there are some universal site-preparation issues that can always be anticipated.
Soil Testing
Soil Testing looks at two separate things: the composition of the soil and its ability to support a structure, and the absorption and drainage rate of the soil or how well it will accommodate septic and water.
The placement of a property’s septic system determines, in part, where the home will be sited, so a soil or “perc test” is usually the first step taken in site preparation—often conducted before the land is purchased. If the property will not be serviced by municipal sewer, the perc test is used to determine if and where a septic system and leach field can be placed on the lot. “Perc” is short for percolation, since this test is used to determine the absorption rate of the soil. Perc tests are conducted by digging multiple pits on the site, a task normally undertaken by a civil engineer, to determine the best location for a septic system. These test pits get a preliminary check to determine the presence of bedrock, the ground-water-table levels, and the nature of the soil.
As a general rule, sandy or gravelly soil has good absorption rates, while clay does not. Bedrock found at shallow depths tends to preclude the placement of a conventional septic system because bedrock is considered an impervious soil with no absorption properties. Ground-water-table levels show up as color variations in the soil at certain depths in the pit—mottled or discolored soil is a sign of the seasonal water table level. Local and state regulations will demand that there be a certain distance of separation between the bottom of the septic system and the seasonal-high-water table. If high-water-table marks appear at too shallow a depth, it could prevent the homeowner from using a conventional septic system, and force the crew to dig a new pit elsewhere on the site.
 |
||||
|
||||
Perc tests also determine the true absorption rate and permeability of the soil by pouring water into the pit and recording water levels over elapsed time. Target absorption rates are dictated by local health ordinances, the number of units to be serviced by the system, and the number of gallons of waste to be discharged per day. Septic systems are still possible on properties with soil that does not perc, but these engineered septic systems often require additional earth-moving and/or pumping systems. “Your basic three limiting factors on the placement of the septic system are the ground water table, bedrock, and local health ordinances,” says Scott Mapes a New England environmental engineer.
Once placement of the septic system has been determined, it is essential to identify well-water accessibility. A drilled well might extend as far as 400′ down, so testing is done to determine the yield and drinking-water quality of the proposed well. The well’s required yield depends, like the septic system, on the number of households it will service. The placement of the well and the septic systems are always linked, and regulations will determine the minimum distance between the two. It is better to have the septic system down slope from the well.
The results of the soil test influence septic system and well placement, as well as overall site-plan design. A site plan design is essential for the approval and permitting process, so test pits might be dug one year in advance of site development.
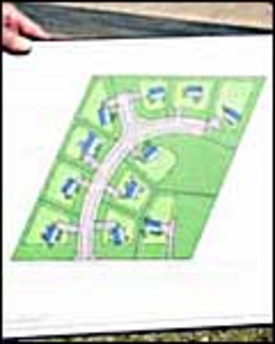
Map It Out—Site Plan Design
After a soil test has been performed and the proposed locations for the septic system and well have been determined, it is necessary to have a site-plan design drawn up to indicate placement of these features as well as other important fixtures. An accurate lot plan is required when applying for a building permit and submitting plans to a zoning review board. Lot plans should clearly indicate the intended placement of the building, septic tank and leach field (or municipal sewer connections), and well location (or municipal water connections). The site-plan design will also depict current vegetation that will be cleared as well as any surrounding wetlands or protected areas and a plan to ensure that such lands are not impacted by the development process. “There are state and federal regulations to protect wetlands,” says Mapes. “If the site borders any wetlands, construction fencing or a barrier of some sort must be included in the plans, and a clear delineation between the construction site, a buffer zone, and the wetlands.”
The site-plan design will show access roads for construction vehicles as well as the proposed location of any paved driveway or road. Curb-cut locations will be indicated as well, and setbacks from any road to the actual building on the site—both of these must adhere to local or town regulations. “The site-plan design will include the location of utilities—where they come in or go out, and if they are above ground or below” explains Matt Gazo, of Gazo Construction in New England.
Finished site-plan designs are brought before zoning-approval boards and used in the permitting process. Although the timeline for these processes vary from state to state, most construction firms or developers will begin this process as soon as possible, usually just after soil tests are completed. Clearing of the site should not begin without obtaining the necessary permits and approvals.
Clearing and Excavation
The basic rule for clearing and excavation is to clear only what is necessary and to use as much fill from the excavation of the foundation elsewhere on site. “Fill is expensive to buy and truck in,” says Gazo, “so we try to use what we have on site.” Clearing involves removing trees and stumps from the building site and wherever else earth-moving may be required such as for the septic system, well, or utilities. “It is generally a good idea to keep clearing to a minimum,” suggests Mapes. “You don’t want to over clear, because it costs so much to clear and remove a cubic yard of material, and clearing can also affect erosion.” Top soil scraped from the site prior to excavation is normally saved in a pile somewhere on site for later use as backfill or in landscaping.
Credit: Renovate Your World


