
Materials:
Step 1: Mark the picture location on the wall
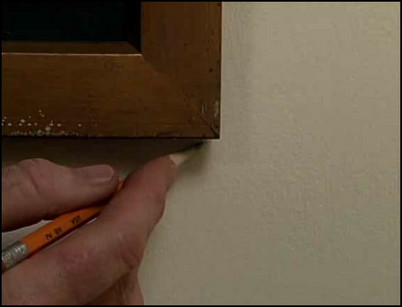
Decide where the picture will hang on the wall. Make marks on the wall where the bottom two corners of the picture will be.
Mark the bottom two corners of the picture.
Step 2: Determine a hanging method
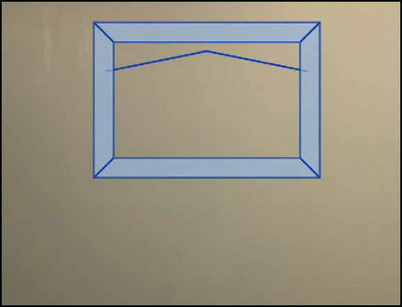
Pictures can hang from a wall using brackets on both sides of the frame or a picture wire. Determine which method will be used to hang the picture and mark the location of the brackets or the peak of the picture frame wire.
Determine the location of the picture fasteners.
Step 3: Choose a fastener
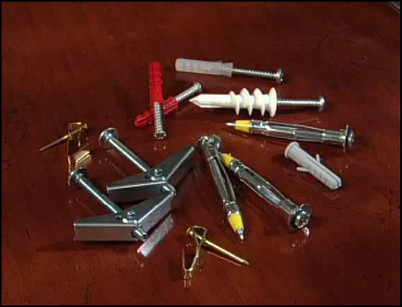
Decide if the picture will be fastened to the wallboard or a wooden stud beneath the wallboard. If fastening to a stud, use a stud finder to locate stud positions, or visually locate them by finding nailheads in the wallboard. Select a wall fastener that is suited to your application. If hanging from a wooden stud, use a two-piece hook-and-nail combination rated for the weight of the picture. If hanging from the wallboard, use a hollow wall anchor.
Use the correct wall fastener.
Step 4: Drill a hole and insert the fastener
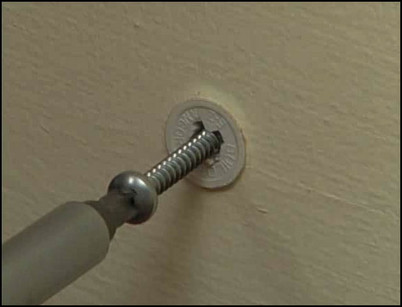
Drill a hole into the wall using a bit slightly smaller than the wall insert. If you are using a wall anchor, insert the fastener into the hole by pushing or by screwing. Drive a screw into the fastener. Whether you are using a wood screw or a wall anchor, leave enough of the screw exposed to hang the picture on.
Drive the screw into the fastener.
Step 5: Hang the picture
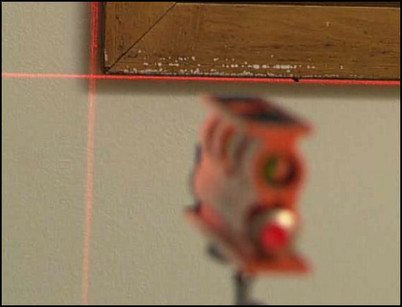
Place the wire hanger over the exposed screw. Use a laser lever to accurately align the picture on the wall.
Use a laser level to align the picture.


