
Materials:
Step 1: Measure the existing door
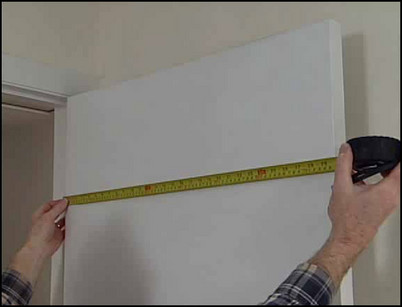
Replace the existing door with one that is the same size. Measure the width and height of the existing door. If you cannot find the exact same size, buy a larger door and cut it down to size.
Measure the existing door before you purchase a replacement.
Step 2: Remove the existing door
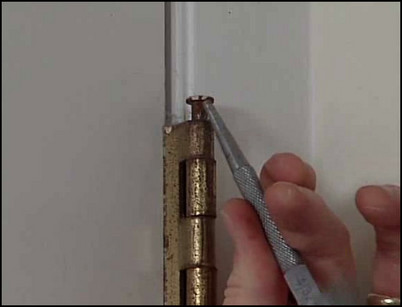
Use a nail set and a hammer to remove the pins from the hinges. Remove the door from the hinges and set it aside.
Use a nail set and a hammer to pry out the pins that hold the door in its hinges.
Step 3: Determine the hinge locations
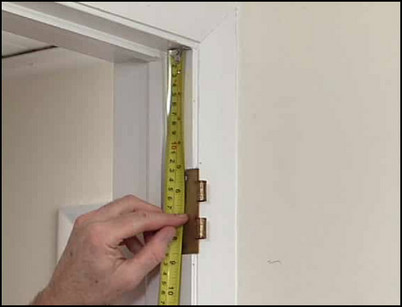
There are two ways to determine where the hinges are located on a new door. One way is to measure from the top of the door to the tops of the existing hinges. The second method is to measure from the inside of the door jamb to the tops of the hinges. Subtract 1/8 inch from the measurement to account for the clearance gap between the top of the door and the door jamb. This is the measurement you will use to mark the hinge placement on the door.
One way to determine hinge placement is to measure from the inside of the jamb to the top of the hinge and subtract 1/8 inch for door clearance.
Step 4: Transfer hinge measurements and cut markings for the hinge plate
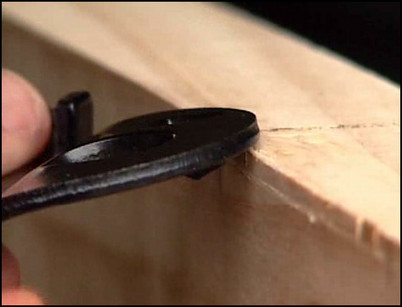
Transfer the hinge measurements to the door and mark the location with a pencil. You can use a hinge profile cutter tool to stamp out the location and depth of the hinge plate area. Hammer the cutter tool into the wood until it is flush. This will give you a standard depth cut for a door hinge. Most profile cutters have a scribing tool to run across the edge of the door to show how deep you will chisel.
Use the scoring guide on the hinge tool to mark the depth of the hinge mortise.
Step 5: Chisel or router the wood to create the hinge mortise
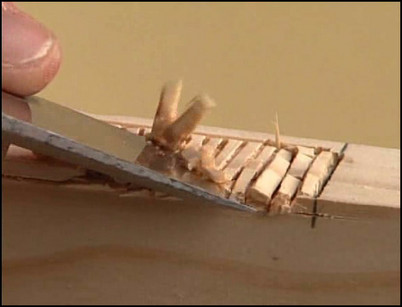
Chisel out the wood to the depth of the hinge plate following the marks left by the profile cutter. Make a series of parallel cuts with the chisel to the depth of the mortise. Then chisel out the wood cuts, working until the mortise is clear and smooth. You can also use a router and guide to cut out the mortise for the hinge plate. A router will generally leave a smoother cut.
Chisel out the series of parallel cuts to make the hinge mortise, working until it is smooth and clean.
Step 6: Screw in the hinge plates
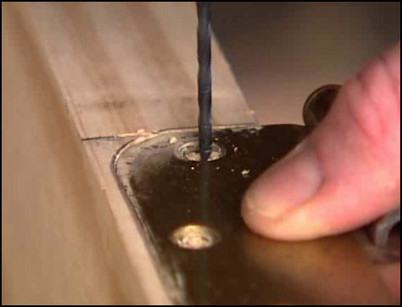
Once the mortises have been cut, use the hinge leaf as a guide to drill pilot holes for the hinge screws. Set the screws in place.
Use the hinge leaf as a guide to drill pilot holes for the hinge screws.
Step 7: Hang the door and check the alignment
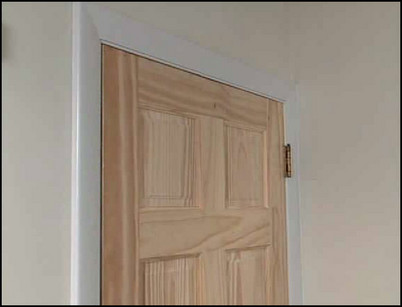
Hang the door by fitting the hinges together and tapping the pins in place. Now check the alignment. There should be 1/8-inch clearance or reveal all the way around the door. If not, continue to adjust the hinges until the proper clearance is achieved. If the door sags from the top, tighten the top hinge screws. If it is not sitting squarely, use thin cardboard shims or playing cards under the hinge to adjust the fit.
Hang the new door on its hinges and check for a consistent 1/8-inch reveal all the way around the door.


