
Materials:
Step 1: Select appropriate tools and fasteners
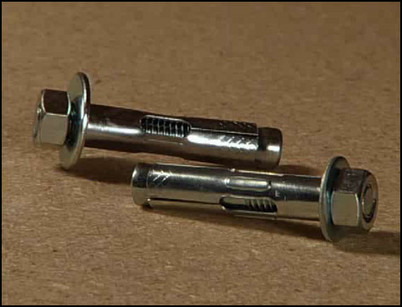
Drilling into concrete requires special tools and fasteners. A carbide masonry bit will be needed to drill into the concrete or concrete block. Consider using a hammer drill for a project requiring numerous fasteners. To hold the shelf, use a masonry fastener designed for concrete or cinderblock.
Soft metal anchors are suitable for securing shelves to concrete.
Step 2: Drill pilot holes
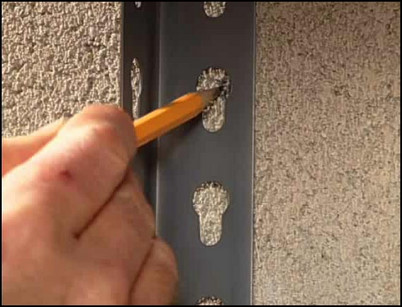
Using the holes in the shelving unit as a guide, mark the location where the pilot holes will be drilled. Using a drill with a carbide masonry bit, drill pilot holes in the concrete. Follow the directions included with the selected fasteners. Always wear goggles and a dust mask when drilling into masonry.
Mark the location of the pilot holes.
Step 3: Drive fasteners into wall
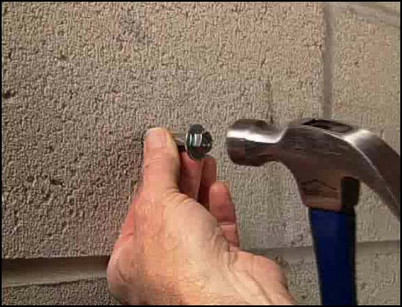
Blow residual dust from each pilot hole. Using a hammer, tap the anchor sleeves into the pilot holes until the sleeve is flush with the wall.
Tap fastener into the pilot hole.
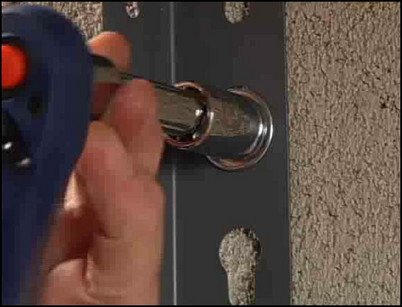
Step 4: Tighten fasteners in the wall
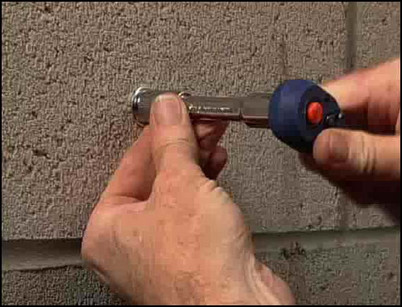
Using a socket set, screw the nut into the masonry fastener. Tighten the nut to pull the anchor, compressing it against the concrete. Now use the socket wrench to loosen and remove the nut and washer, leaving a sufficient length of screw to hold the shelf.
Use a socket wrench to tighten the fastener in the wall.
Step 5: Position shelving unit against the wall
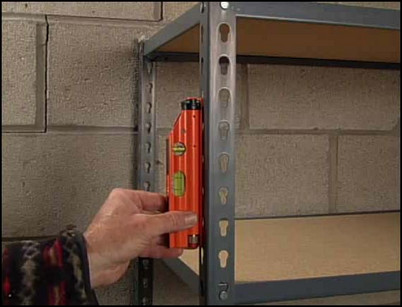
Position the shelving unit against the anchor points on the wall. Use a spirit level to adjust the shelving unit until it is both plumb and level.
Use a spirit level to adjust the position of the shelving unit.
Step 6: Fasten shelving unit to the wall
With the shelving unit holes lined up with each anchor point, place the washer over the bolt. Use a socket wrench and nut to secure the washer and pull the shelving unit to the wall. Repeat with each anchor. Do not overtighten the nuts.
Use a socket wrench to tighten the nut and washer.


