
Materials:
Step 1: Look for studs to brace the drywall patch
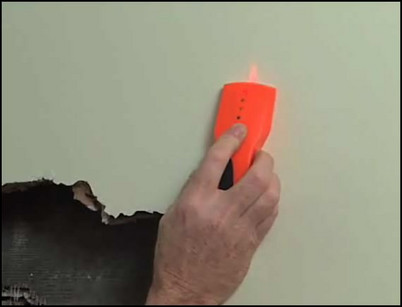
Use a stud finder to locate studs behind the hole. If they are visible or near the edge of the hole, they can be used as support for the drywall patch. Mark the location of the studs on the wallboard edges around the hole.
Use a stud finder to locate the studs behind the wall to be patched.
Step 2: Measure and mark the patch
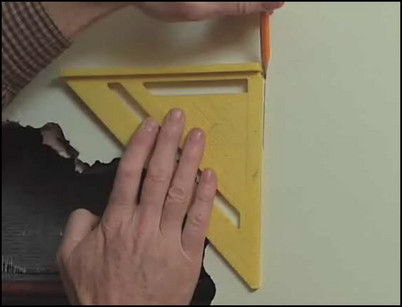
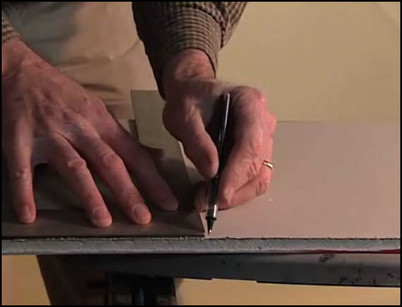
Measure the area to be cut out and filled by the patch. Use a tape measure to mark the boundaries for a rectangular patch. Use a framing square to mark sharp, 90-degree corners for the patch and a level to make sure the lines are square and plumb. Mark all lines on the wallboard surrounding the hole.
Use a framing square to mark 90-degree corners for the rectangular patch.
Step 3: Cut out a rectangular opening for the patch
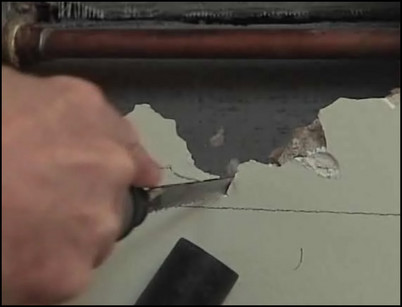
Use a keyhole saw to cut from the opening to the lines marked for the patch. This will create a lot of dust and debris, so use a vacuum to suck up dust and a drop cloth to protect the floor. Always wear a dust mask and goggles when demolishing old wallboard. Follow the cut lines around the patch area and switch to a drywall saw to square the corners.
Use a keyhole saw to cut from the opening to the lines marked for the patch.
Step 4: Insert wood supports for the drywall patch
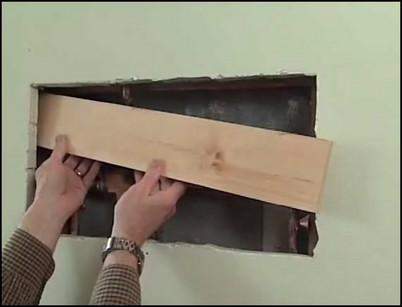
Cut lengths of wood to fit exactly between the studs in the wall. Wedge the pieces to fit between the studs half-exposed at the top and bottom of the opening. The patch will be screwed into the wood pieces to hold them firmly in place.
Wedge a length of wood between the studs at the top and bottom of the hole to support the new drywall.
Step 5: Fasten the supports to the existing wallboard
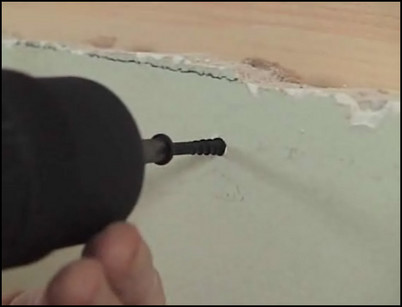
Using a drill and drywall screws, attach the wood to the existing wallboard, setting the screws halfway between the opening and the bottom of the wood support.
Attach the wood supports to the existing drywall with drywall screws.
Step 6: Transfer the measurements and cut the wallboard
Transfer the measurements for the patch to new wallboard. Cut the wallboard by scoring firmly along the cut line on the paper face of the drywall. Then, from the back side, bend the wallboard back away from the cut and it will snap along the line. Keep the wallboard bent and, on the back side, use a utility knife to cut the paper down the length of the fold.
To cut, score the wallboard deeply on the finished side of the wallboard.
Step 7: Place the patch in the hole and attach to wood bracing
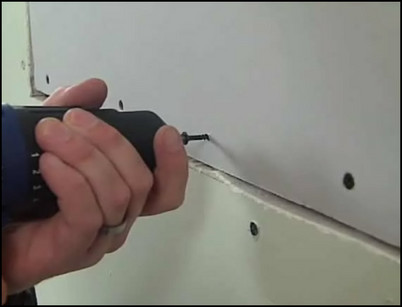
Place the patch in the prepared space and attach it to the wood supports using drywall screws spaced four inches apart. Lightly sand the perimeter of the existing wallboard to prepare the surface for the seam tape and joint compound.
Use drywall screws spaced every four inches to hold the patch in place.
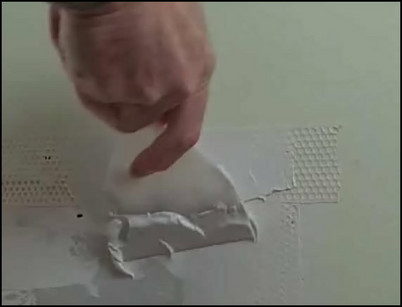
Step 8: Fill the seam for a level finish
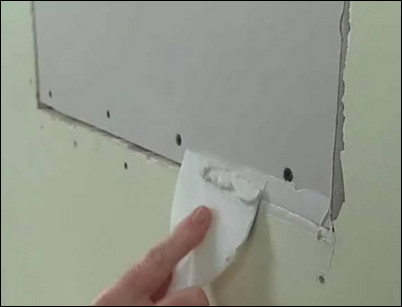
Use a 4-inch joint compound knife to apply the joint compound to the seam. Fill and smooth the seam to make it level with the wall. When the compound is almost dry, use a wet sponge to smooth the edges of the seam. Allow the seam to dry completely.
Using a joint compound knife, fill the seam with joint compound until it is level with the wall.
Step 9: Apply seam tape and prepare the seam
Cut the lengths of adhesive-backed seam tape for the long edges of the patch. Remove the backing and apply the sticky face to the length of the patch seam along the top and bottom. Cut the side pieces to fit exactly between the top and bottom tape. Measure and cut the tape and apply it to the side seams so that it just touches the top and bottom tape but does not overlap at all. Using a 4-inch putty knife, cover the tape with a layer of joint compound to make the transition from the patch to the existing wall.
Apply the joint compound across the tape to make a smooth transition from the patch to the existing wall.
Step 10: Sand the patch seams for a level surface
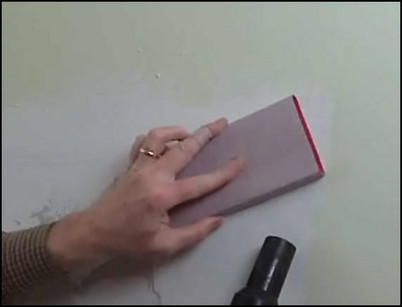
When the compound is completely dry, sand it with 80-grit sandpaper to knock down the high spots and make a level finish. Vacuum the dust as you go and wipe down the area before applying the next coat.
Sand the patch seams with an 80-grit sandpaper to knock down any high spots.
Step 11: Apply final coats for a smooth finish
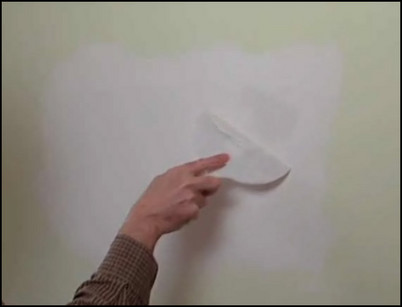
Apply another coat of compound and smooth it across the entire face of the patch using an 8-inch finishing knife. Feather the edges about two inches beyond the seam coat. Allow the compound to dry for 24 hours and sand with a 120-grit sandpaper attached to a sanding block. Wipe the wall clean of dust and apply a final coat of compound mixed with a little water. Smooth the finish coat over the entire surface of the patch and feather it two inches beyond the edges of the previous coat. Sand lightly with 120-grit sandpaper for a smooth finish that is ready for priming and painting.
Apply finish coats that feather two inches beyond the previous layer for smooth edges.


