
Materials:
Step 1: Using paper or adhesive tape for drywall seams
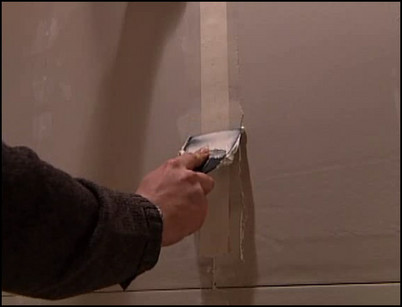
There are two options for seam tape when finishing wallboard seams: paper and adhesive mesh tape. If you opt to use paper tape, it must be pressed onto a compound bed over the seam. First apply a bed or layer of joint compound to the seam using an 4-inch joint finishing knife. Center the wallboard tape over the joint and press it into the compound. Then, hold the 4-inch knife at a 45 degree angle over the tape and run it from from top to bottom, applying just enough pressure to squeeze some of the compound out the sides from under the tape. Apply a coat of compound on top of the tape and allow the seam to dry thoroughly. If using an adhesive mesh tape, center the tape over the seam with the adhesive back against the wallboard. Press the tape over the seam, apply a coat of compound to the taped seam, and allow to dry.
Once the paper tape is in place, hold the finishing knife at a 45 degree angle and press firmly as you move down the tape.
Step 2: Sand the first coat

Once the first rough coat has dried thoroughly, sand it with a coarse 80-grit sandpaper attached to a wood block or sanding block. Knock the high spots down with the sandpaper so the face of the seam is even.
When dry, sand the seam with an 80-grit sandpaper attached to a wood block to knock down any high spots.
Step 3: Complete a second layer of compound
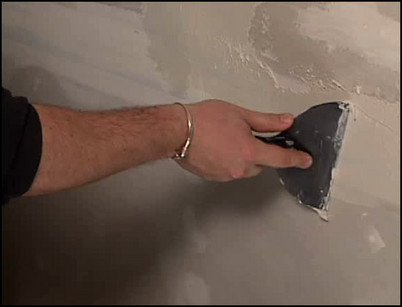
Apply a second layer of compound to the seam using a 10-inch joint finishing knife. Feather the edges of the seam out two inches beyond the edges of the first layer. Let this coat dry for 24 hours before sanding it with a 120-grit sandpaper attached to a sanding block. Vacuum up dust and wipe down the seams before the final coat.
Use a 10-inch joint finishing knife to apply a second coat of joint compound.
Step 4: Applying the finish coat
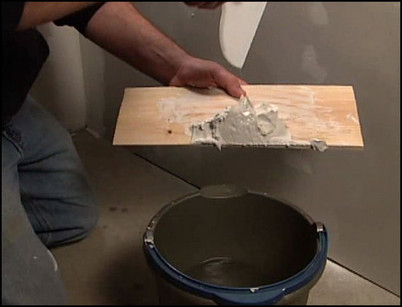
For the top finish coat, put some compound on a small board or trowel, add a little water, and mix it in thoroughly using the finishing knife. Apply this thin coat to the seam to level the seam with the wall. Feather the edges out two inches beyond the second coat for a disappearing seam. Allow the compound to dry for 24 hours and sand with 120-grit sandpaper attached to a sanding block. The seam should be smooth and level. Vacuum up any dust and wipe down the walls before finishing.
Add a little water to joint compound and mix throughly for a smooth top coat.


