
Materials:
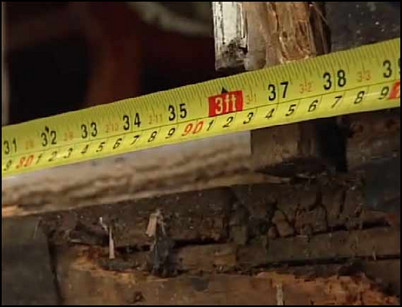
Step 1: Measure for a replacement threshold
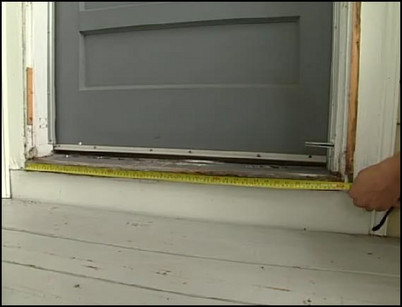
Use a tape measure to measure the old threshold. Purchase a replacement threshold from a lumberyard.
Measure the old threshold.
Step 2: Evaluate old casings
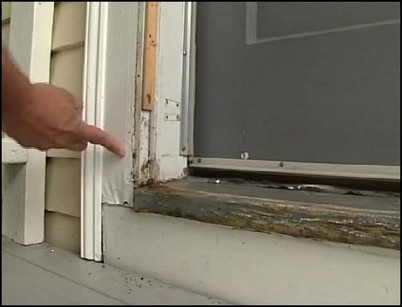
If the old threshold is tightly fit, the wooden casings on both sides of the door may need to be removed first. If the casings are rotted as well, these should be measured and replacement casings should be purchased.
Check the old casings for rot, and purchase replacement wood if necessary.
Step 3: Pry the old casings off
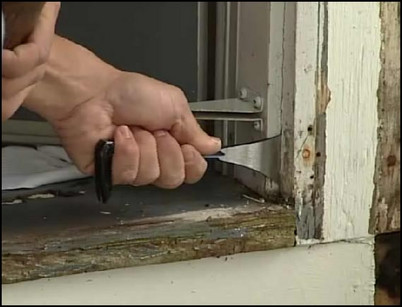
To remove the casings, tap a pry bar into the crack between the front facing and the inside casing, and gently pry the casing away. Work your way up, prying the casing away as you go.
Tap a pry bar into the crack between the front facing and casing.
Step 4: Remove the old casing by hand
When you have pried the casing all the way to the top, pull the casing away by hand. Remove the finishing nails, and set the casing aside if it is to be re-used. Repeat steps 3 and 4 on the other casing.
Pull the casing up and away
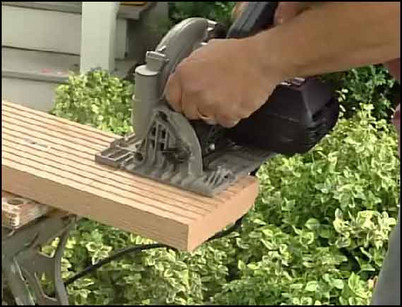
Step 5: Prepare the circular saw
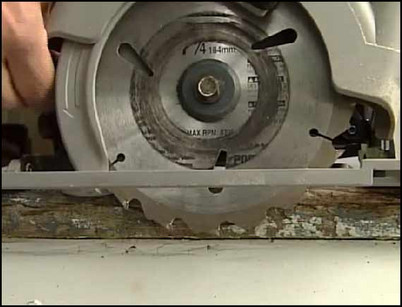
You will use a circular saw to cut the threshold into three pieces. To do so, first set the circular saw blade for a depth just under the thickness of the threshold.
Set the circular saw blade.
Step 6: Cut the threshold with the circular saw
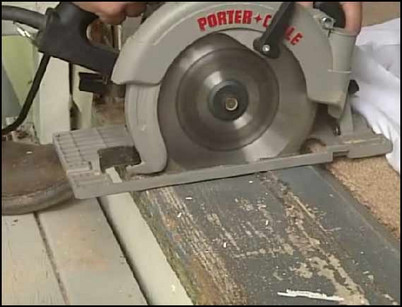
Make two cuts into the threshold with the circular saw, working your way as close as you can to the edge of the threshold.
Cut as close as you can to the edge of the threshold.
Step 7: Finish cutting with a handsaw

Use a handsaw to finish cutting through the threshold.
Use a handsaw to complete the cut.
Step 8: Remove the old threshold
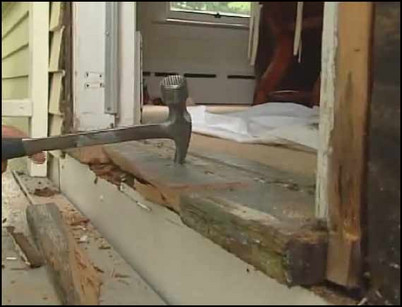
Use a large chisel or the claw of a ripping hammer to split the center section of the threshold into pieces. Use a pry bar to pry the rest of the center section away. Carefully remove the remaining left and right sections of the old threshold by hand.
Split the center section of the threshold.
Step 9: Remove the riser if necessary
If the old riser is rotted and needs to be replaced, use a pry bar to remove it.
Pry away the old riser if it needs to be replaced.
Step 10: Measure the width of the threshold space
Using a tape measure, determine the width of the threshold space. At this time, take measurements for the new riser and casings if these are also going to be replaced.
Measure the width of the threshold space.
Step 11: Cut the new threshold to size
Transfer the width of the threshold space to the new threshold, marking the length with a square and a pencil on the bottom of the new threshold. Cut the threshold to fit. If new casings and a new riser have been purchased, follows this step with those pieces as well.
Mark and cut the new threshold to fit.
Step 12: Test fit the new threshold
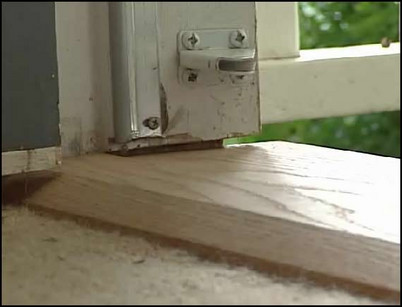
Slide the new threshold into place. There should be 1/8″ – 1/4″ clearance between the threshold and the door. If new casings and a new riser have been cut to size, test fit these as well.
Slide the new threshold into place.
Step 13: Drill pilot holes and paint the new threshold

Drill 3/32″ pilot holes into the new threshold to prevent cracking from the finishing nails. Remove the new threshold from place and paint all six sides of it with a UV-resistant exterior polyurethane. Allow the new threshold to dry. If you have purchased and cut new casings and a new riser, paint these as well.
Drill 3/32 pilot holes into the new threshold.
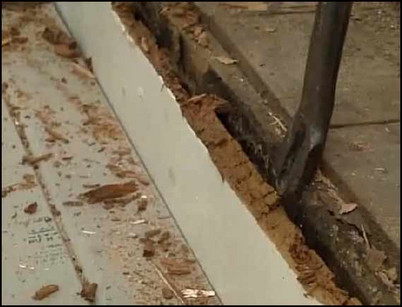
Step 14: Replace the vapor barrier
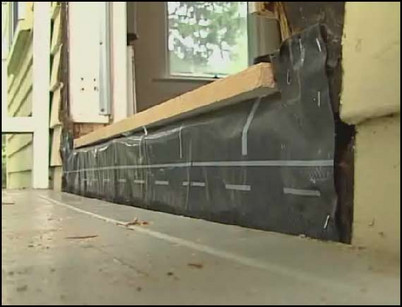
If necessary, replace the vapor barrier that was under the riser.
Replace any torn or worn vapor barrier.
Step 15: Set and fasten the new riser
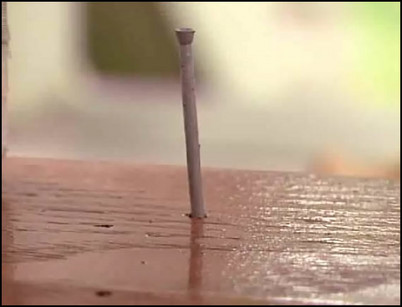
If you are replacing the old riser with a new one, set the new riser in place. Drive 8-penny galvanized finishing nails into the new riser, fastening it into place.
Drive finishing nails into the new riser.
Step 16: Set and fasten the new threshold
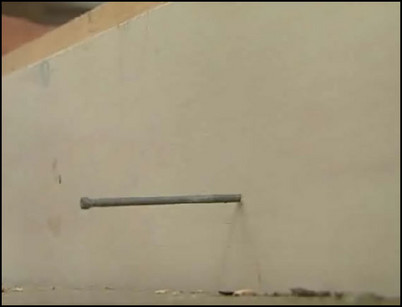
Set the new threshold into place. Drive it firmly into place with a rubber mallet. Drive 16-penny galvanized finishing nails into the pilot holds, fastening it into place. Set the nails with a nail set, and fill the holes with wood filler putty.
Drive finishing nails into the threshold.
Step 17: Set and fasten the casings
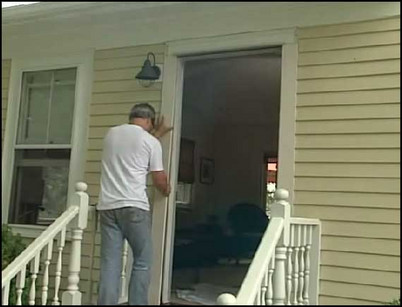
If new casings have been purchased and prepared, or if the old ones are to be re-used, set these into place. Drive 8-penny finishing nails into the casings. Set each nail about 12″ apart. Set the nails with a nail set so the nails will be below the surface of the casing. Fill each hole with filler putty.
Set the casing into place.
Step 18: Caulk the side of the casings
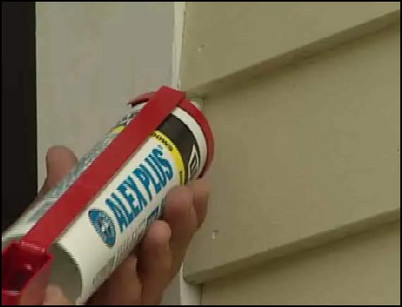
Use caulk to the fill the cracks between the outside of the casings and the house. This will prevent moisture infiltration.
Fill the cracks with caulk.
Step 19: Apply finishing touches

Re-attach any molding or trim that you removed at the start of the project. Apply a final coat of paint where needed to complete the job.
Paint a final coat for the finishing touch.


