
Materials:
Step 1: Measure for replacement door

Use a tape measure to find and record the measurements of both the door opening that the frame fits into and the door itself. Door sizes are listed by width first and length second. When purchasing a pre-hung door, note the configuration of the old door. If the door opens toward you and the door knob is on the left, it is a left-handed door. If the door opens toward you and the door knob is on the right, it is a right-handed door. To get accurate measurements of the door frame, complete step #2 first.
Measure the width of the existing door.
Step 2: Remove the old door and the trim molding
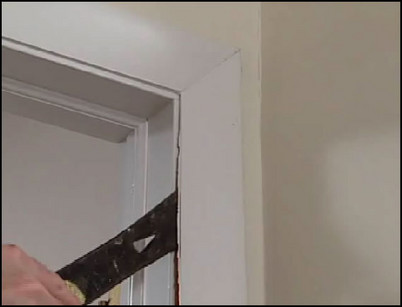
Use a nail set and a hammer to lift the hinge pins out of the hinges. Remove the door from the hinges and set it aside. Use a utility knife to cut the paint between the trim molding and the wall. Gently pry the trim molding from the frame with a pry bar.
Pry the trim molding away from the frame.
Step 3: Remove the old door casing
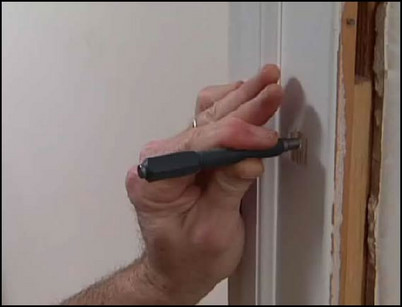
Typically a door frame, or door casing, is held to the studs with finishing nails that are driven into the frame near the hinges and directly across from the hinges. You can use a magnet to locate the nails. Remove the paint and putty covering the nails, and use a nail set and a hammer to drive the nails completely through, and out of, the frame. If this doesn’t work, slip a reciprocating saw in between the door jambs and the filler material to cut the nails in two. Once the nails are removed or cut, remove the door casing. The door opening is now ready for the new door.
Drive the nail out of the casing.
Step 4: Position the new door and frame into place
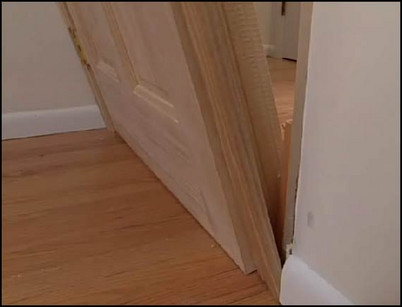
The new door has staples that keep the two sides of the casing attached to the frame. Remove all the staples and remove one side of the casing, leaving the door in the frame. Remove the fastener that prevents the door from opening out of the frame. Slide the frame and door into the door opening, starting at the base, tilting the door into place. Once the door frame is in place, open the door and secure it in the open position with some wood shims.
Starting at the base, tilt the door and frame up into place.
Step 5: Fasten the frame into place
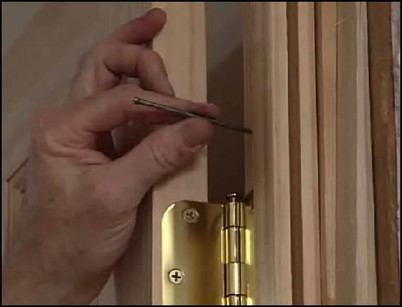
Set the door frame evenly in the opening. Use a level to get the frame plumb on the hinge side. Use shims or wedges between the frame and the studs to adjust the hinge side of the frame until it is both plumb and square. Near the hinges, drive 10-penny finish nails through the frame, the shims and part-way through the studs, but do not drive the nails all the way in. Repeat the process on the other side of the door, opposite the hinges. Position shims or wedges until this side is plumb and level, and drive 10-penny nails through the frame, shims and part-way through the stud. Check that the entire frame is square and plumb, and then drive the finish nails until they are nearly flush with a frame. Counter-sink each nail with a nail set.
Drive a 10-penny nail into the frame, shim and stud.
Step 6: Fasten the trim into place
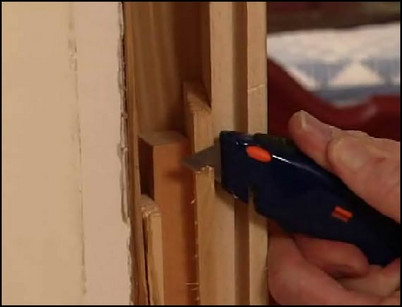
Use a utility knife to cut away excess material from the shims between the frame and the studs. Position the trim into place. Fasten the trim into place with 6-penny finishing nails. Use a nail set to counter-sink the nails below the level of the wood. Putty the nail holes with wood putty. Your new door is ready to be painted or stained to your liking.
Cut away the excess shim.


