
Materials:
Step 1: Turn off emergency furnace switch.
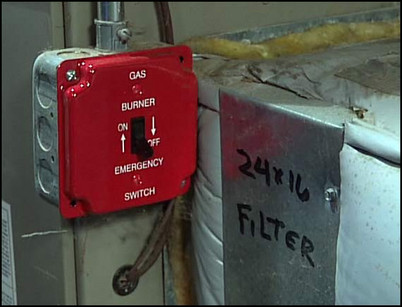
Locate and turn off the emergency furnace switch.
Turn off the emergency furnace switch.
Step 2: Remove the old thermostat.
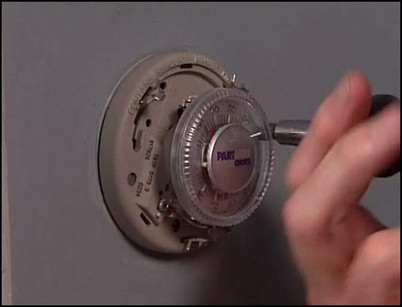
Remove the cover of the old thermostat. It should pull away easily. Remove the screws that hold the thermostat to the base plate. Now, lift the thermostat off the base plate. Note the number of wires connected to the base plate: There will be two or four wires, depending on if the thermostat controls heat only or heating and cooling.
Remove the screws that hold the thermostat to the base plate.
Step 3: Detach and remove base plate.
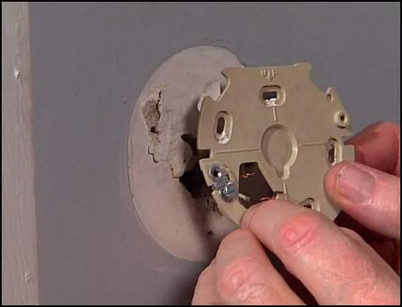
Remove each wire from the base plate. Be sure to label each wire with the letter next to the screw where the wire was attached. Use a screwdriver to remove the screws that hold the base plate to the wall. Lift the base plate away from the wall, allowing the wires to slip through the hole in the plate. Be sure to hang on to the wires to prevent them from slipping into the wall. If necessary, pull the wires out a bit more and secure them to the wall with some tape.
With the screws removed, lift the base plate from the wall.
Step 4: Drill holes for the new base plate anchors.
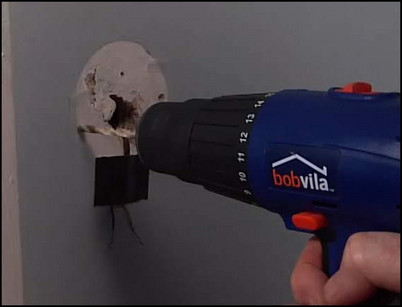
You will most likely have to drill new holes for the new thermostat base plate. Using the holes in the new base plate as a guide, mark the position of the holes for the wall anchors. Use a drill bit the same size as the wall anchors that came with the new thermostat. Drill a hole for each anchor, and then press or tap the new wall anchors into the holes.
Press or tap the new wall anchors into the holes.
Step 5: Fasten the new base plate into place.
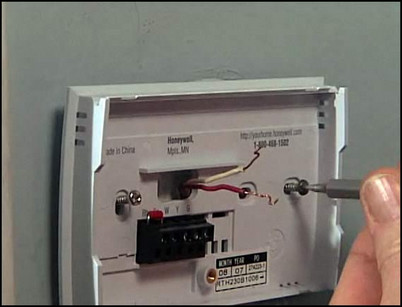
Position the new base plate over the wall anchors and secure it in place with the provided screws. Following the directions that came with the new thermostat, connect the wires to the proper terminals.
Screw the new base plate in place.
Step 6: Prepare and attach the new thermostat.
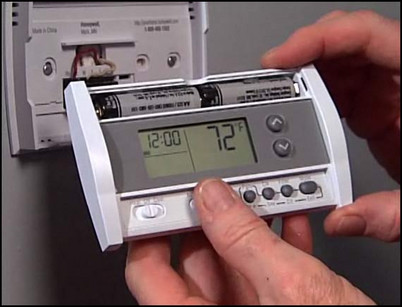
If necessary, insert new batteries into the new thermostat. Some thermostats won’t require batteries, but if yours does, be sure to change these every year. Attach the new thermostat to the base plate. You can now program your thermostat to change temperatures according to your lifestyle and energy-saving needs.
Insert batteries and attach the new thermostat to the base plate.


