
Materials:
Step 1: Turn off power to the circuit.
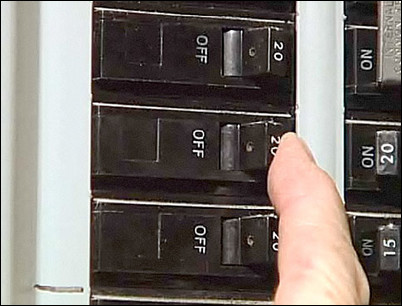
Go to the circuit breaker and locate the circuit supplying power to the ceiling fixture. Turn off that circuit.
Turn off the circuit breaker.
Step 2: Remove any glass parts from the old ceiling light.
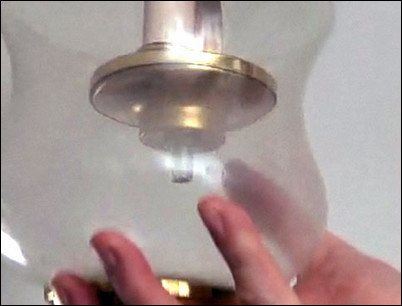
Unscrew and remove any glass parts from the old ceiling light. This includes light bulbs.
Remove glass parts.
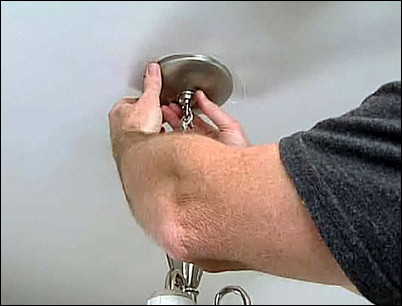
Step 3: Remove the bracket cover.
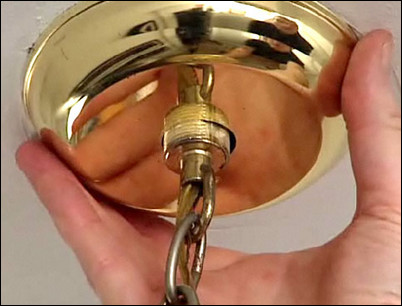
Remove any screws or nuts that hold the old bracket cover plate in place. Remove the bracket cover plate.
Unscrew the bracket cover plate.
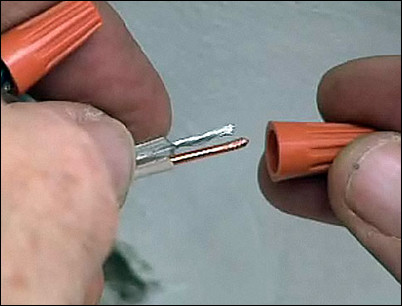
Step 4: Unscrew the wire nuts.
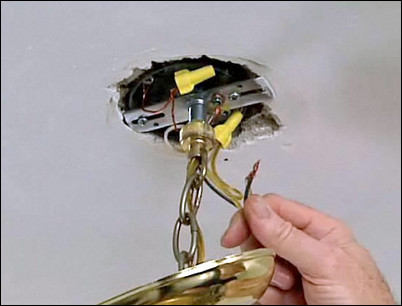
Remove any electrical tape from the wire nuts. Now, unscrew the wire nuts to expose the twisted pairs of wires. Be very careful not to touch the exposed wire ends.
Remove the wire nuts to expose the twisted wires.
Step 5: Test the wires for voltage.
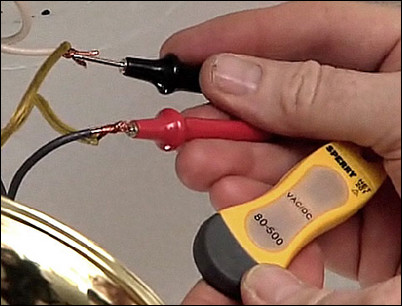
Use a voltage tester to ensure that no power is running to the wires. Simultaneously touch the black and white wires with the voltage tester to make sure the circuit is dead.
Touch the black and white wire at the same time.
Step 6: Remove the old fixture.
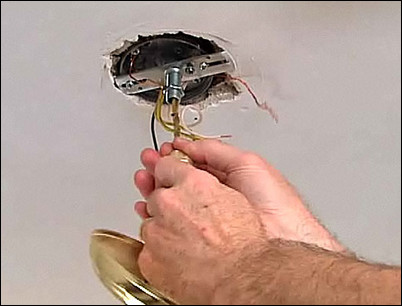
Separate the wires. It is not uncommon to have the wires run through the center of the support. If this is the case, the wires will have to be pulled out.
Pull the wires from the support.
Step 7: Replace the old bracket if necessary.
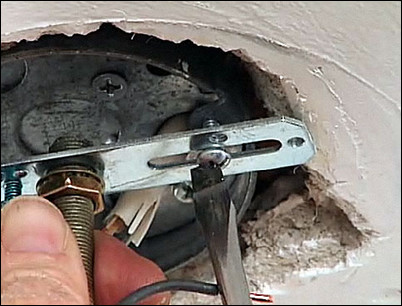
Unless the new ceiling light bracket is identical to the old one, you will have to replace it. Simply unscrew the old bracket using a screwdriver, and screw the new one in place.
Screw the new bracket into place.
Step 8: Add chain links if needed.

Some ceiling fixtures hang from a chain. Determine if any links need to be added, and do so using pliers.
Add links to reach a desired length.
Step 9: Connect the ground wires.
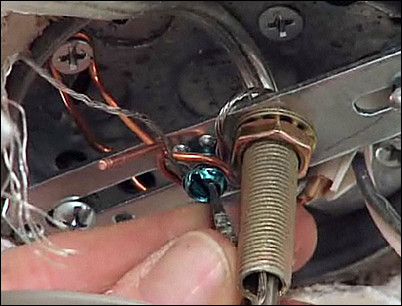
While one person supports the new fixture, slide the wires up into the bracket tube. You can use pliers to pull the wires through the tub, but be careful not to cut the wire insulation. Now, wrap the bare ground wire from the fixture around the green ground screw. Wrap the bare ceiling ground wire around the same green ground screw, and tighten the screw securely with a screwdriver.
Tighten the green ground screw.
Step 10: Connect the remaining wires.
Strip one inch of insulation from each of the new lamp’s wires. Use the wire nuts supplied with the new fixture to twist the wires together. White wire should connect with white wire and black with black. Be sure to consult the instructions for any specific information on this step. Once all the wires are connected in the wire nuts, wrap electrical tape around the bottom of each wire nut to seal the bottom of the wire nut to the wires.
Insert the paired wires into the wire nuts and twist.
Step 11: Secure the new fixture in place.
Following the specific instructions that come with the new fixture, secure the new light to the bracket. Continue following the instructions to install any glass shades, globes or other lamp parts. Screw in the new light bulbs. When these steps are completed, restore power to the circuit at the panel, and enjoy your new ceiling light fixture.
Follow the new fixture instructions to assemble all the parts.


