
Materials:
Step 1: Know your saw: the ripping saw.
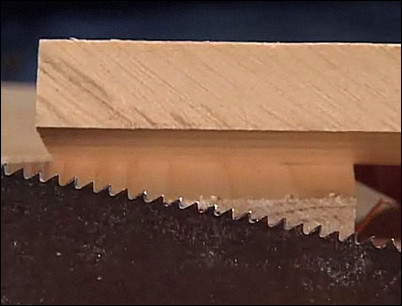
There are three most common types of saws. The first is the ripping saw. The ripping saw cuts wood with the grain. The teeth of a ripping saw are all set in the same direction with a deep valley, or gullet, to prevent the saw from binding when cutting with the grain. A ripping saw can leave a fairly fine pattern on the sawn wood. The fineness of the cut is determined by the number of teeth on the saw. The greater the number of teeth, the finer the cut, and the slower the saw will cut.
The teeth of a ripping saw are all set in the same direction and leave a fine pattern.
Step 2: Know your saw: the crosscut saw.
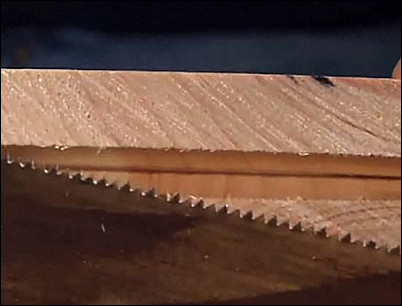
The crosscut saw is a more common type of hand saw. It is designed to cut across the grain. The teeth of a crosscut saw have a shallower valley between each point, and they are bent in opposition to one another. The result is a fine cross-grain finish.
Crosscut saw teeth are bent in opposition to one another.
Step 3: Know your saw: the combination saw.
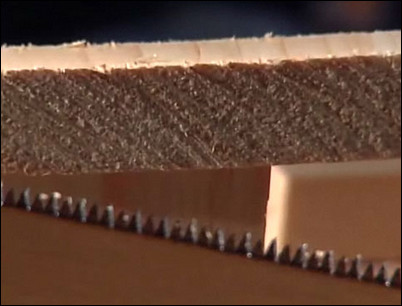
The combination saw is a more recent variation on the hand saw. The combination saw will cut with and against the grain (“rip” and “crosscut”), and it will also cut through other materials like PVC and plastic pipe. The combination saw teeth are vertical with their sharpened edges facing each other. The saw cuts quickly in any direction and leaves a slightly rougher edge. When a combination saw blade becomes dull, it can be replaced rather than re-sharpened.
The combination saw leaves a slightly rougher edge.
Step 4: Strike a line.
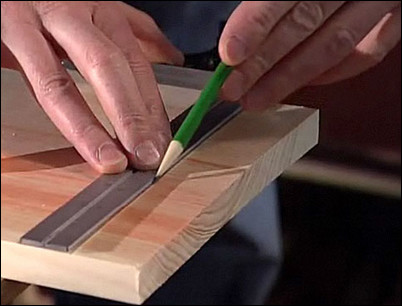
To make an accurate cut, use a combination square and a pencil to strike a straight cut line on the material you wish to cut.
Use a combination square and pencil to strike a straight line.
Step 5: Start the cut.
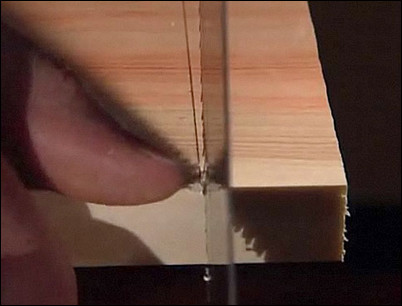
Using your finger as a guide, line the blade of the hand saw to rest on the “scrap” side of the line. Slowly pull on the saw at a low angle to start the cut.
Carefully use your finger to line the saw up with the pencil line.
Step 6: Continue the cut.
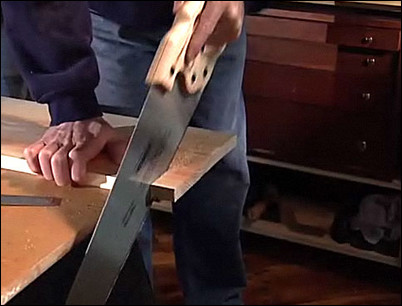
As soon as the saw is in motion, move your hand away from the saw. Hold the saw at about a 60-degree angle and cut the wood in a smooth, steady motion. American saws cut on the push. Guide the saw with a steady motion, and use the full length of the saw.
Use the full length of the saw, cutting on the push.
Step 7: Finish the cut.

As you near the end of the cut, flatten the angle of the saw to make a gentle, shallow final cut.
Flatten the angle of the blade for the final cut.


