
Materials:
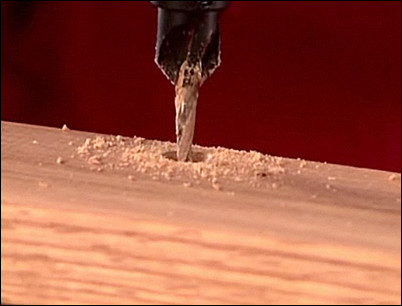
Step 1: Drill pilot holes.
If you are driving a brad, particularly into hard or brittle wood, it is a good idea to drill a pilot hole first. Choose a drill bit slightly smaller than the brad. Drill one pilot hole through the wood for each brad you will need.
Drill a pilot hole for each brad you will need.
Step 2: Drive the brad into the pilot hole.
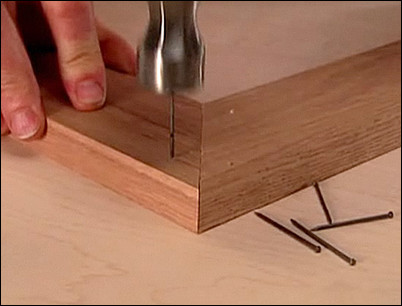
Hold a hammer directly over the brad and drive it into the wood. Stop when the brad is just slightly higher than the wood. Be sure to hold the head of the hammer level to prevent the face of the hammer head from denting the wood. You should also firmly hold or clamp the wood you are fastening in position as you drive the brads into place. This will ensure a tight fit.
Hammer the brad into the hole.
Step 3: Set the brad.
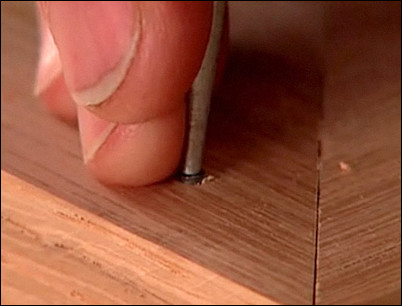
Select a wood punch (also called a nail set or nail punch) the same size as the head of the brad. Place the punch directly over the brad, and strike it sharply with a hammer. Re-center the punch as needed to keep it directly over the brad. Set the brad just under the surface of the wood.
Center the punch directly over the brad and strike it with a hammer.
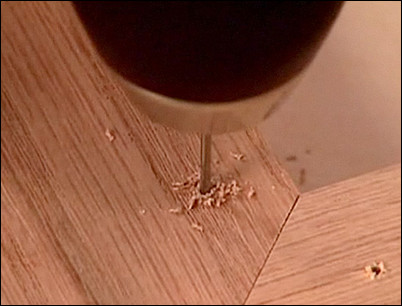
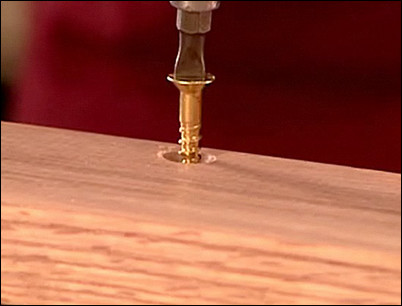
Step 4: Drill a pilot hole for a screw.
Fine finish work in lumber may call for screws to be used as fasteners. Generally, screws have greater holding power than nails and can be easily removed and refastened if disassembly is required. To drill a pilot hole for a screw, use a countersinking bit with a collar. You can adjust the depth of the hole by adjusting the location of the collar on the bit with an Allen wrench. To drill the hole, clamp the two pieces of wood into place. Locate the drill bit and drill a hole into both pieces of wood, stopping when the bevel of the collar is even with the surface of the wood.
Stop when the bevel of the collar is even with the surface of the wood.
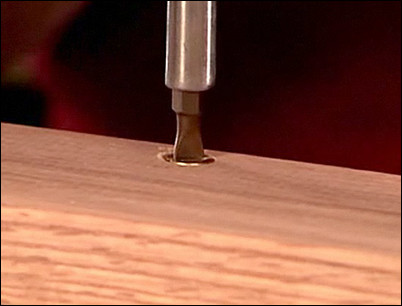
Step 5: Fasten the screw in place.
Place a screw in the hole. Pressing down, set the screw until it is tight and the surface of the screw is just below the surface of the wood for a clean, solid finish.
Turn the screw to set it in place.
Step 6: Use a self-tapping screw for rough construction.
A self-tapping screw does not require a pilot hole. Self-tapping screws are useful when working with rough construction or with plywood. Some self-tapping screws are designed specifically for fastening plywoods and composites.
Remember to clamp the two pieces of wood together when using self-tapping screws.


