
Materials:
Step 1: Stabilize the gasoline.
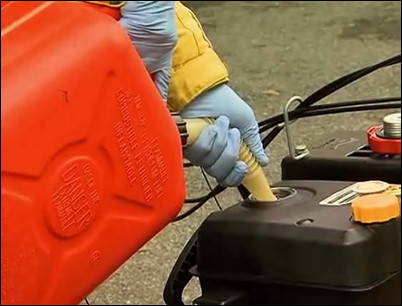
The first step is to stabilize the gasoline remaining in the snowblower. To do this, follow the instructions on a container of gas stabilizer and add the recommended amount for a full tank of gas. Pour the stabilizer into a full can of gas and mix the two ingredients thoroughly. Top off the snowblower fuel tank with the stabilized gasoline. Run the snowblower for a few minutes to allow the stabilizer to flow through the fuel system.
Top the fuel tank off with stabilized gasoline.
Step 2: Prepare the snowblower for changing the oil.
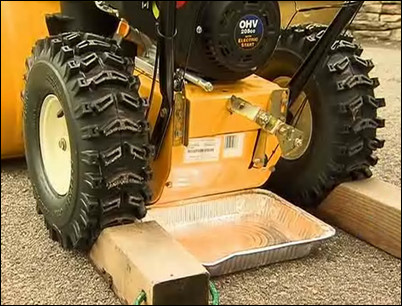
Remove the ignition key. Block the wheels and locate the oil drain plug, which should be near the bottom of the engine block. Place a properly size waste container under the oil drain plug. Now, remove the oil filler cap.
Use a container large enough to hold all the oil.
Step 3: Drain the oil.
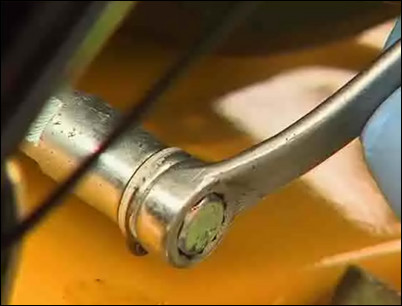
Use a box wrench to remove the oil drain plug. Allow the oil to run freely into the waste container. Be careful as the oil can be very hot. Tip the engine to ensure that all the oil has drained free. Re-install the oil drain plug and tighten securely.
Remove the oil drain plug.
Step 4: Fill the snowblower with oil.
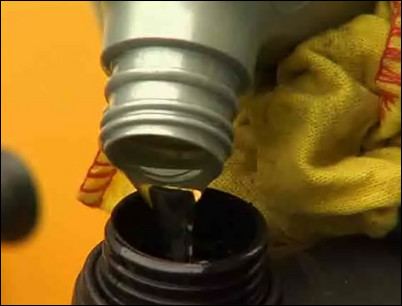
Refer to your owner’s manual to select the correct oil weight. Refer to your manual for the proper amount of oil to add and pour it into the machine. Check the level with the dipstick until the oil reaches the “full” line. Do not overfill. Replace the oil filler cap and tighten securely.
Fill with the proper weight oil.
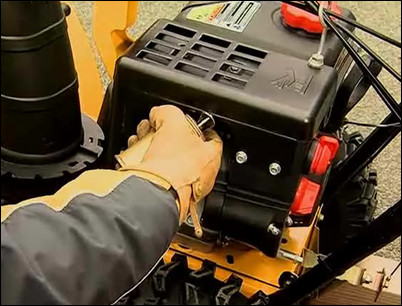
Step 5: Remove the spark plug boot.

Locate and remove the spark plug boot.
Remove the spark plug boot, which looks like a black hose here.
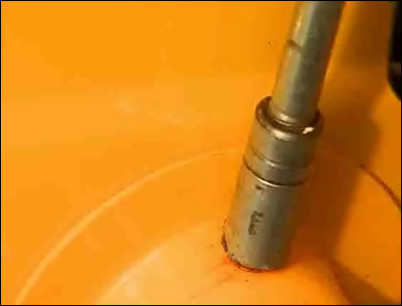
Step 6: Remove the spark plug.
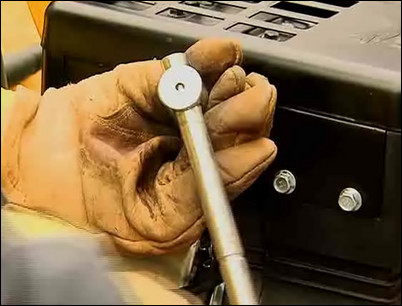
Use a ratchet and a deep spark plug socket to remove the spark plug by turning it counterclockwise.
Turn the spark plug counterclockwise.
Step 7: Inject oil into the cylinder.
Use an oil can with a long spout to inject two squirts of oil into the cylinder through the spark plug hole. Use the snowblower hand crank to turn the engine over a few times. This will coat the inside walls of the engine with oil, protecting it from rust.
Insert two squirts of oil through the spark plug hole.
Step 8: Replace the spark plug.
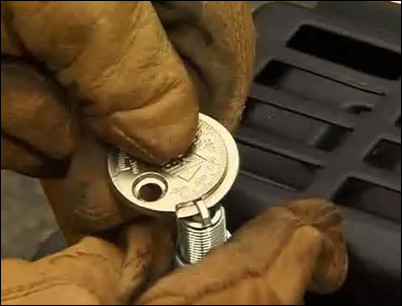
Purchase a replacement spark plug that is identical to the old one. Using a spark plug feeler gauge, set the gap of the spark plug to the manufacturer’s recommended setting. First, thread the spark plug into the cylinder by hand to prevent cross-threading, then tighten with a ratchet and socket. Finish with a 1/2 turn after the spark plug seats to compress the washer.
Use a spark plug feeler gauge to set the gap of the spark plug.
Step 9: Replace the spark plug boot.
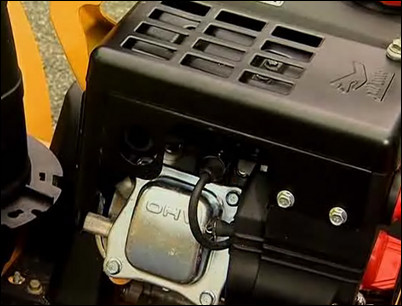
Replace the spark plug boot. Press down until you hear a click.
Replace the boot.
Step 10: Grease the snowblower fittings.
Consult the owner’s manual to determine which fittings need to be greased. Use a grease gun with #2 grease to lubricate each fitting. Follow any other lubrication instructions. Store the snowblower in a cool dark area, and it will ready come winter.
Lubricate the fittings.


