
Difficulty: 1 of 5
Using a jig is a great way to make accurate, angled cuts.
Always wear eye protection when using a table saw or power tools. Follow the instructions that came with the table saw.
Materials:
– Band saw
– Combination square
– Medium density fiberboard (mdf)
– Pencil
– Push stick/block
– Table saw
Step 1: Transfer the jig pattern.
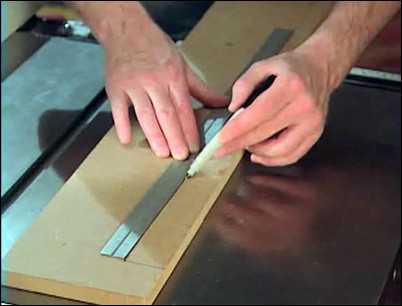
Transfer the jig pattern information to a piece of medium density fiberboard (mdf). Use a combination square to ensure an accurate line.
Mark the jig pattern on a piece of mdf.
Step 2: Cut out the jig pattern.
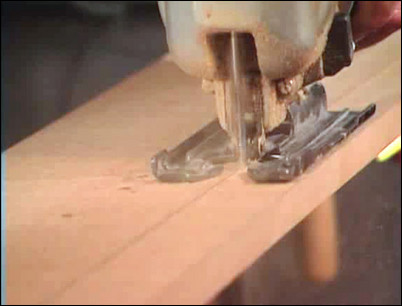
Use a band saw or jig saw to cut out the pattern.
Cut the pattern out with a band saw.
Step 3: File the pattern.

Use a file to create a smooth, clean pattern.
Use a file to clean up the pattern.
Step 4: Test out the jig.
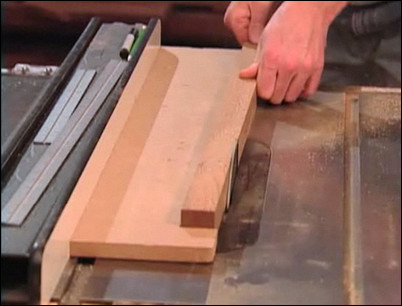
Try out the jig. Hold the jig against the fence. Rest the stock against the jig with the jig stop facing away from you. Push the stock with the push stick.
Push the stock through with the push stick.


