
Materials:
Step 1: Set nails in place.
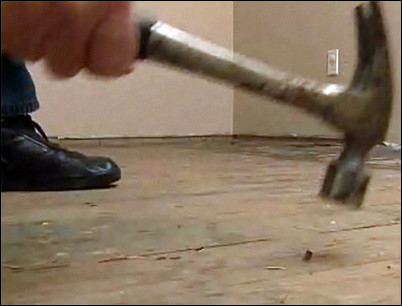
Before the new flooring can go in, the subfloor must be clean and smooth. Look for any protruding nails, and set them in place with a hammer.
Set any protruding nails in place with a hammer.
Step 2: Scrape away old underlayment.
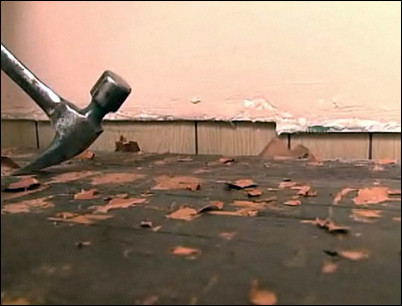
Use a hammer to scrape away the old underlayment to leave smooth surface.
Scrape the underlayment with a hammer.
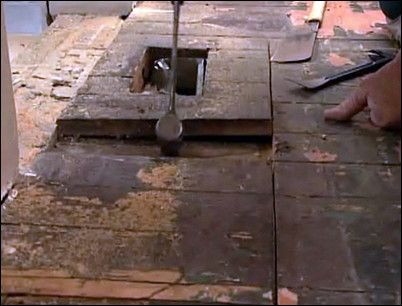
Step 3: Search for damaged areas.
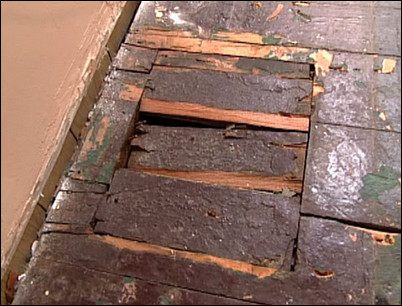
Some spots on the subfloor might need repairs. This old register isn’t used anymore and will be covered up. Additionally, there is a section of subfloor that is damaged, and the old threshold for the door needs to be brought up to level. One piece of plywood will solve these problems. We begin by removing the sections of subfloor that are affected. Measure and mark the area to be removed. This will guide you with the cuts.
This section is damaged.
Step 4: Measure and set the blade depth.
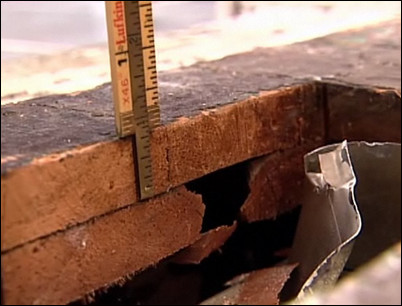
Measure the depth of the subfloor that will be removed. Transfer the measurement to set the depth of the circular saw blade.
Transfer the measurement to set the blade depth.
Step 5: Cut the old subfloor.
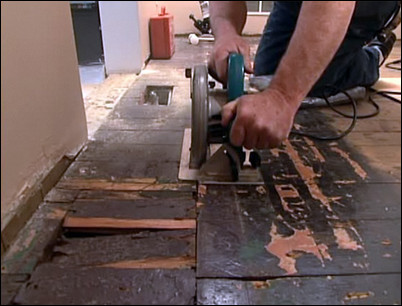
Use the circular saw to cut into the subfloor, taking care not to cut into the layer below. Follow the markings for the cut.
Cut the boards for the subfloor.
Step 6: Pry up the cut floorboards.
Use a pry bar to pry up the floorboards. Use a hammer to crack away any threshold glue. Remove any dust and dirt with a vacuum.
Pry up the floorboards.
Step 7: Measure and cut the plywood patch.
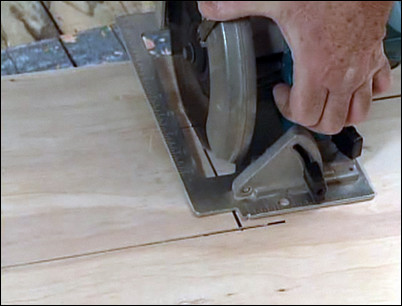
Measure the area to be patched and transfer the measurements to a piece of plywood. Cut out the patch.
Cut out the plywood patch.
Step 8: Install the patch.
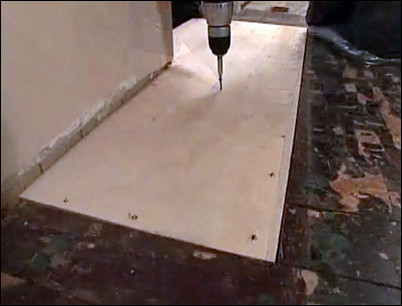
Tap the plywood patch into place with a hammer. You might need to build up the patch with additional stock to get it level with the floor. When it is set properly, screw the patch to attach it to the subfloor.
Screw the patch into place.
Step 9: Vacuum the area.

Use a vacuum to clean the room. Be sure to get dust and debris out of all the cracks or they will come loose during the installation of the new floor and force you to stop frequently to clean.
Clean the room of dust and debris.
Step 10: Measure the room.
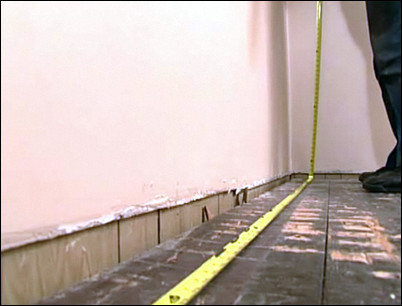
To make sure the walls are parallel, measure the floor at both ends of the room. It will be important to lay the new flooring parallel to the wall.
Measure the floors at both ends of the room.
Step 11: Roll out the felt paper.
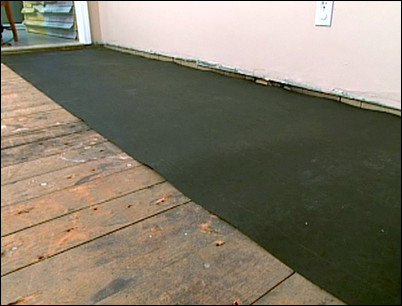
Roll out lengths of #15 saturated felt paper. This will prevent squeaks and slipping of the new floor. Use a box cutter to trim the paper to fit. With the felt paper completely in place, the new flooring is ready to be installed.
Roll out the felt paper across the room.


