
Materials:
Step 1: Prime the walls.
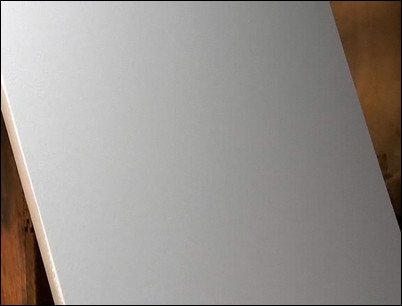
To add a faux finish to a wall, begin by painting two coats of primer over the wall. The wall should be clean, sanded and smooth. Even if the existing paint is in good condition, it is a wise idea to prime the room.
Begin with a clean, sanded, smooth and primed wall.
Step 2: Add the base coat.
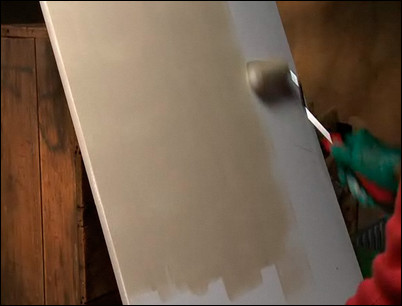
The base coat should always be either a satin or a semi-gloss finish. We are using latex paint here for both easy application and cleanup. Apply the base coat over the primer coat with a roller. Apply the base coat over a two- or three-foot section of the wall, filling in the space between. After the base layer dries, you will often find areas missing paint. You will get better overall results if you give the walls another even coat of base paint before you start.
Apply the base coat over three-foot sections and fill in the spaces between.
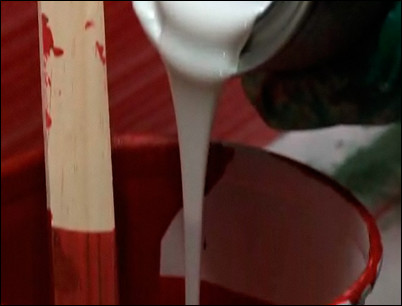
Step 3: Measure, mix and stir the first strie color.

The first process strie color is made up of the latex semi-gloss, gloss or eggshell color you want for the stripes. This is mixed with a latex glaze. The glaze is a clear carrier that you use to make the strie color more transparent and to allow you enough time to lay down the pattern. The mixing ratio is five parts of latex glaze to one part of eggshell latex paint. The glaze looks milky white, but it dries clear. Measure and pour the glaze into the mixing bucket first, then add the paint. Stir the glaze thoroughly to blend the glaze and paint together.
Mix together five parts latex glaze to one part latex paint.
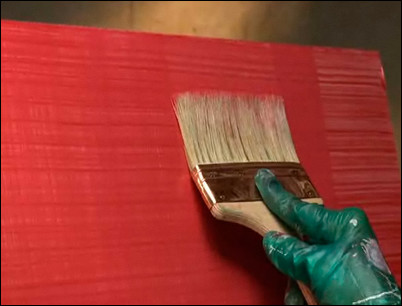
Step 4: Apply the first process strie color.
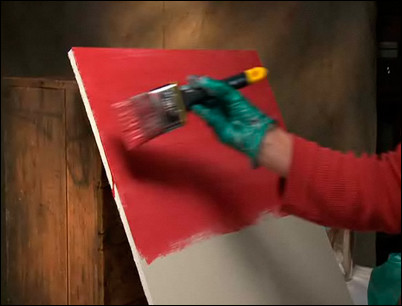
Using a quality 4-inch latex paint brush, apply the single-process color to the wall in the same direction you want the stripes to run, which is horizontally in this case. Leave a little more paint at the beginning of the run so that you have additional paint to pull across with strie brush. Apply enough paint to cover the width of two passes of the strie brush you will be using. Paint the entire length of the wall.
Apply enough paint to cover two widths of the strie brush.
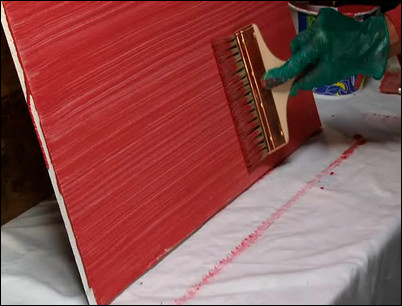
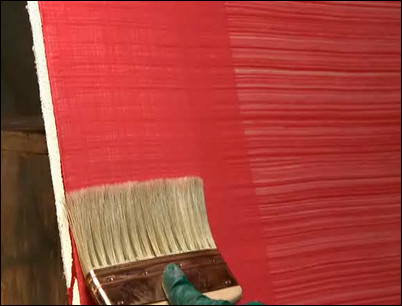
Step 5: Make two passes with the strie brush.
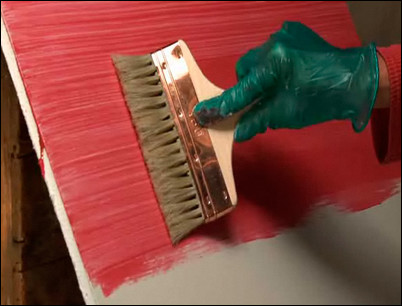
Hold the strie brush flat to the wall and press down slightly. Pull the strie brush slowly and steadily across the wall. Don’t stop until you reach the end of the wall. As you near the end of the wall, rotate the brush to carry the pattern all the way to the edge. Return to the beginning of the wall. Holding the brush flat to the wall, pull the strie brush across the remaining paint, overlapping about a quarter-inch.
Use the strie brush to create the first pattern along the painted length of wall.
Step 6: Continue applying the single-process color and using the strie brush for the pattern.
When the first run of pattern has been applied, use the 4-inch latex brush to apply more of the single-process color over the base coat. Again, cover an area just slightly under two widths of the strie brush. Distribute the paint evenly, leaving a little more paint at the beginning of the wall to be able to drag across the wall with the strie brush. Use the strie brush again to make the pattern, always overlapping the previous pass by a quarter-inch and keeping the brush nearly flat to the wall.
Overlap the previous pass by a quarter-inch.
Step 7: Wipe off the strie brush.

After two or three passes, wipe off the strie brush with a cotton, lint-free rag to remove the excess paint.
Wipe off the brush after two or three passes.
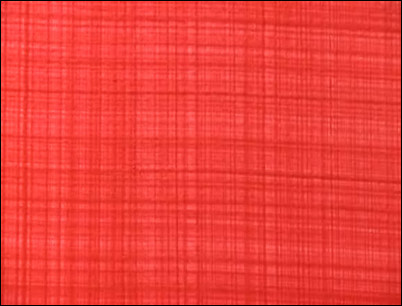
Step 8: Allow the wall the dry.
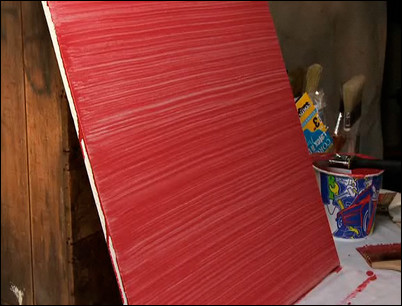
When you are done, your first process color should look like something like this. Let the wall dry completely, and use the time to thoroughly clean and dry your brushes.
The first process color should look like this.
Step 9: Prepare the second process color.
After the wall is thoroughly dry, we’ll add the second process, a vertical strie. The first step is to add more glaze to the 5:1 ratio glaze/paint mixture to make this pattern more transparent.
Add more glaze to the strie paint mixture to make it more transparent.
Step 10: Vertically apply the second process color.
Using a quality 4-inch latex paintbrush, evenly apply the second process color vertically. Leave a little more paint on the top of the stripe to pull down with the strie brush. Paint enough of the second process color to cover two widths of the strie brush.
Apply the second process color vertically.
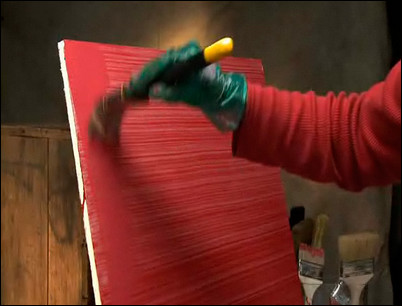
Step 11: Use the strie brush to make the vertical pattern.
Using the same cleaned and dried strie brush, hold the brush flat to the wall and, with a gentle pressure, drag the strie brush straight down from the top of the wall to the bottom. Rotate the brush slightly as you get to the bottom to continue the pattern evenly. Go back to the top of the wall, and repeat the process. Remember to overlap the previous pass by about a quarter-inch.
Pull the strie bush down the wall, holding it flat.
Step 12: Continue the process across the room.
Continue across the wall, adding one or two brush-widths of tinted glaze with a 4-inch latex brush then slowly pulling the strie brush down over the paint with a straight, even motion. Remember to use a clean, lint-free cotton rag to wipe the strie brush dry after one or two passes, which will keep the brush from holding too much paint. It’s the dry strie brush that makes a crisp burlap pattern.
Follow steps #10 and #11 to complete the double-process burlap strie pattern.
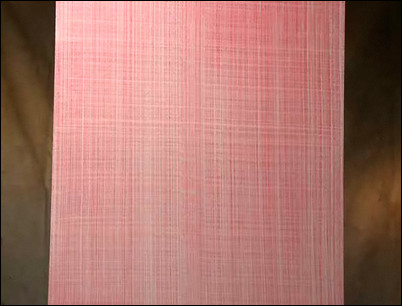
Step 13: Allow the wall to dry.
When the walls have all been treated with the second process color and strie brush application, allow them to dry. The result is a rich, textured classic burlap pattern.
Enjoy the double-process burlap strie pattern.
Step 14: Consider other colors for the pattern.
You can alter the strie effect simply by changing the colors you choose. For instance, you can make the second process color lighter than the base. To do so, you can mix the original beige base color with the latex glaze in a ratio of one part paint to five parts latex glaze. With a mixed glaze, you can follow steps #10 to #12 to apply this lighter second process color. It’s a little trickier to get the pattern even when laying a lighter tint over a darker color. If the layer is too heavy you can even out the pattern by going back over the area with a light touch if you work quickly. If there is a thin line, add a little more glaze with a latex brush and then gently smooth it out with the strie brush. Altering color combinations creates endless possibilities, but the result is the same: A classic faux painting pattern rich in texture and sophistication.
This effect was achieved by using a second process color that was lighter than the base coat.


