
Materials:
Step 1: Find and prepare a location.
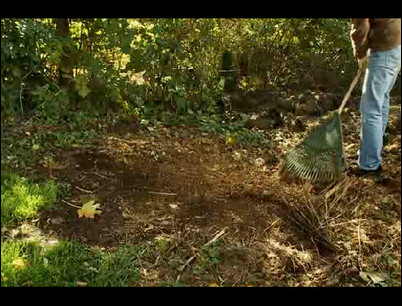
Choose a location for your pile. Check to see if there are any local zoning restrictions or regulations pertaining to composting. Pick a spot somewhat out-of-sight but close to your garden and landscaping. Clear the area and, if you wish, contain it with snow fence or other fencing. Measure a space that’s no smaller than three square feet to allow the compost heap to work effectively but no larger than five square feet to allow it to be manageable. Choose an area with good drainage that’s sheltered from direct light and strong winds. It helps to be able to reach the compost heap with a hose as it has to be watered from time to time.
Clear the shaded area for the compost heap.
Step 2: Drive the fence posts into the ground.
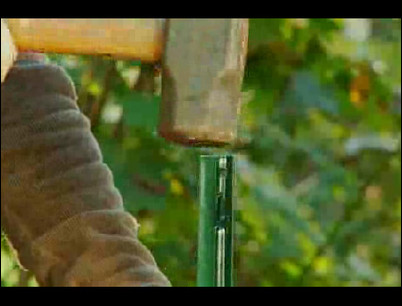
Drive fence posts into the four corners of the area you have selected for your compost heap. Make sure that the posts are plumb so that the fence will wrap evenly around them.
Check that the fence posts are plumb.
Step 3: Install the wire fencing.
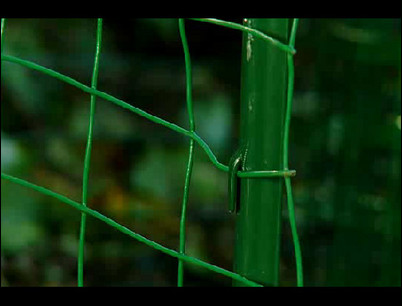
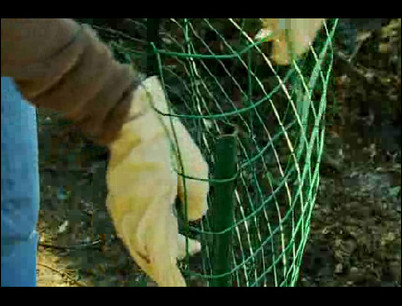
There are many types and sizes of wire fencing. We have chosen vinyl-coated, welded mesh utility fencing. Mesh fencing typically comes in 50-foot rolls. This fence material is easy to handle, colorful and resists rust. The open mesh allows air to reach the compost. Each of the four posts has small hooks to which you can attach wire fencing. Hold the wire mesh under the hooks on the first fence post and hammer the hooks over the mesh wire to secure the fencing in place.
Hammer the hook down over the wire mesh.
Step 4: Continue installing the fencing.
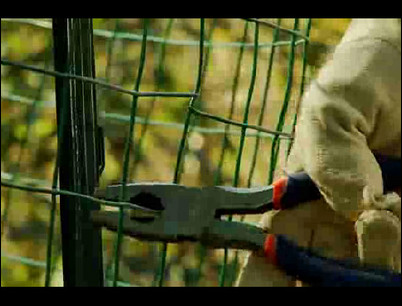
Pull the wire fencing tightly around the other three posts to form a three-sided container for the compost heap. Leave the front, or fourth, side open. Using electrician’s pliers, cut off the section of mesh you are going to use from the rest of the roll. Continue to secure the rest of the fence to the posts.
Cut off the fencing from the roll.
Step 5: Cut the top of the fence and fold over the edges.
Cut the mesh fencing one or two sections higher than the fence post. Next, fold over the mesh fencing, which will help protect you and your family from the sharp edges. With all the edges folded over, you now have a simple, three-sided container for your new compost heap.
Fold over all the sharp edges of the mesh fence.
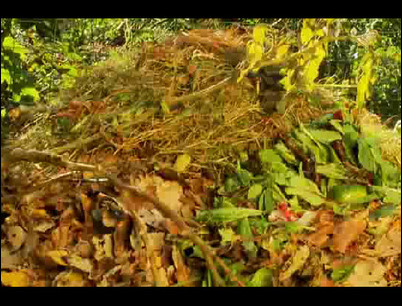
Step 6: Create the green and brown layers of the compost heap.
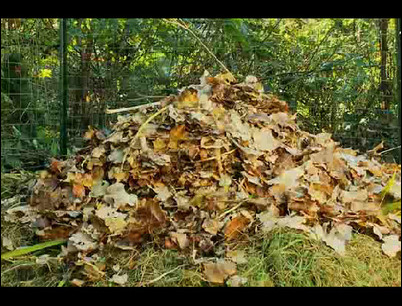
You begin a compost heap by creating layers of organic material. Start with a six to eight-inch layer of organic green materials like grass clippings, the rakings from weed whacking and yard trimmings. You can include all your organic kitchen scraps such as vegetable peelings, old salads, fruits and vegetables. The nitrogen in the green materials provides microbes that break down the pile into usable compost. You can even throw in coffee grounds and filters as well as dryer and vacuum lint. Add six inches of brown organic ingredients, such as dry leaves and small twigs or wood chippings from carpentry projects. These brown materials provide carbon necessary to generate fuel to break down the organic materials. Note: Small pieces break down fastest, so it’s best if leaves are shredded.
Layer brown organic materials over the green organic materials.
Step 7: Add fertilizer or compost starter to the pile.
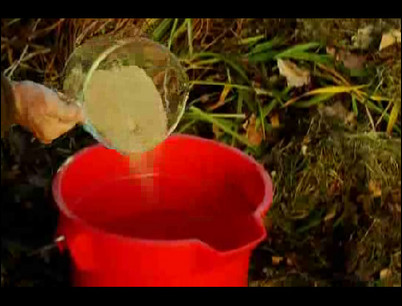
Add to either a cup of 10-10-10 fertilizer or compost starter mixed with water to the layer. If you use a commercial compost starter, follow label directions. The fertilizer or starter acts as an activator to accelerate the decomposition. These activators provide a nitrogen source for the microbial community.
Add the starter to the pile.
Step 8: Add a layer of top soil.
Lastly, add one to two inches of top soil (plain garden soil will work) in an even layer across the organic material. The soil helps to stimulate the chemical breakdown of the organic materials.
Add top soil.
Step 9: Build up the pile with additional layers.
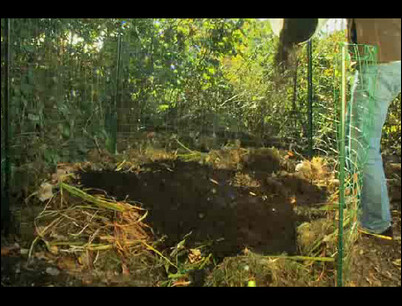
Continue adding 12- to 15-inch layers to the compost heap. Each layer consists of a mixture of green and brown organic materials. Mix each layer as you add more material. Remember to keep the compost heap moist. As you build the layers of the compost heap, wet each layer with a bucket of water and fertilizer then add one inch of top soil. Stop when the heap is between three and five cubic feet. A compost heap that is too small may not get hot enough for the composting reaction to take place, and a compost heap that is too large is too hard to turn.
Continue adding layers to the pile.
Step 10: Keep the compost pile moist.

The compost heap has to remain moist to work. A good rule of thumb: If you can squeeze a drop or two of water out of a handful of working compost, the pile is moist enough. If it becomes too moist for too long, it will start to smell. In that case, turn the pile over with a pitchfork more frequently to encourage evaporation. If the pile is too dry, add water using a garden hose. Wet down the outside surface and stick a hose into the interior of the pile in a few places, being careful not to over-water.
Use a garden hose to wet the interior of the pile.
Step 11: Use a pitchfork to fluff and turn the pile regularly.
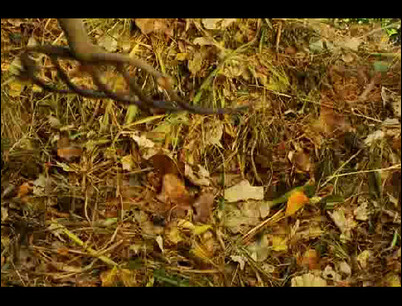
In addition to moisture, a compost heap needs air for decomposition to take place. Using a pitchfork, fluff the pile every week or so to allow air into the center of the pile. Combine the tasks of watering and turning the pile to simplify the maintenance of your compost heap.
Use a pitchfork to turn the pile.
Step 12: Periodically check the temperature of the pile.
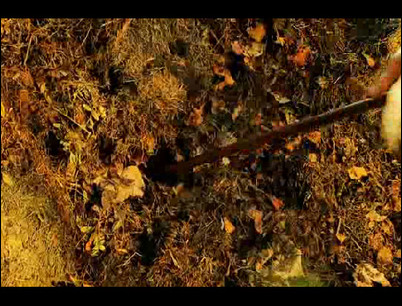
A properly blended, fluffed and moist compost pile should reach temperatures around 120 to 140 degrees Fahrenheit. To check if it’s hot inside the heap, insert one end of a metal pole into the middle of the pile and let it sit for a minute. When you remove the pole, the end should be warm to the touch.
Feel the end of the pole.
Step 13: Care for the heap until it breaks down into compost.
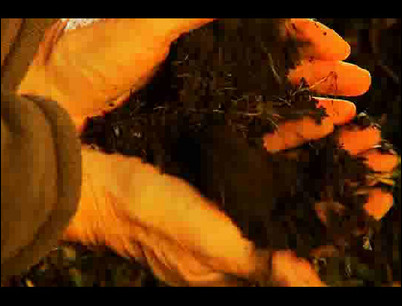
With care, the heap will begin breaking down into compost in a matter of months. The process will take longer if the materials are course or the weather is very hot or very cold. Ready-to-use compost is a rich, dark brown material with an earthy smell. Mixed with your garden soil or spread over the surface as mulch, the nutrients in the compost will greatly improve the quality of the soil, nurturing your plants and insuring a strong and healthy growing season.
Finished compost is rich, dark brown and earthy in smell.


