
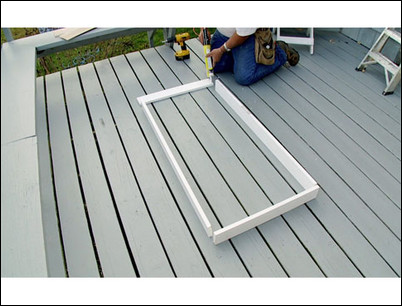
Materials:
Step 1: Order and purchase the replacement window.
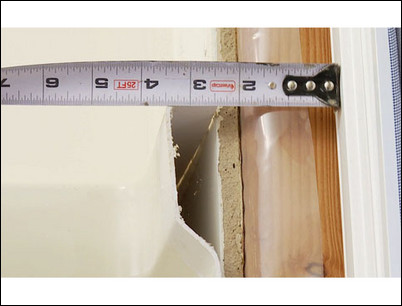
Replacements for casement windows are determined by the size of the glass inside the window. Carefully measure the height and width of the glass. Some brands of windows have the model number and year etched into the corner of the glass, which is very helpful in ordering a replacement.
Measure the height and width of the glass to order a replacement.
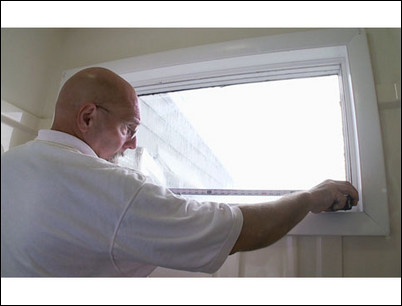
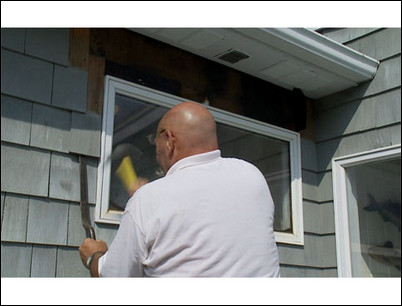
Step 2: Remove the inside molding.
Using a putty knife and a hammer, start in the corner to pry the molding away. Working slowly across the molding, use a pry bar to separate the molding from the extension jambs. This window is in a bathroom and overlaps the top of a fiberglass tub enclosure so extra care is needed to avoid damaging the enclosure.
Use a pry bar to remove the molding.
Step 3: Remove the extension jambs.
Remove the extension jambs that fill the space between the frame of the window and the molding. The extension jamb is generally held in place by just a few finish nails and should come out easily.
The extension jambs should come out easily.
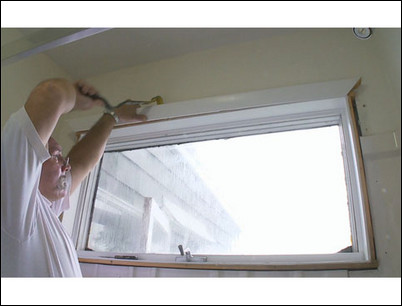
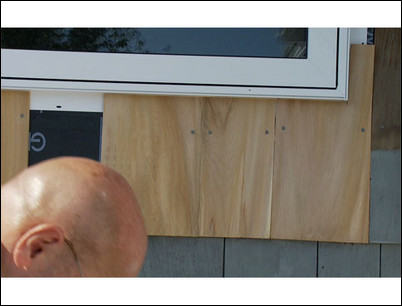
Step 4: Remove the last course of shingles.
Outside, you will remove the shingles surrounding the window. To remove the shingles, we will use the pry bar and a special tool called a shingle thief. The shingle thief slides up underneath the shingles to cut the nails used to hold the shingles in place. Starting along the soffit, pry off the last course of shingles first. These are top-nailed with galvanized finish nails and will come off easily. For safety and just to be practical, remove all the nails as you go. Eventually, all the nails have to be removed or driven into the wall. The next course of shingles should come off with the pry bar as well.
Use the pry bar to remove the top two course of shingles under the soffit.
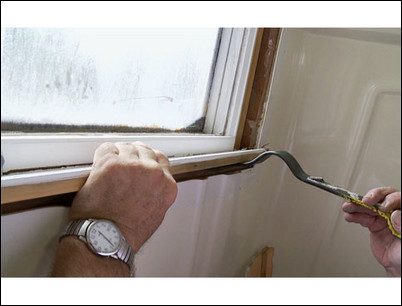
Step 5: Use the shingle thief to remove the remaining shingles around the window.
The shingle thief is used to remove shingles without damaging the ones that will stay in place and are adjoining. Slide the shingle thief up under the shingle and hook the nail holding it in place. Sharply whack the handle of the shingle thief and the hook will cut through the nail. Do this for both nails and slide the shingle down and out. If you can see the nails, you can drive them through the shingle using a nail set. The goal is to remove as few shingles as needed.
Hook the shingle thief around the nail and whack the thief with a hammer.
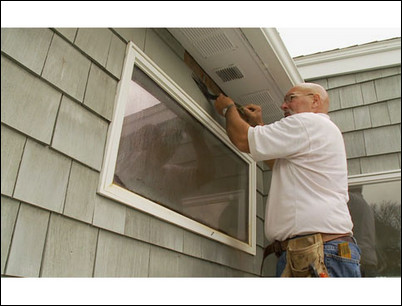
Step 6: Remove the nails holding the flange to the framing.
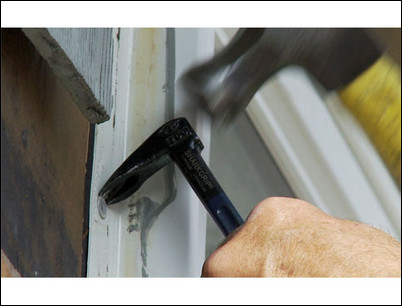
When the surrounding shingles are removed and the flange for the window is exposed, use a hammer and cat’s paw to pry up the galvanized roofing nails holding the flange to the framing. Continue removing all the nails around the window flange. Leave the nail in the top center of the flange until last so that the window doesn’t fall out on top of you.
Use a cat’s paw to remove the nails from the flange.
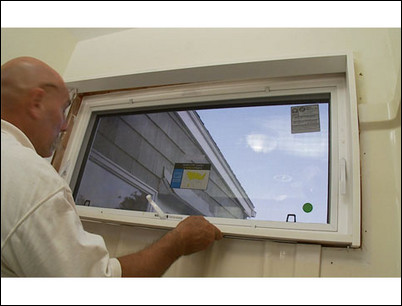
Step 7: Remove the final flange nail and remove the window.
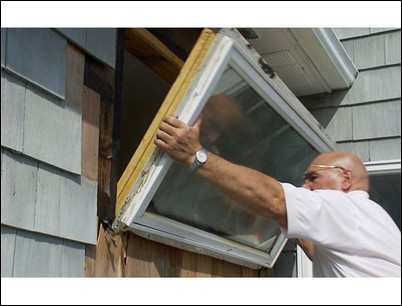
Remove the final nail from the flange and the window should come right out.
Remove the window.
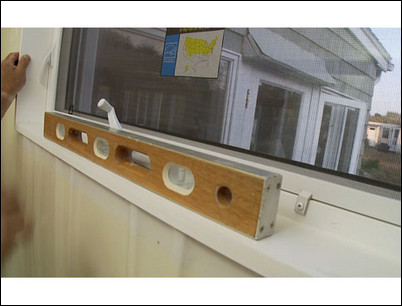
Step 8: Check the new window and the opening.
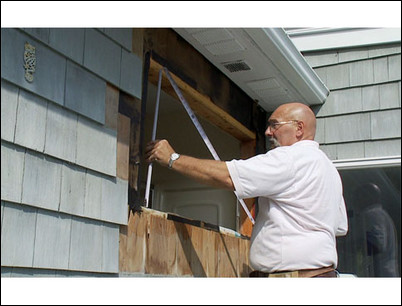
Confirm that the widow will fit the rough opening. Using a level, check to see that the opening is square. If it is not, add wedges as necessary on the sill until the rough opening is exactly level.
Check that the opening is square.
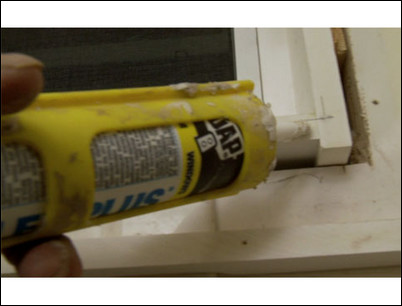
Step 9: Run water seal gasket along the bottom and sides of the opening.
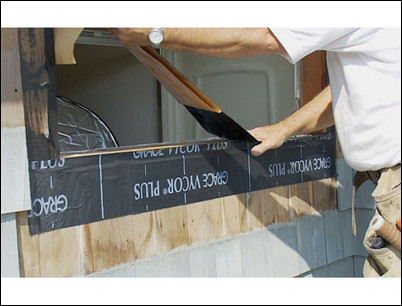
Cut and glue in place a watersealing gasket around the edges of the opening. This material is available in rolls. You peel off the backing and stick the gasket material around the sides of the rough opening. The bottom sill gets a layer over the top of the sill as well, which overlaps the gasket along the bottom of the rough opening. Run a length of gasket material along each side, as well. This keeps water and moisture from getting behind the shingles and down between the rough opening and the window.
Install the gasket along the bottom of the rough opening and then on the top of the sill.
Step 10: Install the new window.
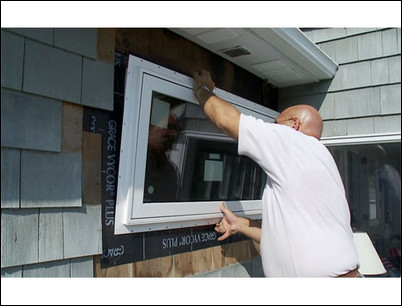
Install the new window and check that it is both level and centered in the opening.
Check that the window is level and centered.
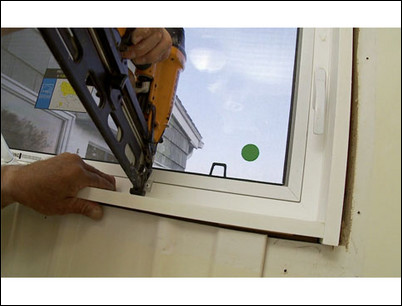
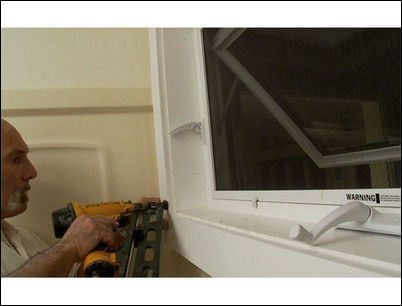
Step 11: Nail the window flange in place.
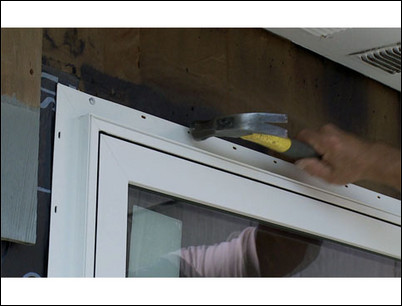
Nail the top of the flange to the house with 1 1/2-inch galvanized roofing nails. Put one nail into the center of every other slot. Vinyl replacement windows expand and contract and the holes in the flange are slotted so that the window can move without binding. Before you nail the rest of the flange in place, check to make sure that the window is square by measuring from corner to corner. Some windows may have to be squared by hand as you nail them in place. Once you know that the window is square, continue nailing the flange to the framing.
Nail the flange in place.
Step 12: Lay a strip of gasket over the top of the flange.
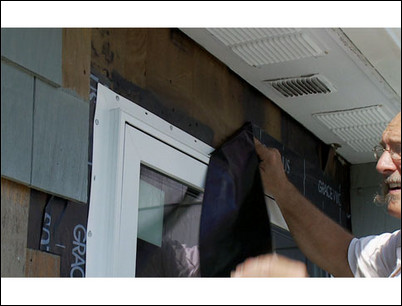
With the window in place, lay a strip of gasket material over the top of the flange. The top gasket goes over the flange to keep water from running under it and into the rough opening.
Lay a top gasket over the flange.
Step 13: Carry a line for the first course of shingles.
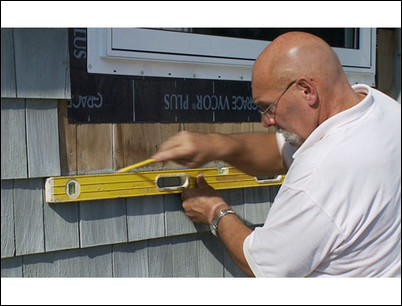
To replace the shingles, carry a line for the first course of shingles to go under the new window.
Use a level and a pencil to carry the line.
Step 14: Measure the corner shingle.
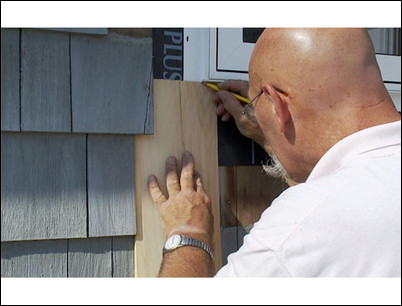
Measure and mark the corner shingle to fit around the window.
Measure the corner shingle.
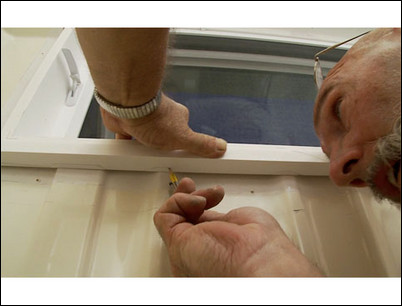
Step 15: Cut and nail the corner shingle.
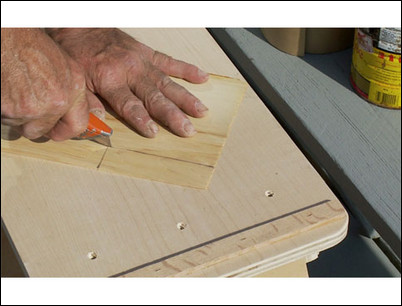
Using a utility knife, cut the shingle to fit and nail it into place with 3-penny galvanized nails. Use two nails for each shingle.
Use two nails per shingle.
Step 16: Line up the course of shingles under the window and cut to fit.
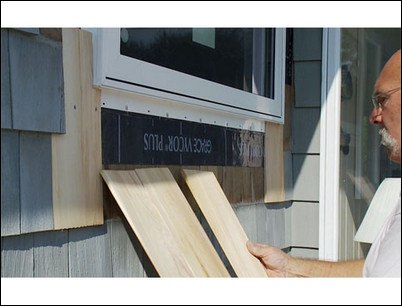
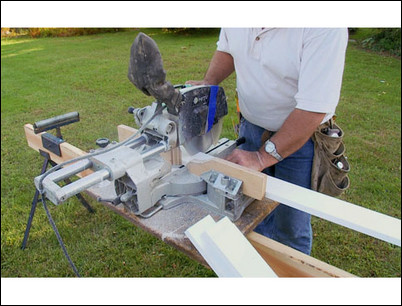
Line up a set of shingles for the entire course under the window. Each shingle should overlap the joints in the course below by at least one inch so that rainwater cannot get under the shingles. Shingles can be cut to fit on a portable table saw, but work cautiously when handling them. White cedar shingles can touch each other when nailed up side-by-side. Red cedar shingles should have the edge of a nickel’s distance between them. If the edges of the shingles are not square, use a small hand plane to bring the edges parallel to each other. The better the fit, the better the weather seal.
Cut and install the course of shingles below the window.
Step 17: Start on the outside and work toward the center on the course of shingles.
Work toward the center of the course of shingles, and then slide the last shingle under the edge of the abutting shingle, which is temporarily tacked in place with one nail. Score the center shingle with a utility knife and snap off the excess. Insert the trimmed shingle. Carefully aligning the shingle, nail it into place. It’s much easier to fit a shingle in the center of the course than in a corner.
Score and cut the last, center shingle to complete the course.
Step 18: Continue installing shingles around the window.
The top course of shingles under the window is top-nailed with galvanized finish nails, two nails to a shingle. Continue to use these techniques to shingle the rest of the area surrounding the window until all the shingles are nailed in place.
The top course of shingle under the window is top-nailed.
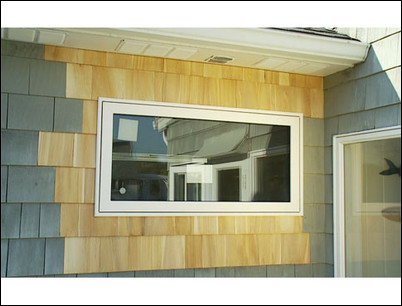
Step 19: An overview of the Inside casing.
Inside the house, install the new extension jambs and window casing. Here’s how to build out the casing using the new plastic composite trim material. The inside extension jamb will be flush with the highest point on the fiberglass shower enclosure. The outside extension jamb will be scarfed to fit over the fluted tub enclosure. Lastly, the extensions will be covered with a 3 1/2-inch molding with a 3/16th reveal, creating the window casing.
The extensions will be covered with a 3 1/2-inch molding.
Step 20: Measure the height of the opening.
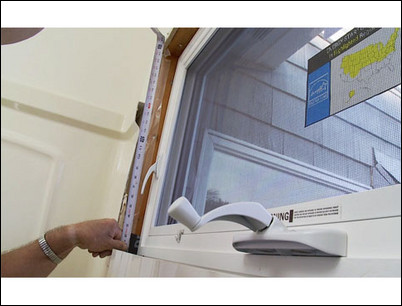
Start by measuring the height of the distance from the sill to the top of the rough opening and subtract 1/4-inch for a loose fit.
Measure the height.
Step 21: Measure between the inside edges of the window.

Measure the distance between the inside raised edges on the top and the bottom of the window. The finished inside extension jamb will be cut to line up along this raised edge on the window.
Measure between the inside raised edge of the top and bottom of the window.
Step 22: Measure at the highest point of the bathtub enclosure.
Measure at the highest point of the bathtub enclosure to establish the depth for the extension jamb.
Measure to establish the depth of the extension jamb.
Step 23: Cut the trim stock for the four extensions.
Transfer the measurements to a length of composite trim stock and cut the two inside horizontal and two inside vertical extensions to length.
Cut the extensions.
Step 24: Insert the two vertical extensions and mark the inside dimension.
Insert the two vertical extensions into place and carefully mark the inside dimension where the horizontal extensions will line up with the raised section of the casement window frame. Do this for both vertical parts of the extension jamb.
Mark where the horizontal extensions will line up with the raised section.
Step 25: Drill two holes in the ends of both vertical extensions.
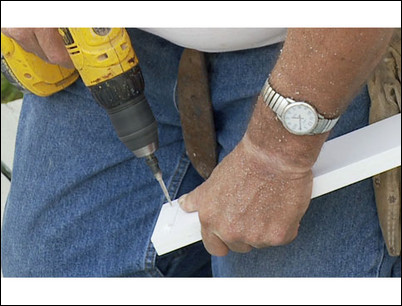
Drill two holes in the ends of both vertical extensions. Do this for both the inside vertical extension pieces.
Drill two holes.
Step 26: Caulk and screw the inside extension parts together.
Apply caulk to the ends of the top and bottom inside extension parts and then screw the parts together using rust-resistant screws. Composite trim benefits from the caulk bond, which helps to create a tighter water-proof joint.
Screw the extension together.
Step 27: Caulk between the window casing and rough opening and insert the extension.
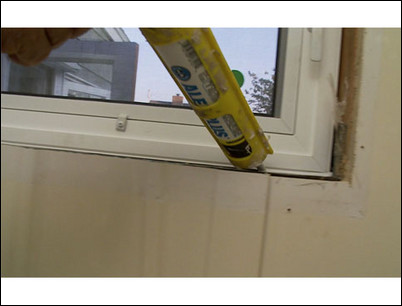
Next, apply a bead of caulk between the edge of the window casing and the rough opening, which helps to seal out drafts along the edge of the window. Insert the assembled inside window jamb extension into the rough opening and press it up against the casement window unit.
Caulk between the casing and the opening.
Step 28: Use a level on the extension jamb.
Check to make sure the extension jamb is level.
The jamb should be level.
Step 29: Fasten the bottom of the jamb.
Holding the inside extension jamb tight against the casement window, fasten the bottom of the window jamb to the rough opening.
Fasten the bottom of the extension jamb.
Step 30: Insert wedges to fill the area.
Moving to the side of the inside extension jamb, insert wedges to fill the area between the rough opening and the inside extension jamb. The inside edge of the extension jamb should line up with the raised edge of the casement window.
Insert wedges between the rough opening and the jamb.
Step 31: Insert and fasten the wedges on both sides.
Insert wedges the same way on the other side. Fasten the vertical sides of the inside extension jambs through the filler wedges and into the 2X4s of the rough opening.
Fasten through the filler wedges and into the rough opening.
Step 32: Mark the reveal.
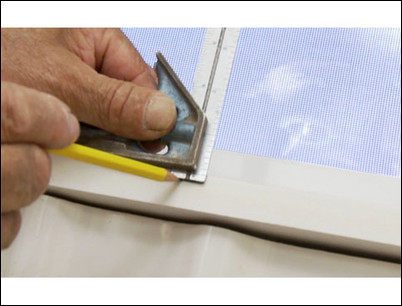
Mark a 3/16th setback or reveal around the entire perimeter of the inside extension. The molding will align with this mark.
Mark the reveal around the entire perimeter of the extension.
Step 33: Measure for the outside extension jamb.
Measure for the outside extension jamb, which in our case is a 1 1/16th inches deep, to bring it level with the inside extension jamb. The length will be 54 inches long to allow for a 3 1/2-inch molding and a 3/16th-inch reveal.
Measure the length of the outside extension jamb.
Step 34: Cut and install the first section of the outside extension jamb.
Cut and install the first outside extension section, carefully aligning it to the marked line and fastening it into place with finishing nails. This piece is being nailed to a flat, level surface so the installation is not complicated.
Install the top section of the outside extension jamb.
Step 35: Prepare the bottom section of the outside extension jamb.
The bottom section of the extension jamb will require a little extra attention. Lay the 1 1/16-inch section over the fluted fiberglass tub enclosure. Using a common compass set to the distance between the wall and the outside of the extension jamb, scribe the pattern onto the outside of the extension jamb. The pattern is transferred to the extension jamb, which we will trim to fit.
Scribe the pattern onto the length of jamb.
Step 36: Cut and shape the lower outside jamb to fit.
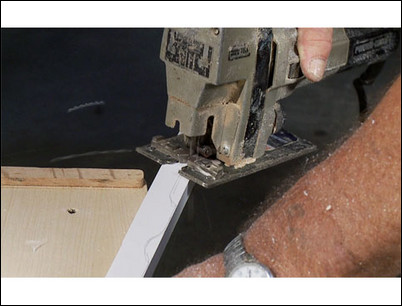
Using a jig saw, carefully follow the line scribed onto the lower outside extension jamb. You will notice that the composite trim material is easy to cut and leaves a reasonably clean edge. Along sections where just a shallow adjustment in the line is needed, a sharp hand plane will shave the composite material easily and leave a smooth line. When you are done, the composite materials is shaped and ready for installation.
Use a jig saw to cut along the scribed line.
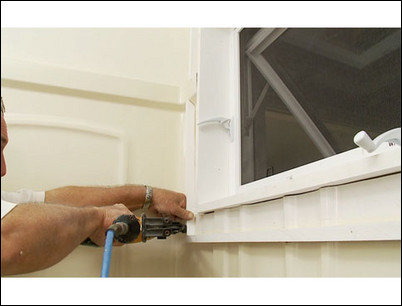
Step 37: Install the lower outside extension.
Line up the lower outside extension along the measured line and fasten it in place.
Fasten it in place.
Step 38: Measure, cut and install the upper vertical outside extension jamb sections.
Measure and cut the four outside vertical sections. The composite material cuts very much like wood. Carefully line up the upper outside extensions and fasten them in place.
Install the upper vertical sections.
Step 39: Scribe and cut the lower vertical sections.
The lower sections fit over the fiberglass tub enclosure and will have to be scribed to fit the contours of the fiberglass. Using a compass set to the offset equal to the distance between the wall to the end of the inside extension, scribe the line of the contour onto each of the lower outside extensions. Following the scribed lines, trim the lower outside extensions.
Use a compass to scribe the line.
Step 40: Install the lower outside extension jambs.
Fasten the lower outside extensions to the fiberglass enclosure, carefully checking your measurements as you go.
Fasten the lower sections in place.
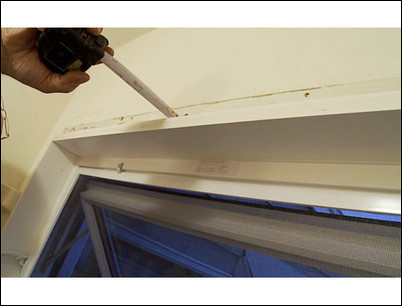
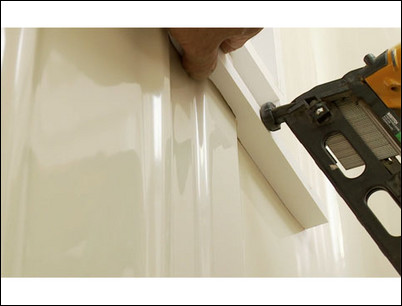
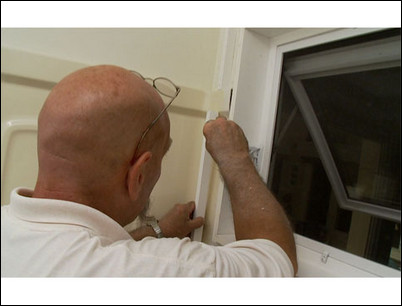
Step 41: Cut the mitered corners for the molding.

Set up a 45 -degree angle to cut mitered corners into the 3 1/2-inch molding. Cut the top and bottom molding sections first.
Cut the molding.
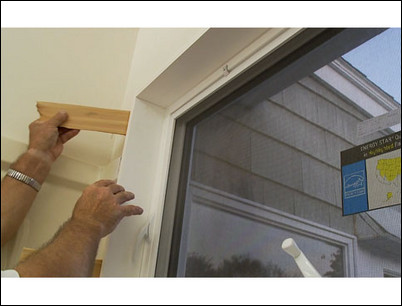
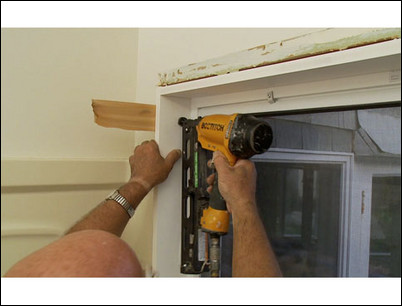
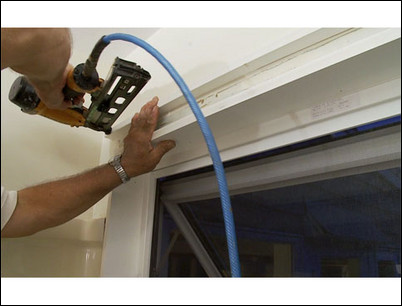
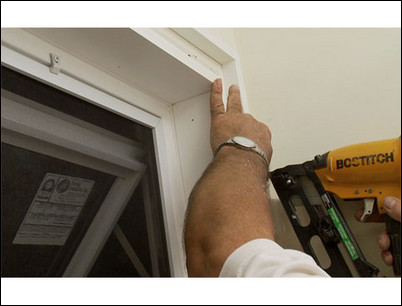
Step 42: Fasten the top molding into place.
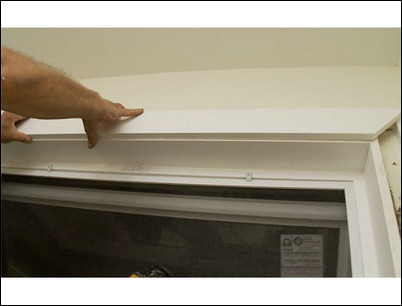
Align the top molding with the line set for the reveal, and fasten the molding in place.
Fasten the molding into place.
Step 43: Apply caulking and install the lower molding.
Because the bottom molding is in the shower enclosure, apply a bead of caulking to seal the joint. Aligning the lower molding to the 3/16th reveal, fasten the molding in place.
Fasten the lower molding in place.
Step 44: Measure, cut, caulk and install the last vertical sections of molding.
Carefully measure the last two outside molding sections and cut the sections to fit. Apply a bead of caulk to all four sides of the molding and press it tightly into place. Do the same with the molding on the other side, first caulking and then fastening the molding in place.
After caulking the molding, fasten it in place.
Step 45: Apply finishing touches as desired.
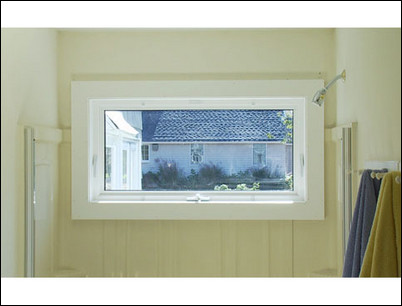
With the inside molding firmly nailed in place, the nail holes can be puttied with filler and the molding can be left as is, or sanded, primed and painted just like wood. The new window unit, combined with a new inside casing of plastic composite trim, will give you years of trouble-free service.
Enjoy the new casement window.


