
Materials:
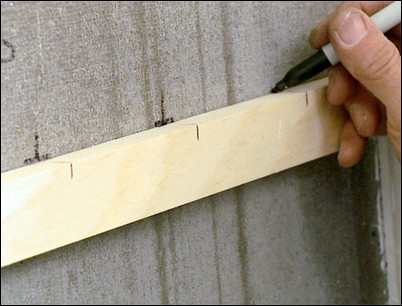
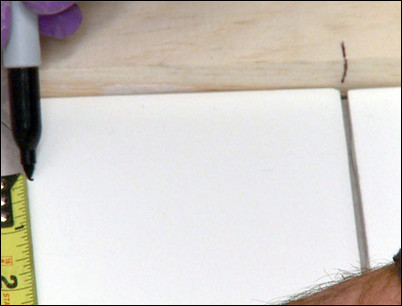
Step 1: Create a story stick.
The first step to replacing the tile is to create a story stick. A story stick is a piece of wood that basically a yardstick customized to your project so you can make the measurements you need to complete the job. Using the existing tiles, mark the spacing of each tile on the stick, which will be your guide for marking the positions of the new tiles.
Mark the spacing of the existing tiles on the story stick.
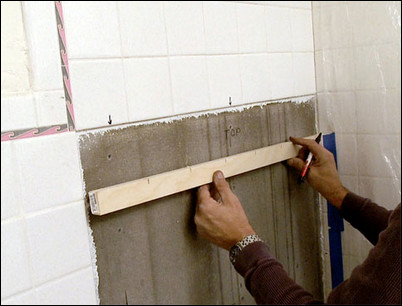
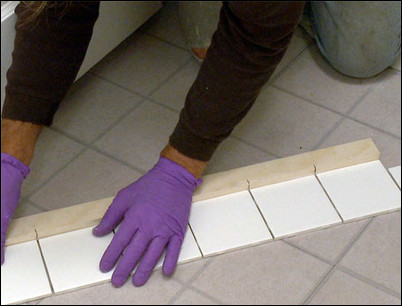
Step 2: Use the story stick to mark the location of the first line of tiles.
Now that the story stick is marked with the tile spacing, line it up with the bottom of the first row of tiles to be replaced and place a mark on the wall where each joint will be.
Mark the location for the first row of tiles. Use the existing tiles to the left and right for the horizontal plane.
Step 3: Continue using the story stick to create a map for the replacement tiles.
When you have marked the first row, use the story stick to mark the height for the additional rows of tiles, thus creating a map the location of every new tile.
Use the story stick to mark the height for each row of tiles.
Step 4: Mix and apply the mortar.
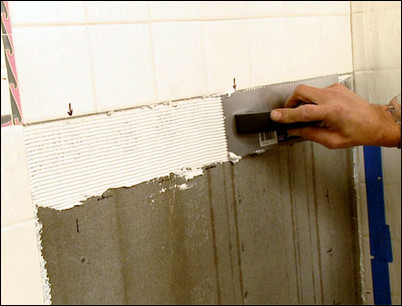
Thoroughly stir a container of pre-mixed thin-set tile mortar that contains a latex additive. Trowel the mortar on the edge of a notched trowel. You may want to wear rubber gloves when you lay up the tile. Spread the adhesive over the first row or two of tiles. Thin-set adhesive begins setting quickly, so only apply what you can cover in 15 minutes.
Apply mortar for the first row or two of tiles.
Step 5: Begin to lay the first row of tiles.
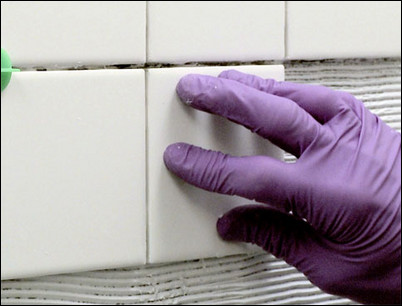
Slather a coating of thin-set mortar on the back of a tile and firmly press the tile into place. Be sure to use the reference marks on the wall to align it exactly.
Position the first tile into place.
Step 6: Use spacers to keep the tiles straight.
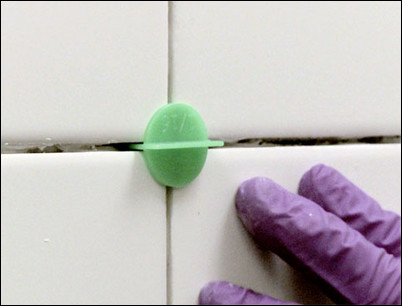
To keep the tiles straight and aligned, temporarily insert plastic spacers between the tiles. In this case, we are using a one-eighth-inch spacer to match the spacing in the original tile. (Note: The spacer shown in the video displays one-sixteenth on the face, but this number refers to the side not being used. The other side of the spacer that is in use is the one-eighth-inch side.)
Position the spacer in the corner.
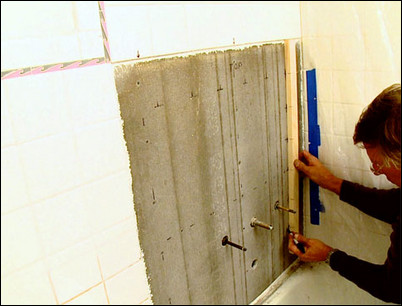
Step 7: Continue laying the first row of tiles.
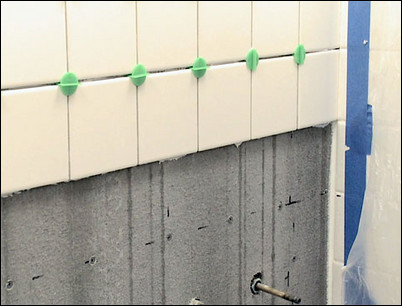
Continue to lay the tiles by applying the thin-set adhesive to their backs then scraping off any excess adhesive with the notched trowel and pressing the tile firmly into place with a slight twisting motion. Temporarily insert a plastic spacer and set alignment with the surrounding tiles by pushing the tile firmly up against the spacer. Work your way across the wall, steadily laying each tile and aligning it with plastic spacers. The last tile of the row slips in under the corner tile on the facing wall, assuring a watertight joint. With the completion of each row, check to make sure the tiles look straight and are aligned with the row above. Adjust any tiles that may have slipped.
The last tile of the row slips under the corner tile on the facing wall, assuring a watertight joint.
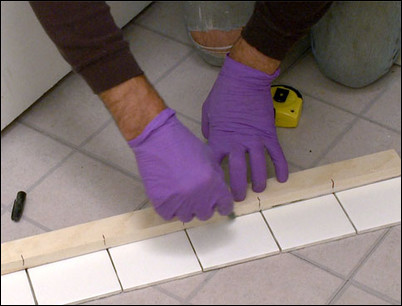
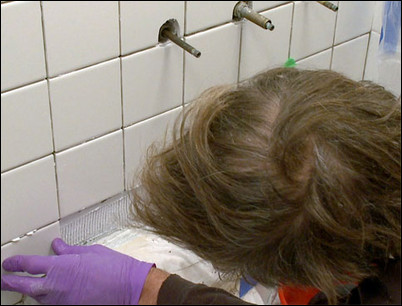
Step 8: Use the story stick to ensure a straight and level row.
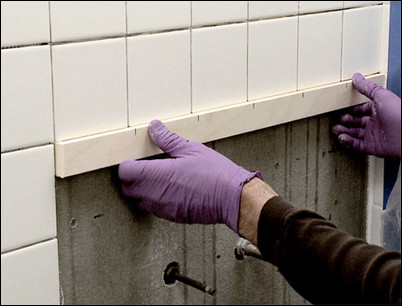
One trick for checking that the tiles are horizontally aligned is to gently bring the story stick up under the row of tiles. It will be obvious if any tiles have slipped.
Gently bring the story stick up under the row of tiles.
Step 9: Mark the tiles for the valve stem row.
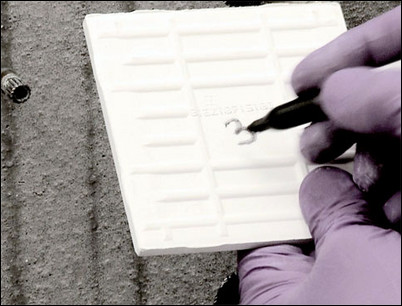
Some of the tile in the next two rows will have to be cut to allow for the valve stems to pass through. To do this, first number the tile positions on the wall then number one tile for each position. This is a simple trick to help you glue the right tile in the correct place.
Mark numbers on the back of the tiles that correspond to the numbered positions in the stem row.
Step 10: Mark the tile to be cut for the valve stem opening.
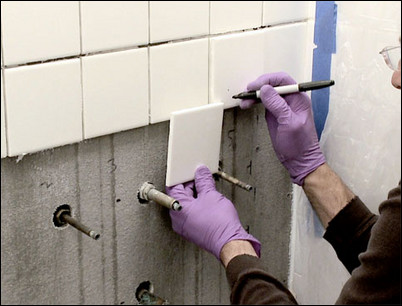
To mark the tile for cutting, take a numbered tile and place it directly on top of the tile above the valve. This is the tile you are going to cut to fit around the valve stem. Using another tile as a measuring stick, line up the measuring tile along with the two sides and the top of the hole in the cement board for the valve stem and transfer these three measurements to the tile above.
The marks on the tile show the two sides and top of the valve stem hole. Use the other tile as a measuring tool.
Step 11: Sketch the shape of the opening.

Using the three marks as a guide, sketch the shape of the opening on the tile.
Use the three marks to sketch the opening in the tile.
Step 12: Measure and mark all the tiles that will need to be cut to allow for openings.
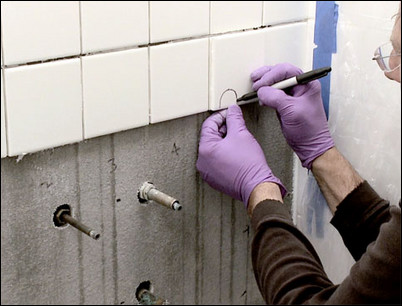
Using this quick and accurate trick, measure and mark the outlines of each of the tiles that will need to be cut to allow for either a valve stem or the bathtub spout. When all the tiles are measured and marked for cutting, it’s time to cut out the openings with a tile cutter.
Use the same trick to mark all the openings to be cut.
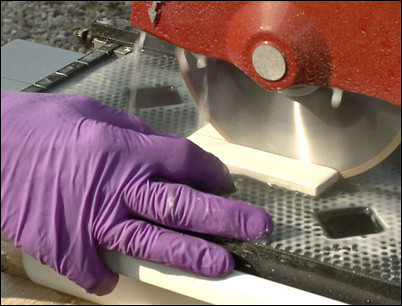
Step 13: Cut out the opening for the tile.
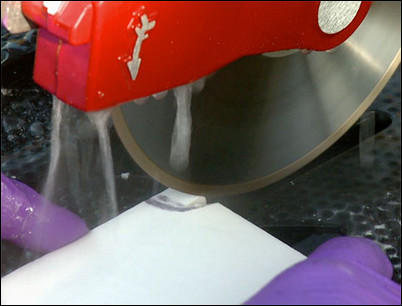
Follow all the safety instructions outlined in the wet saw instructions, including wearing safety glasses, a dust mask and rubber gloves. Holding the tile firmly with both hands, cut out the shape of the opening on the tile by first making repetitive, parallel cuts up to the edge of the line. Then, use the blade to nibble away the remaining tile material.
Make repetitive parallel cuts to the edge of the line.
Step 14: Carefully use the blade as a grinder for a square edge.
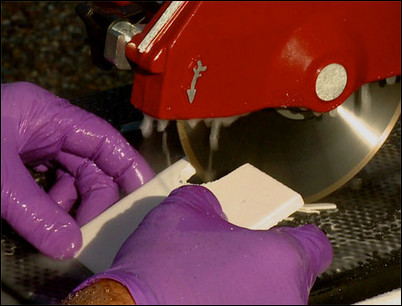
Holding the tile firmly in both hands, tilt the tile up to square the edge. Be very careful as you are working closely to a sharp carbide saw blade. Hold the tile firmly with both hands, keeping your hands to either side of the moving blade. With practice, you will find that the wet saw acts both as a saw and a grinder, allowing you to shape the opening to fit to the contour of the line.
Tilt the tile up for a square edge and to shape the opening.
Step 15: Apply the thin-set adhesive to the cement board.
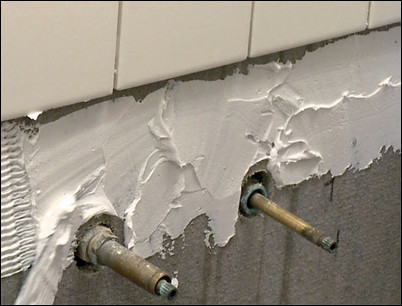
Check the fit of each of the tiles to make sure that they fit into the space. When you are satisfied with the fit, apply the thin-set adhesive to the cement board. If there is not enough space for the notched trowel, use a smaller trowel to spread the adhesive then smooth out the thickness with the tip of the notched trowel.
Use a smaller trowel to fit into tight spaces.
Step 16: Set and align the tiles for the row.
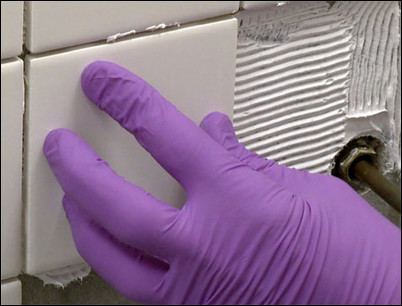
Butter the back of each tile with the notched end of the trowel. Using a twisting motion, press each tile into place, utilizing the spacers to align the tiles. Continue laying the tiles along the row.
Use spacers to keep the tiles aligned.
Step 17: Measure the height for the bottom row.
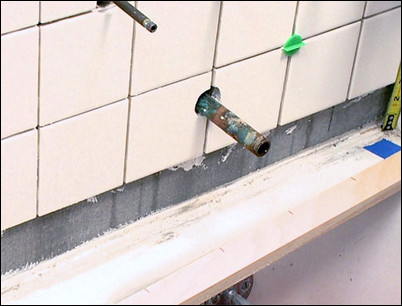
In this situation, all the tiles in the last row will have to be cut to fit. The first step is to measure for each tile in the last row. The tub may be parallel to the last row of tiles, in which case the tiles will all be cut to the same length, or there may be slight angle that would cause each tile to have to be cut to fit. It’s necessary to accurately measure the height of each tile carefully.
Measure the height of the last row of tiles accurately.
Step 18: For unlevel situations, lay the tiles on the floor.
In an older home, few features are level, but there is a trick to mark the last row of tiles for cutting. Using the story stick as a guide, lay all the tiles on the floor exactly as they will be installed on the wall.
Use the story stick as a guide.
Step 19: Mark the height for the left and right sides of the row.
From the measurements, mark the height of the far right tile and the height of the left tile as measured on the wall. In our case, we are using the height of the notch of the tile we removed from the wall.
Mark the heights for the left and right sides of the row.
Step 20: Draw a line between the two marks.
Using the story stick as a ruler, draw a line from the mark on one side to the other side. The bottom row tiles are now marked and ready to cut.
Connect the two marks with a line.
Step 21: Cut the bottom row tiles and check the fit.
Using the tile saw, carefully cut along the lines you drew on each tile. Once each tile is cut, line them up in order and check the fit. As with the cement board, it’s better to leave the cuts a little “proud” (or too large) and have to trim them a little on the wet saw than to have the tiles be too short. You want the tile to just touch the edge of the lip of the tub.
Check the fit of the cut tiles.
Step 22: Apply adhesive and lay the tiles in the bottom row.
Apply thin-set adhesive to the cement board. If it is another tight fit, spread the thin-set with a spackling knife and then even it out with the edge of the notched trowel. Butter the back of each tile with thin-set and press the tiles firmly in place. After checking the final alignment, allow the tiles to dry overnight. In the next segment, we will apply the grout and caulk the edges of the tub for a professional finish.
Set the final row of tiles and allow to dry overnight.


