
Materials:
Step 1: Fix any leaks.

Before replacing the backing, it is important to address any leaks. In this project, the water damage was caused by a leaking packing nut on the hot water valve stem. For years, the valve stem had been spraying a mist of hot water behind the wall, soaking the inside of the wall. Before we continued this project, we replaced the packing nut and tested the valve until we were sure that the leak was fixed.
Fix any leaks like this valve stem packing nut.
Step 2: Measure the height of the opening.
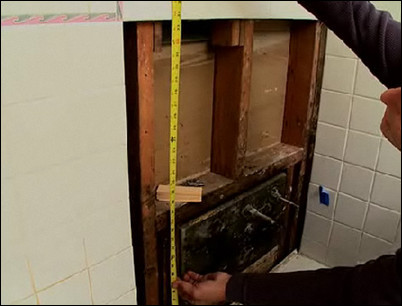
Measure the height of both sides of the opening. Don’t presume that the corners are square.
Use a tape measure for the height.
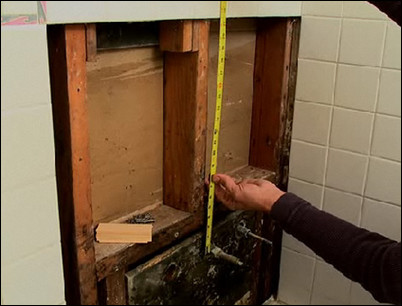
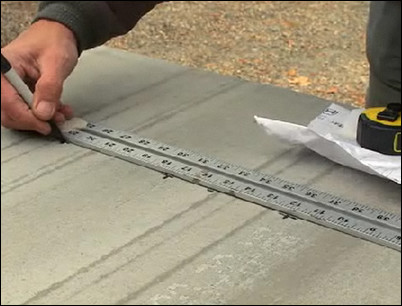
Step 3: Measure the width of the opening.

The second measurement you will need is the width of the opening. In this measurement, we have allowed for the new backing and tile to tuck into the corner behind the existing tile that runs down the adjacent wall.
The width measured will allow for the new tile and backing to tuck into the corner, as shown here.
Step 4: Measure for the fixtures.
Measure the location of the bathtub spout as well as the hot and cold water valves and the diverter valve. We are measuring from the top of the opening and from the sides of the opening.
Measure from the top and sides to all of the fixtures.
Step 5: Draw a diagram for the board to be cut.
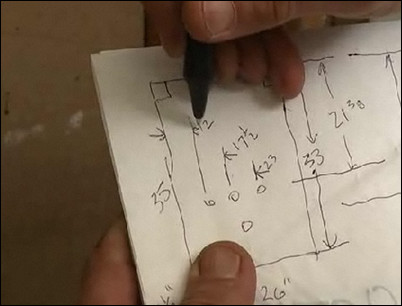
Draw a rough diagram of the board you are going to cut, noting the locations for the center of the holes for the valve stems and spout. Take the time to double-check your measurements.
Double-check all the measurements.
Step 6: Transfer measurements to the cement board.
We will be using one-half-inch cement board as the backing for the new tiles. Cement board is a rigid, mold-resistant, waterproof base for re-tiling the tub surround. It is an excellent base for tiling and grouting. Our measurements show that the height of the top of the face of the tile is one inch from the face of the studs supporting the wall. The height of the combination of the new one-half-inch cement board and the new tile is three-quarters of an inch, so we plan to cut one-quarter-inch lath strips to place between the studs and the cement board as spacers to make up the difference. Using a pen and a four-foot drywall T-square, transfer the outside dimensions from your diagram to a sheet of cement board. Check each measurement twice.
Use a pen and T-square to transfer the outside measurements to the board.
Step 7: Transfer measurements for the fixtures.
Transfer the location of the valve stems and spout from the diagram to the cement board. Carefully mark the exact center point for each valve stem and the tub spout location. Place a cross to mark the intersection of the height and width measurements. If you have any doubt, go back and check your measurements. In our case, the backing comes down around the edge of the tub so we have traced the pattern of the old tile to match the curve of the tub to get an exact fit.
Mark a cross for the intersection of the height and width measurements of the fixtures.
Step 8: Cut the board.
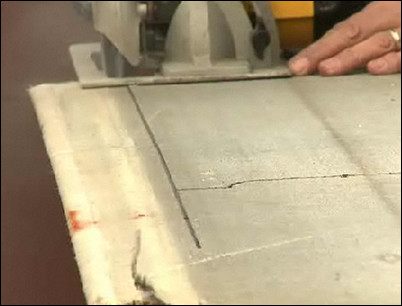
Working outside and wearing both a well-fitting dust mask and safety goggles, cut the cement board along the outside of the line using a circular saw and a wet and dry circular diamond saw blade. It is better to cut the cement board a little larger for a tight fit even if you have to trim it down a little after fitting it in place. Cutting the cement board too small for the opening will mean you’ll have to cut a new board.
Use a circular saw to cut the board a little.
Step 9: Cut any curves for the edge of the tub.
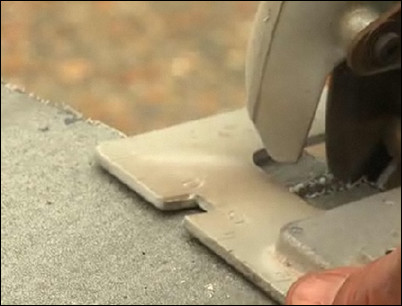
To cut the curve in the board for the edge of the tub, make a series of short, overlapping parallel cuts, running the abrasive blade right up to the edge of the line.
Cut overlapping parallel cuts for any curve in the board.
Step 10: Cut out the holes for valves and the spout.
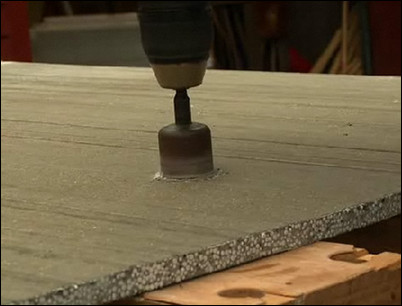
Using a carbide grit hole cutter large enough to allow the valve stem and fitting to pass through, place the drill bit over the intersection of the lines and cut the holes for each of the valve stems and spot. The trick to cutting a clean hole is to cut halfway through the board on one side and then stop and turn the board over. Using the hole as a guide, cut the hole halfway through the other side until you cut cleanly through the material. Use this process to cut out all the holes.
Cut each hole halfway on each side of the cement board for a clean hole.
Step 11: Clean any old caulk from the work area.
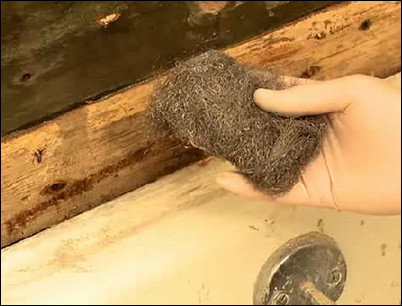
Back in the bathroom, cut away any old caulk. Wearing rubber gloves, scrub the edge of the tub with steel wool until all traces of the old caulk and grout are removed.
Remove all traces of old caulk and grout.
Step 12: Dry-fit the board and make any necessary adjustments.

Lay the cement board against the edge of the tub and check the fit. Mark the areas where you need to make adjustments, and trim the cement board with the saw. Here, the edge of the tub has a lip that will require that we trim the cement board to match.
Mark areas where adjustments need to be made, like the lip of the tub shown here.
Step 13: Use shims to make sure the finished tile will be flush with the old tile.
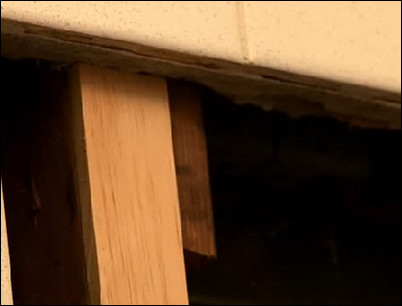
The cement board fits the opening perfectly but it still needs to be shimmed so that the new tiles will be flush with the old tiles. We have cut one-quarter-inch shims the width and length of the studs to raise the cement board so that the surface will be flush. Before you fasten the shims to the studs, check the fit using one of the shims, a test piece of cement board and one of the new tiles. Because of the importance of the fit, make a separate check of the shim for the corner to make sure that the new tiles will tuck under the adjoining tiles. If the shim is too thick, you can sand the shim until the fit is perfect. If the shim is too thin, you can combine shims of different thicknesses until the tile is flush.
The one-quarter-inch shim is cut to the width and length of the studs to bring the new tile level with the old.
Step 14: Fasten the shims to the studs.
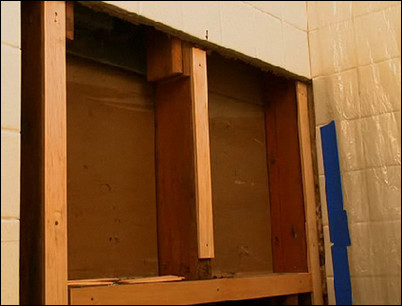
Using a hammer and 5-penny nails, nail each of the shims to the studs. If there are any cross members, they should be shimmed out as well. Any bracing that the cement board will rest upon should be shimmed out so that the entire surface is flush with the surrounding area. The more places that the cement board is fastened, the less the cement board can flex. Flexing would cause the new grout to crack, which could lead to future water problems.
Shim out any places where the cement board will rest.
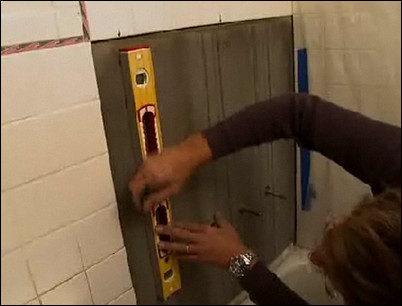
Step 15: Mark the location of the center of each stud.
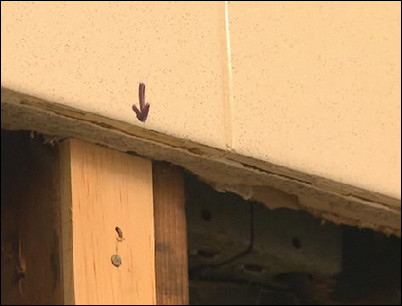
Mark the location of the center of each stud and cross member so that you can easily line up the screws to fasten the cement board solidly to the studs.
Mark the center of each stud.
Step 16: Insert the cement board and prepare it for fastening.
With the shims in place, insert the cement board so that it is resting on all the shims. If you press down anywhere on the cement board, there should be no movement. Using the marks you made as a reference, draw lines indicating the center of each of the studs and cross members.
Mark small lines for the center of each stud and cross member.
Step 17: Drive screws through the board and into the studs.
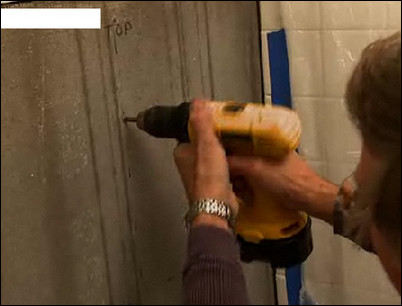
Using two one-half-inch cement board screws, drive a screw in every six inches along the line of the studs. Set the screws so that they are flush with the surface of the cement board.
Drive screws into the board every six inches.
Step 18: Caulk the spaces between the cement board and wallboard.
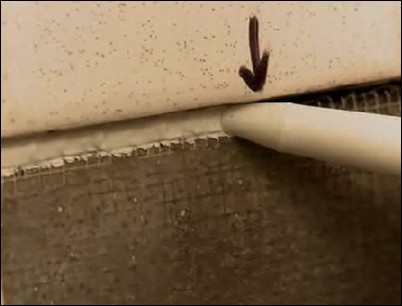
Using a caulking gun and a high-quality silicone caulk, neatly fill the space between the cement board and the adjoining wallboard, forming a water- and air-tight seal. Apply the caulk evenly so that it is flush with surface of the cement board.
Apply the caulk evenly.
Step 19: Allow the caulk to dry.

Allow the caulk to dry thoroughly as recommended by the manufacturer. The cement board backing is now solidly in place. The project is now ready for the next phase: cutting and laying the new tiles.
The project is ready for the next phase: cutting and laying tile.


