
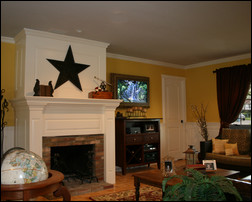
Crown molding can do wonders for the character of a room, adding height to a small space and definition to a bland area. It can also serve a functional purpose, hiding blemishes, concealing installation gaffes and even protecting the room’s walls from unsightly expansion and contraction cracks.
 Many synthetic molding products, like this 4-inch plastic crown from Easy Crown Molding, look just like real wood when installed. Photo courtesy of Easy Crown Molding. |
Installing crown molding is an easy way to upgrade any room in the home. And with more than a few material options, a room can be outfitted with new crown molding in even the most frugal of budget scenarios. It’s a relatively straightforward installation process even for novice do-it-yourselfers. There are even pre-cut, peel-and-stick molding solutions for the tool-wary. Professional installs, however, can better guarantee against unsightly seams and over-caulked corners.
Choose a Molding Material
Material selection can impact the installation method, including the tools required and the time it will take to complete the job. Common crown molding materials used for the exterior or interior of a home include wood, plaster, composite, metal and synthetic materials like vinyl and foam (also called “expanded polystyrene” or “EPS”). Wood species range from less expensive pine to luxurious mahogany and also include poplar, oak maple and Douglas fir. Medium density fiberboard (MDF) remains a favorite among professional installers. “MDF is more stable,” says John Langan, owner of JL Molding Design, a professional molding installation business in Hillsborough, N.J. “It is less likely to expand and contract, and it paints easily.” Installers will commonly opt for the MDF “Ultralite” (sometimes denoted as “MUL”), a lighter MDF that is easier to install.
Crown molding is sold by the linear foot and can come in a few length options, depending on where it is purchased. Professional installers usually purchase molding from suppliers in 16-foot lengths, which allow for longer runs in bigger rooms, reducing the number of seams. Big box stores like Home Depot and Lowe’s sell molding in eight-foot lengths, which requires fastening two lengths together in larger rooms during installation. “When molding is bought in six-and-a-half or eight-foot lengths there are a lot more seams to make disappear,” says Tim Larkin, owner of T.F. Larkin, Inc., a professional molding installation business in San Diego, Calif. Cost for the molding depends on the material selected and can be influenced by availability, particularly in the case of real wood. MDF Ultralite molding is available for under $1 per foot in most markets while real wood can easily reach double-digit levels. The size of the molding and the intricacy of the profile will also impact cost.
Wood molding may require staining, which will add time to an installation and cost to the overall job. Homeowners interested in painting the installed molding will want to consider materials that are ready-to-paint.
EPS or Styrofoam® molding materials can sometimes be installed without nails—these materials make for an easier DIY project and require only adhesives to attach the product to the wall. Some synthetic options like urethane can also be purchased with pre-casted inside and outside corners, which can save the DIYer the challenging steps of mitering the corners.
If purchasing a real wood crown molding, it is a good idea to inspect the material prior to staining and installing. Real wood can have inconsistencies in the grain and color. Consistency is important to achieve the look of one long, uninterrupted length of crown molding surrounding a room.
Style Points
Crown molding comes in a wide selection of style options. Depending on the installer or supplier, styles will have different names. Crown molding styles range from simple designs, with one line or bead, to intricate, ornate pieces with multiple lines, beads and other stylized features like dental blocks or egg-and-dart. The elegant “built-up” molding look—traditionally achieved using two base pieces and a crown piece—is available in single pieces of the synthetic materials like EPS.
When selecting a style from a retailer or distributor, homeowners should consider selecting a style that is available in multiple sizes, particularly if a room with multiple ceiling heights is going to be crowned or multiple rooms of varying height are to be crowned with the same style. “You want the style to carry through for the different heights,” says Larkin. In this situation, the shorter ceilings would get the smaller crown and the higher ceilings would get a larger crown, but the crown styles would be consistent. “But not every style comes in multiple sizes,” warns Larkin.
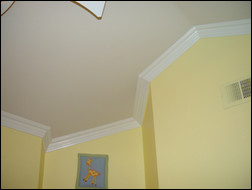 Even crazy angles are no match for the professional crown molding installer. Photo courtesy of T.F. Larkin, Inc. |
To help choose from the many style options, professional installers like Langan suggest finding inspiration in a room’s existing décor. “Certain rooms are more formal than others,” he says. “Formal rooms like the foyer, dining room or living room might look best with the extra design, a larger size or more complex look.” The carvings or etchings of antique furniture in a room might suggest a complementary crown style with multiple lines and creases while the clean, straight lines of contemporary décor could be best matched with a simpler pattern.
For the homeowner with a larger budget, molding can be made to order in just about any design desirable. Using the design of an existing piece of molding or a CAD representation of a customized style, a mill that deals with custom molding can rip and mill the desired profile. Such a process will drive up the costs, however. The setup cost alone can run as much as $300.
No matter what style a homeowner is considering, it is always a good idea to bring home a few samples to test by holding it up to the wall. This will help to narrow down the options and settle on the perfect fit for a room.
Sizing Up
In addition to the different lengths in which crown molding is sold, products will also come in different sizes. There are most commonly two sizes given. One denotes the measurement of the piece down the wall from the top of the ceiling (height) and the other measures the distance that the piece juts out from the wall at its farthest point (projection). The measurement of the face is sometimes given as well. Choosing a size that is appropriate to the room décor and the height of the ceiling will leave a room with better crown molding results.
The size of the molding can also have an impact on the installation process. Larger profiles can be challenging to cut on the average miter saw. Homeowners looking to install the molding themselves should take this into consideration when selecting a molding size.
Installation Know-How
Crown molding installation can be performed by the homeowner and can make for a challenging but rewarding day or weekend project. Taking accurate room measurements is crucial—both the total wall length and the corner angles should be calculated—and a tape measure and a protractor are required. When purchasing the molding, it is wise to buy extra to allow for practice cuts or mistakes. The unused material can usually be returned.
The installation process will vary depending on the molding material. Real woods, MDF, composites and other materials will usually have to be cut to size and nailed to the studs. Corners will require a miter saw and a jigsaw or coping saw (if the corners are going to be coped). Coping is an installation method for
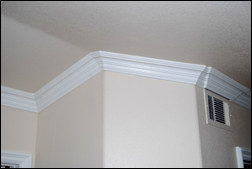 Professional installers can handle difficult corners and obstacles like vents. Photo courtesy of T.F. Larkin, Inc. |
handling inside corners. In a coped corner, the first length of molding retains a square end and is installed so the end is flush with the adjacent wall. The next piece is mitered to a 45-degree angle, and the material backing is cut away using a coping saw or a jig saw. When this coped end slides up against the square end, it gives the appearance of two mitered ends joining flush, which hides the joint. Coping is used on inside corners because these corners are rarely plumb, and mitered ends will often leave an exposed joint. Additionally, the inevitable shifting of the walls over time will more likely expose the joint of a mitered inside corner than a coped one.
Some manufacturers of synthetic, no-nail crown molding like SoSimpleCrown offer their own installation videos to guide homeowners through the process of installing their adhesive-only polystyrene products. Such companies will sell direct to the customer and will often offer pre-cut corners that also glue to the wall, eliminating the need for coping or mitering.
Easy Crown Molding is another well-known, no-nails molding option. Made from a lightweight, hard-shell polymer, the product is inexpensive and installs using a peel-and-stick process that doesn’t require any cutting, nailing or caulking. “A 17’ x 17’ kit weighs less than five pounds,” says Jim Jensen, inventor and owner of Easy Crown Molding. The popular alternative molding option sells for around $1 per linear foot, can be primed and painted, and doesn’t require any tools to install. “A first-timer usually installs an entire room in under an hour,” says Jensen.
Homeowners should be sure to closely follow the installation guidelines for any no-nail, alternative crown molding products.
Going Pro
If in doubt, the homeowner can always hire a professional installer. Not only can an installer purchase the materials cheaper, he or she can get the pieces in 16-foot lengths, which can mean fewer seams and a faster install.
The professional will also know how to quickly and efficiently handle both inside and outside corners, whether coping or mitering. “We miter all our corners,” says Larkin. “Probably 90 percent of installers out there cope.” To Larkin, mitering all corners is a point of pride, as it requires precise measurements and cuts to ensure a flawless joint.
Professional installers also have experience handling bowed walls and obstructions such as vents, which can frustrate the DIYer.
When hiring a professional, it is a good idea to choose a licensed contractor (in states where applicable) and to make sure an estimate is given upfront. Most contractors will not cite a flat per-linear-foot rate as the number of corners and other variables like obstacles will all affect the installation time. Look into possible deals, like one room crowned for free if other rooms are also done. “With me, the more rooms you have crowned, the less it costs per room,” says Larkin.
Whether installing on one’s own or hiring a professional or purchasing real wood or synthetic, crown molding is a great way to add elegance to any room in the home.
Credit: Renovate Your World


