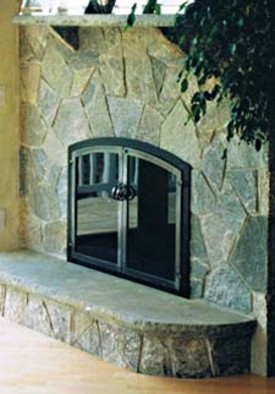
 Photo courtesy of Cape Cod Fireplace Shop |
Installing glass fireplace doors is a wonderful way to add beauty, safety and energy efficiency to your home. They allow you to safely leave a dwindling fire much sooner than an open fire and because they block your home’s regular heat source from escaping up the chimney, you are able to leave the damper open allowing all residual smoke from burning embers to rise up and out. Installing a glass fireplace enclosure kit oneself can be tricky and is best tackled with two people, but even a novice do-it-yourselfer should be able to install them in about two hours without incident. And, keep in mind that if you are reading this before you have your kit, things will become much more clear once you have the doors in hand and you are able to see what you are working with.
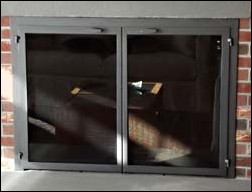
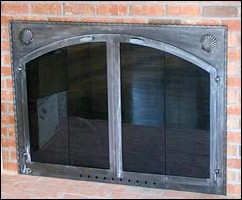 Photo courtesy of Cape Cod Fireplace Shop |
The first thing to consider before purchasing a kit is the structure of your fireplace. If it was constructed of brick, a DIY fireplace door installation is generally not a problem unless the brick is extremely old and brittle, but when it comes to other materials such as mortar or field stone, a professional ideally should be consulted.
Once you have determined that your fireplace can withstand an added bolted structure, the next step is to measure the firebox opening from top (the lintel) to the bottom (the hearth) and side to side. Most fireplaces are constructed with a lintel bar to which you can attach the doors, but in the rare instance where there is no bar, the doors must be secured directly to the masonry.
 Photo courtesy of Cape Cod Fireplace Shop |
When you open your new glass door kit, you will see included (2) lintel clamps for the top and (2) floor brackets for the bottom. You will also see (4) screws in place where the clamps and brackets are to go, lead anchors for the bottom and insulation for the perimeter of the doors. The first step is to remove the screws and put them aside. Next, assemble the lintel clamps as specified and attach them to the top part of the doors (be sure to set them so as to span the entire length of the lintel). You will see that these are slotted (as opposed to one fixed screw hole) so that the screws can be adjusted up or down for a perfect fit. Next, secure L-shaped floor brackets to the bottom of the kit. You may be tempted to lay the glass doors on their front for this, but doing so could put the glass at risk, so it is best to have your helper hold them or lean them upright against a secure surface.
The next step is to fit the kit into the opening of the fireplace (hanging a light inside before fitting is a good idea). Once you have the glass door unit in place and it is straight and flush, use a pointed Sharpie to mark where floor brackets meet the surface of the hearth and where the screws will be driven. Remove the door kit, set it aside and use a 5/16" masonry bit to drill (2) 2" deep holes into the hearth. Then, carefully tap lead anchors in the drilled holes (for maximum security and fit, be sure to remove drill dust prior to securing the anchors).
You can now fill the three channels on the top and sides of the door kit with the insulation and put the door kit in place – carefully lining it up with the holes drilled into the hearth. Secure the bottom brackets with the screws using a socket wrench, making sure not to over-tighten. You are now ready to secure the lintel clamps at the top with the thumbscrews provided and voila! You’ve got a new set of beautiful glass doors and a whole new fireplace experience.
It is important not to panic if your doors are slightly askew the first time around. While there is very little room for mistakes and re-drilling on the base of the fireplace, the lintel bar and the slotted screws allow for some readjustment. If you do find that the bottom edge is uneven, seek the advise of a professional before re-drilling into the hearth.
Enjoy your new fireplace!


