
Materials:
Step 1: Pick a location and a species of tree appropriate to that locale.
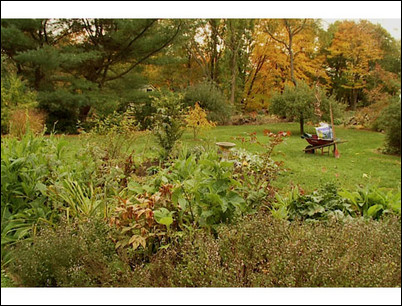
A new tree requires a location with good soil and good drainage. Pick a spot in your yard where the tree has room to grow. Check with your local nursery to select from a number of species that will grow in the location you have in mind. Try to plant trees when it’s overcast. Ideally, the best time to plant a tree is just before or while it’s raining.
Pick a spot with good soil and drainage.
Step 2: Measure the width of the hole for the tree.
Use your shovel to gauge the width of the hole you will need to dig for the tree. The hole should be three times the width of the root ball. Transfer that width to the ground where you will dig. Most roots grow sideways out of the cluster, and you will need to give them a soft start to build a strong, new root system.
Measure the width of the root ball.
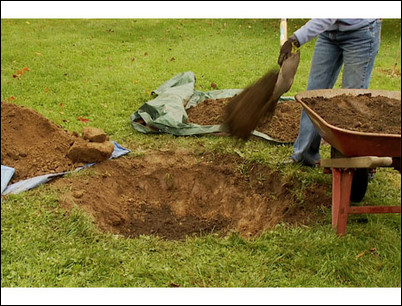
Step 3: Begin digging the hole.
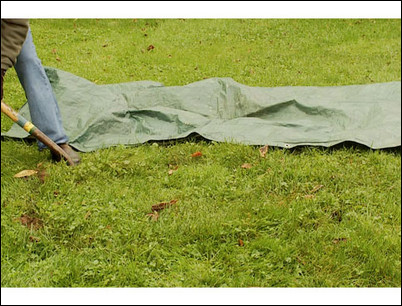
Lay out a plastic tarp to hold the grass and dirt. This will make cleanup a snap. Begin digging out the hole, cutting and removing clumps of grass and placing them on the tarp. Cut down and lift out the entire root system so that the grass will not grow back around the tree.
Dig the hole.
Step 4: Separate and reserve the top soil.

Shake out the top soil from the roots of the grass as you go. This soil will be re-used when you plant the tree and you can compost the grass. An easy way to separate the grass from the top soil is to flop each clump of grass onto the tarp, grass-side down. Whack the clump of grass with the back side of a cultivator, which will separate the soil from the grass roots without all the heavy lifting and shaking.
Use a cultivator to separate the top soil from the grass.
Step 5: Continue digging out the hole.
Continue to remove all the grass from within the circle. Remember, the diameter of the circle will be three times the width of the root ball of the tree. Remove any remaining dark top soil and place it with the top soil from the grass into a wheelbarrow. Mix this fertile top soil with rich compost to surround the new roots of the tree. What won’t fit in the wheelbarrow, set aside on the tarp to use later. Remove the remaining sub-soil and place it on another tarp. Consider using small tarps and don’t overload them, which makes lifting and moving the contents around easier.
Place the sub soil on a different tarp.
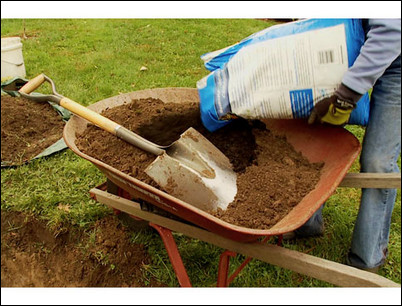
Step 6: Add compost and fertilizer to the top soil.
Break up any clumps of top soil and aerate the soil by turning it. Add compost in a ratio of one part compost to three parts top soil and mix thoroughly. The compost provides microorganisms to help the roots grow. Following the directions on the package, add organic fertilizer. Typically you will want to use fertilizer low in nitrogen if you are planting in the fall, so that you don’t stimulate the growth of new leaves. Conversely, you will want to use fertilizer higher in nitrogen if you are planting in the spring to stimulate growth of new leaves. Your nursery can suggest the right fertilizer for your situation. Mix the fertilizer thoroughly into the soil.
Mix the fertilizer and compost with the soil in a wheelbarrow.
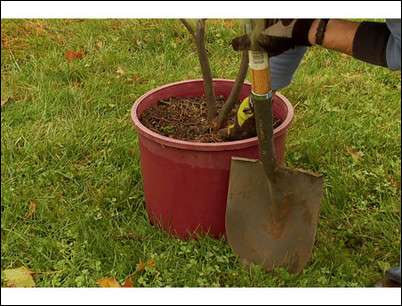
Step 7: Measure for the depth of the hole.
To figure out how deep you need to make the hole, use the shovel blade to estimate the depth from the bottom of the root ball to the top of the root crown. The root crown is where the roots meet the trunk of the tree. The depth of the hole should be just two to three inches deeper than the height from the bottom of the tree’s root ball to the root crown, which will allow a few inches of rich soil to be added underneath the roots before planting the tree. When the tree is properly planted, the level ground surrounding the tree should be just below the tree’s root crown.
Use the shovel to determine the hole depth.
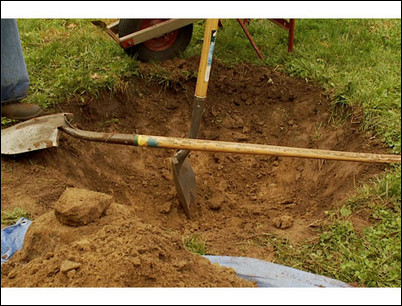
Step 8: Transfer the measurement to the hole.
Using the shovel, transfer the depth measurement to the hole. You can use an additional shovel to indicate the ground level.
Transfer the depth measurement.
Step 9: Add mixed soil to the hole.
Add the newly mixed soil to the bottom of the hole, spreading the soil under where the root ball will rest. Measure the depth again to make sure that the root crown will be just above level ground.
Add the soil to the hole.
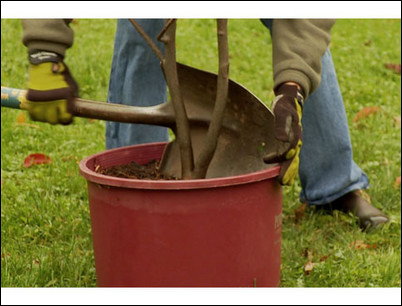
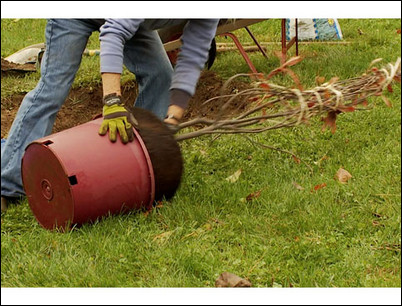
Step 10: Remove the tree from its container.
Gently lay the tree on its side. Grasping the tree by the trunk just above the roots, firmly pull the tree from the container.
Grasp the tree just above the roots and pull.
Step 11: Inspect and score the root ball.
Inspect the root ball. If the roots encircle the root ball, gently pull the roots apart so that they can easily grow out into the surrounding soil. The root ball of this young tree is in good shape and only needs scoring. Using the blade of a pruning shears or a utility knife, lightly score the root ball at regular intervals. The purpose of scoring the roots is to tease out some of the tender feeder roots that will spread out and away from the root ball and into the new surrounding soil.
Use the blade of a pruning shear to lightly score the root ball.
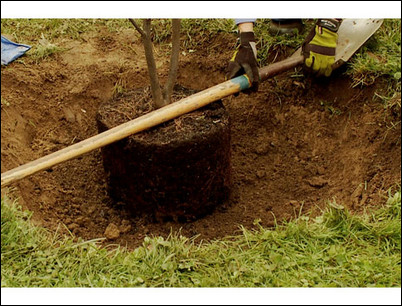
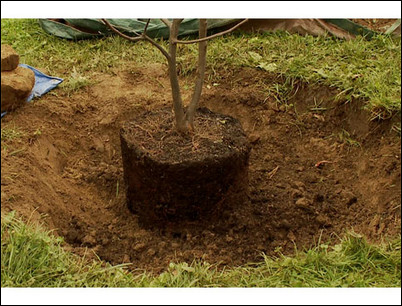
Step 12: Place the tree in the hole and check the depth.
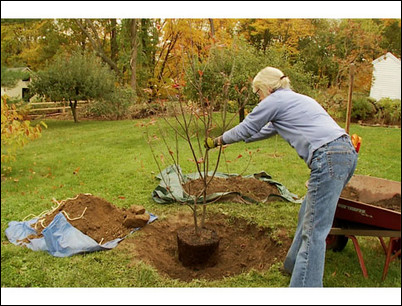
Gently lower the tree into the center of the hole. Using a shovel as a guide, look to see if the root crown will sit above the surface of the surrounding area. If necessary, remove the tree and add more soil underneath to elevate it to an appropriate height. Check again with the handle of your shovel to ensure that the root crown will be above level ground.
The root crown should be just above ground level.
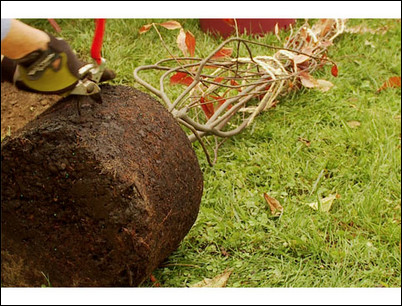
Step 13: Free the branches and position the tree.
Cut the branches free of the tree, being careful to gently remove the binding without breaking any of the tender branches. Turn the tree to offer its best side toward a prominent position, such as your kitchen window.
Carefully cut the branches free.
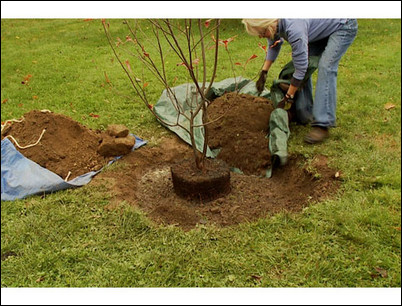
Step 14: Fill the hole halfway with the enriched soil.

Surround the base of the root ball with the enriched soil. Add any remaining top soil from the tarp, placing the richest soil nearest the new emerging roots. Continue to fill the area surrounding the root ball until the hole is half-filled.
Fill the hole halfway.
Step 15: Saturate the new soil with water.

Saturate the root ball and new soil with water, and then let the water fill the hole to the top of the new soil.
Fill the hole with water up to the new soil.
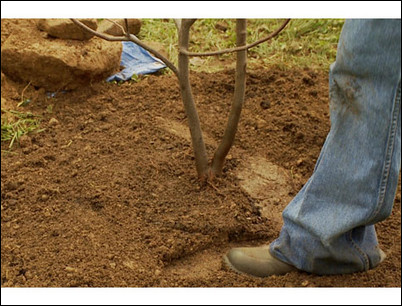
Step 16: Release trapped air in the soil.
Tilt the tree from side to side to release any trapped air in the soil.
Tilt the tree from side to side.
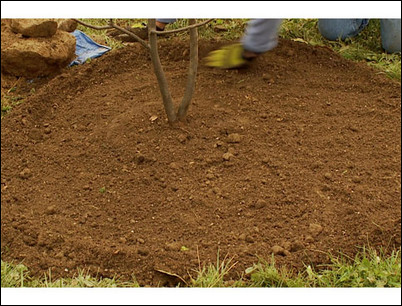
Step 17: Add the rest of the top soil.
Continue to add the remainder of the top soil from the tarp. Spread the soil evenly around the root ball and rake it out until the soil is level. If you need more soil, you can add organic compost to the subsoil in a 50:50 ratio. This soil will go on top of the enriched top soil to fill the remainder of the hole. Top off the soil until it is level and just below the root crown.
Fill the hole until level and just below the root crown.
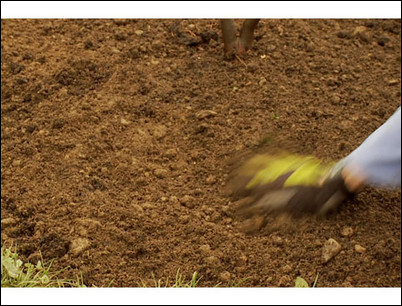
Step 18: Press down on the soil around the root ball.
Press down the soil around the root ball to create a ring to help guide water away from the tree trunk and toward the edges of the new roots. Finish filling the hole, leveling the soil around the tree just below the root crown.
Press down on the soil to form a ring around the root ball.
Step 19: Form a lip around the hole.
Form a dish shape out of the soil, creating a lip along the circumference of the hole. The lip will hold water over the roots and prevent erosion.
Make a lip around the circumference of the hole.
Step 20: Saturate the dish with water.
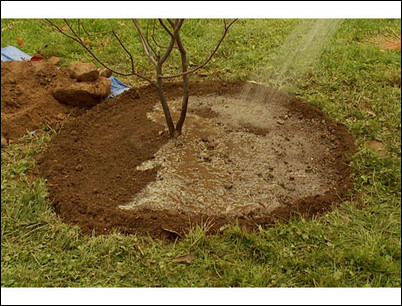
Saturate dish with water, thoroughly soaking the soil and root ball.
Fill the dish with water.
Step 21: Add mulch to the surface.
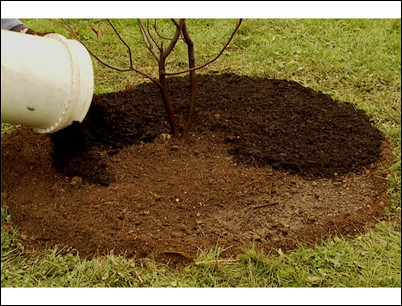
Add two inches of mulch to the surface of the dish. The mulch helps to keep the soil cooler, lower evaporation and control weeds. Leave two or three inches of open area around the root crown to protect the trunk of the tree from rot.
Leave an open area around the root crown.
Step 22: Drive three stakes in the ground around the tree.
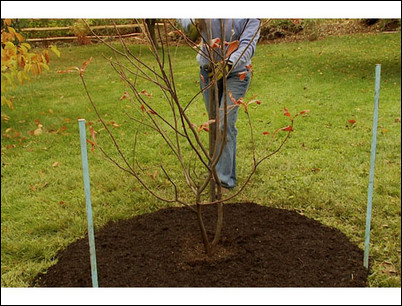
With the tree successfully planted, you need to stake the tree to support it until the roots take hold. Drive three equally spaced stakes into the soil, about two to three feet from the tree. Locate the first two stakes facing the direction of the prevailing winds. Set the third stake on the opposing side.
Position two stakes facing the direction of the prevailing winds.
Step 23: Use jute twine to support the tree.
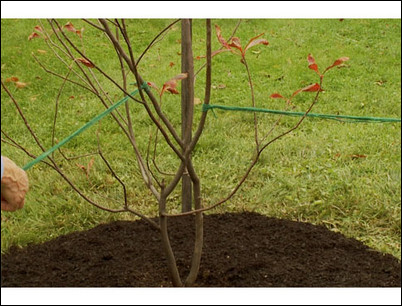
Tie jute twine to the stake and wrap the twine around the tree with a loose knot before connecting to the stake. Repeat this process for all the stakes, with each line run to support a major limb. A few lengths of twine on a tree this size will provide strong support without risking damage to the bark.
Tie jute twine from the stake to the tree limb and back again.
Step 24: Care for the tree regularly.
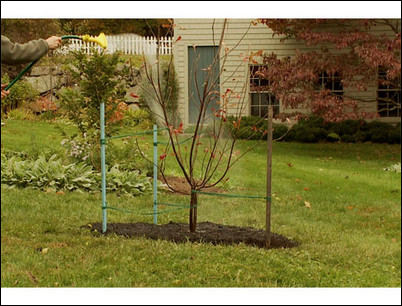
Water your new tree regularly during the first week. If the leaves appear to droop a little, dig down six inches and inspect the soil. If the soil is dry, water it again. If the weather is very hot, consider using drip irrigation to keep the soil moist until the tree has overcome the shock of the transplant. With time, your tree will grow to become a valued addition to your yard.
Water the tree regularly.


