Vapor diffusion retarders, air retarders, and air/vapor retarders all relate to the interaction of temperature and moisture in and around the building envelope. A vapor barrier or vapor diffusion retarder (VDR) is a material that reduces the rate at which water vapor can move through a material.
The Thermal-Moisture Dynamic
Water vapor moves in and out of a building basically in three ways: with air currents, by diffusion through materials, and by heat transfer. Of these three, air movement is the dominant force because, like most fluids, air naturally moves from a high pressure area to a lower one by the easiest path possible. This is generally through any available hole in the building envelope. Moisture transfer by air currents is very fast (in the range of several hundred cubic feet of air per minute) and accounts for more than 98% of all water vapor movement in building cavities. Thus it’s very important that unintended paths that it may follow be carefully and permanently sealed. The other two driving forces are much slower processes and most common building materials slow moisture diffusion to a large degree, although never stop it completely.
In decades past, buildings did not need to restrict the flow of airborne moisture, since when the building cavities got wet they also generally dried quickly due to the “leaky” construction methods that allowed air to move freely through the building envelope. So the water vapor movement really didn’t matter much until the introduction of thermal insulation. When insulation is added, the temperature of the water vapor can drop very quickly since it is being isolated from the heat of the building (in the winter) or from the outdoors in the summer if the building is being air-conditioned.
Whether from the indoors or outdoors, airborne water vapor entering the envelope of the building through holes around plumbing pipes, ductwork, wiring, and electrical outlets are some of the less obvious, yet important, points where air can move in and out of the thermal envelope. During the winter in Northern climates, any warm air entering the walls from the house cools and condenses it’s water vapor inside building cavities. In the South, humid air does much the same except it comes from the outdoors and condenses inside the wall cavities during the cooling season.
The laws of physics govern how moist air reacts within various temperature conditions. This behavior is technically referred to as “psychrometrics.” A psychrometric chart is used by professionals to determine at what temperature and moisture concentration water vapor begins to condense. This is called the “dew point.” By understanding how to find the dew point, you will better understand how to avoid moisture problems in your house.
Relative humidity (RH) refers to the amount of moisture contained in a quantity of air compared to the maximum amount of moisture the air could hold at the same temperature. As air warms, its ability to hold water vapor increases. As air cools this capacity decreases. For example according to the psychometric chart: air at 68°F (20°C) with 0.216 ounces of water (H2O) per pound of air (14.8g H2O/kg air) has a 100% RH. The same air at 59°F (15°C) reaches 100% RH with only 0.156 ounces of water per pound of air (10.7g H2O/kg air). The colder air holds about 28% of the moisture that the warmer air does. The moisture that the air can no longer hold condenses on the first cold surface it encounters (the dew point.) If this surface is within an exterior wall cavity wet insulation and framing will be the result.
In this example, we can control two things—temperature and moisture content. The R-value of the wall cavity insulation moderates the effect of temperature across the building envelope cavity. An airtight, vapor diffusion retarder, properly installed towards the warm side of this cavity, reduces the amount of moisture entering it. Except in deliberately ventilated spaces, such as attics, these two factors work together to reduce the opportunity for condensation in a house’s ceilings, walls, and floors.
Types of Vapor Diffusion Retarders
Vapor diffusion retarders (VDRs) are typically available as membranes or coatings. Membranes are generally thin, flexible materials, but also include thicker sheet materials sometimes termed “structural” vapor diffusion retarders. Materials such as rigid insulation, reinforced plastics, aluminum, and stainless steel are relatively resistant to water vapor diffusion. These types of vapor diffusion retarders are usually mechanically fastened and the sealed at the joints.
Thinner membrane types of VDRs come in rolls or as integral parts of building materials. A common example of this is aluminum- or paper-faced fiberglass roll insulation. Foil-backed wallboard is another type commonly used. Polyethylene, a plastic sheet material, can be used as a VDR for above grade walls and ceilings (only) in very cold climates (in locations with 8000 Heating Degree Days or higher).
Most paint-like coatings also retard vapor diffusion. While it was once believed that only coatings with low perm ratings (see below) constituted the only effective VDR, it is now believed that any paint or coating is effective at restricting most water vapor diffusion in milder climates.
Perm Ratings
The ability of a material to retard the diffusion of water vapor is measured by units known as “perms” or permeability. A perm at 73.4°F (23°C) is a measure of the number of grains of water vapor passing through a square foot of material per hour at a differential vapor pressure equal to one inch of mercury (1″ W.C.) Any material with a Perm rating of less than 1.0 is considered a vapor retarder. Knowledgeable professionals typically use VDRs with ratings of 0.1 or less. However, if you carefully seal the warm-side VDR and interior finish, you can also safely install a low permeable material, such as rigid insulation board (a perm rating as high as 1.4) on the cold side of walls.
A good rule to remember is: To prevent trapping any moisture in a cavity the cold-side material’s Perm rating should be at least five times greater than the value of the warm-side.
Installing Vapor Diffusion Retarders
It is important for VDRs to minimize condensation or moisture problems in the following areas of a building: walls, ceilings, and floors; under concrete slabs; and in crawl spaces. A continuous VDR with reliable air sealing is very important if you have a house constructed on a concrete slab. Use a VDR with a perm value of less than 0.50 if you also have a high water table.
In moderate heating dominated climates (less than 4,000 Heating Degree Days), materials like painted gypsum wallboard and plaster wall coatings impede moisture diffusion to acceptable levels and no further VDR is needed. In more extreme climates, a VDR is advisable for new construction. VDRs perform best when installed closest to the warm side of a structural assembly. In cold climates this is towards the interior of the building. In hot/wet climates, this is towards the exterior of the building. Reasonable rules-of-thumb to follow when placing vapor retarders are:
– For climates having 2200 or more heating degree days (HDD; a HDD is a unit that measures how often outdoor daily dry-bulb temperatures fall below an assumed base, normally 65oF (18oC) locate the VDR on the warm side of the exterior structural assembly. If possible, locate it on the inside of the assembly using the “one third, two thirds rule”: the VDR has one third of the cavity insulation to its warm side, two thirds to the cold side. This protects the retarder from physical damage through errant construction or remodeling activities.
For climates with fewer than 2200 HDD (cooling-dominated climates) where the building is near, but not quite in, the 2200HDD zone (a.k.a. fringe zone) place the VDR in the same location as climates farther north. Farther south (about 1900 HDD) it is unimportant where it goes. For climates even farther south than this, and one generally hotter and more humid, some professionals recommend omitting the VDR completely. This is due to the winter heating loads and summer cooling loads being roughly equal. Any choice of location ends up having the VDR on the wrong side of the structure half of the year. However, other building science research indicates that it should be applied directly under the exterior finish and is sometimes itself the exterior finish. An air/vapor retarder, described below, may be a better choice for this situation.
– When installing a VDR it should be continuous and as close to perfect as possible. This is especially important in very cold climates and in hot and humid climates. Be sure to completely seal any tears, openings, or punctures that may occur during construction. Cover all appropriate surfaces. Otherwise you risk moist air condensing within the cavity, which would lead to dampened insulation. The thermal resistance of wet insulation is dramatically decreased, and prolonged wet conditions will induce mold and wood rot.
For crawl spaces under the house, carefully cover the crawlspace floor. This is to slow ground moisture from evaporating into the crawlspace and condensing there. In addition, it’s now considered a good practice to completely seal crawl spaces and carefully insulate the inside face of the foundation walls. Seal all foundation vents too. Be aware that this may be contrary to your community’s building code. Discrepancies between current building science and building codes can be difficult to resolve satisfactorily. Many people have resolved this issue by renaming the crawlspace a “short basement” on their construction plans.
To avoid building code conflicts concerning crawl spaces use the following guidelines:
– Make sure the height of the space exceeds local regulatory requirements (usually 4 feet or 1.22 m)
– Install plenty of perimeter drainage and some central floor drains in the crawl space
– Slope the floor of the space towards the floor drains
– Lay down at least two layers of six-mil (0.015 cm) thick polyethylene plastic sheets as the VDR. Overlap the seams at least 2 feet (0.61 m). Extend the plastic up the foundation walls (avoid covering the vents in the event that you may need to open them again in the future).
These measures allow for emergency drainage and ventilation. As an option you can also pour two inches (51mm) of concrete over this to protect the polyethylene VDR from damage.
Vapor Retarders in Existing Buildings
Except for extensive remodeling projects, it’s difficult to add materials like sheet plastic as a VDR to an existing home. However, many existing homes don’t really need a more effective VDR than the more than likely numerous layers of paint on their walls and ceilings. These multiple layers are quite effective as a VDR in all but the most extreme northern climates.
“Vapor barrier” paints are also an effective option for colder climates. If the Perm rating of the paint is not indicated on the label, an alternative is to read the paint formula. The paint label usually indicates the percent of pigment. To be a good VDR it should have a relatively high percent of solids and thick in application. Glossy paints are generally more effective VDRs than flat paints and acrylic paints are generally better than latex paints. When in doubt apply more coats of paint. However, it’s best to use paint labeled as a VDR and follow the directions for applying it.
In any case, the key to controlling unwanted water vapor movement is the careful air-sealing of gaps in the structure and not the VDR alone.
Air Barriers
Air barriers are intended to block random air movement through building cavities. Air barriers can be made of almost anything. A continuous air barrier is an important feature in energy-efficient design not only for the energy it can save but also because the water vapor carried by the air is the primary way moisture related damage gets started in structural cavities. As the water vapor cools it condenses and so promotes structural damage, rotting wood, other mold growth. Air barriers reduce this problem by stopping much of the air movement but still allowing what water vapor that does get in to diffuse back out again.
Some common materials used for this purpose are: “house wrap,” plywood, drywall (gypsum) board and foam board. Many of these materials are also used for insulation, structural purposes, and finished surfaces. What to choose and how to use it depends mainly on where you are building and the climate. A discussion of all the choices is beyond the scope of this article. Please see the reference section at the end for books dealing with this issue.
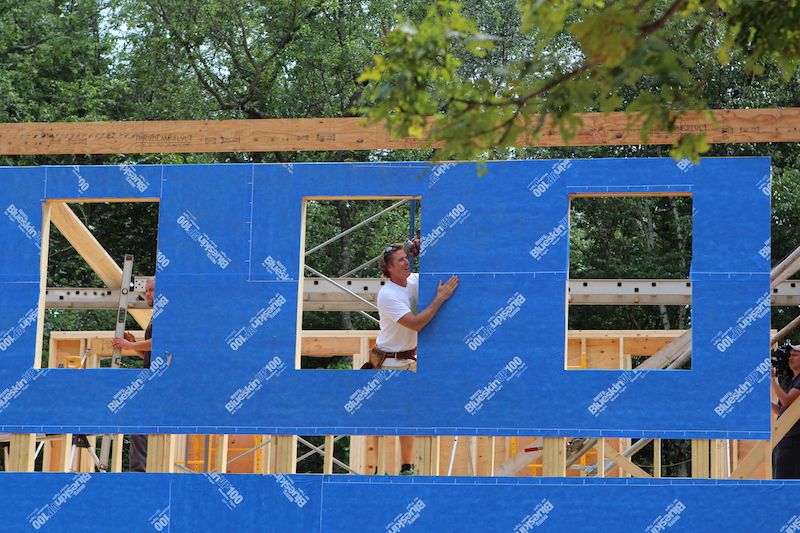
The most common air barrier material is use today is “house wrap.” Some wraps have better weathering or water repelling abilities than others. All come in a variety of sizes for different purposes and are made of fibrous spun polyolefin plastic, matted into sheets and rolled up for shipping. Sometimes, they also have other materials woven or bonded to them to make it more resistant to tearing.
House wraps are usually wrapped around the exterior of a house during construction. Sealing all of the joints with “house wrap tape” is a good practice that improves the wrap’s performance about 20%. All house wrap manufacturers have a special tape for this purpose.
In wet climates house wrap sometimes reacts poorly with certain kinds of wood siding. Lignin (a natural occurring substance in many species of wood) is water-soluble and acts as a detergent. Like all detergents, it decreases surface tension and so destroys the house wrap’s ability to repel water. Field research has shown that wood lignin makes it easier for liquid water to pass into the wall. Certain types of wood siding like redwood, cedar, and manufactured hardboard siding seem to accelerate the problem. To avoid this problem, carefully attach heavy building paper (30 pound asphalt impregnated) to the walls as a substitute for house warp or install felt-paper over the house wrap as a water repellent surface that is unaffected by wood lignin.
It’s also a good practice to use the “airtight drywall approach” on the interior wall finishes too. Both methods together effectively build an airtight wall that will have no moisture problems.
Air/Vapor Retarders
An air/vapor retarder attempts to combine water vapor and the air movement control with one material. This method is most appropriate for wet Southern climates where keeping humid outdoor air from entering the building cavities is critical during the cooling season.
It’s generally placed around the perimeter of the building just under the exterior finish, or it may actually be the exterior finish. In many cases it’s constructed of one, or a combination of, the following: polyethylene plastic sheets, builder’s foil, foam board insulation, and other exterior sheathings. The key to making this method work effectively is to permanently and carefully seal all of the seams and penetrations, including around windows, doors, electrical outlets, plumbing stacks, and vent fans.
Missed gaps of any size not only increase energy use, but also increase the risk of moisture damage to the house especially during the cooling season. An air/vapor retarder should also be carefully inspected after installation before other work covers it. If small holes are found, you can repair them with caulk or polyethylene or foil tape. Areas with larger holes or tears should be removed and replaced. Patches should always be large enough to cover the damage and overlap any adjacent wood framing.
© 2004 U.S. Department of Energy


Home Wrap: what is the product he used on the outside walls of the building that we were watching. It was an adhesive house wrap but he said it was difficult to put down but worth it. It was tacky.