
Materials:
Step 1: Plan ahead and purchase an organizer system.
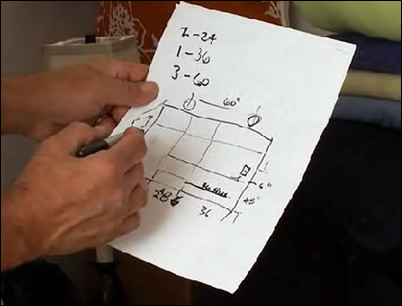
To install a closet organizer system, start by looking at the storage area and considering all the things you want to store there. Measure the area and work up a plan that will make best use of the space. Choose an organizer system that has the majority of the features that you will need for your project. These kits are very flexible, and you can buy additional shelves, supports, fasteners and special storage options if you need them. When you have everything you need, study the installation instructions and compare them to the plan you drew up. Make sure you have all the parts you will need before you start.
Plan ahead and buy the system to meet your needs.
Step 2: Know which fasteners you will need.
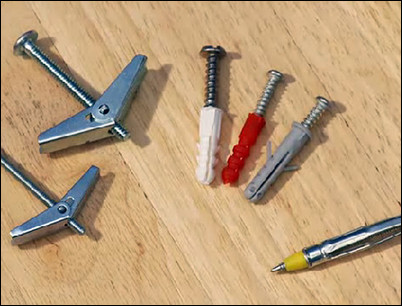
You will need to choose a fastener that works with your wall type. Fasteners are what hold the shelves and brackets to the wall. There are many different types of fasteners. For traditional walls of gypsum wallboard screwed to wood studs, an expansion fastener will work. These are often included with the kits. With expansion fasteners, you drill a hole on the wall and insert the plastic sleeve. When you screw the screw into the plastic sleeve, the sleeve expands, securing the fastener to the wallboard. A more robust version of the expansion fastener will work with wallboard for heavier weight. When you insert these fasteners into the wall and tighten the screw, the rear of the fastener is pulled forward, securely clamping the fastener to the wallboard. Some walls are made of other materials beside wallboard. For plaster and lathe walls or plywood walls, often a toggle fastener is best. When you push these through the hole, the wings spring open, holding the fastener in place.
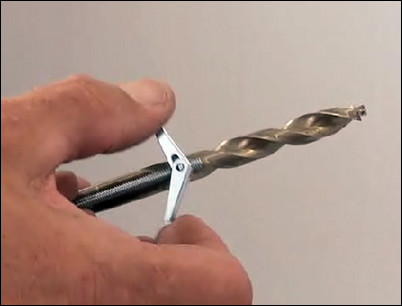
Pictured from left to right: toggle fastener, expansion fastener and heavy-duty expansion fastener.
Step 3: Use a stud finder to locate and mark the stud locations.
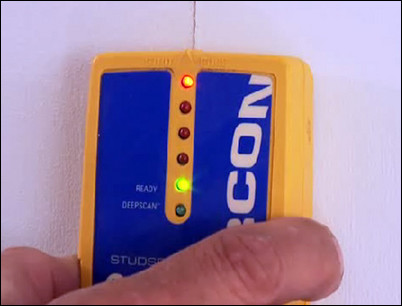
Using a stud finder, locate the studs behind the wall. Pass the stud finder slowly over the wall. The indicator will light up when it passes over a stud. Mark the locations. Brackets for the organizer that are located over a stud can be directly screwed into the stud with a common wood screw and will not require a special fastener.
Pass the stud finder over the wall until it lights up.
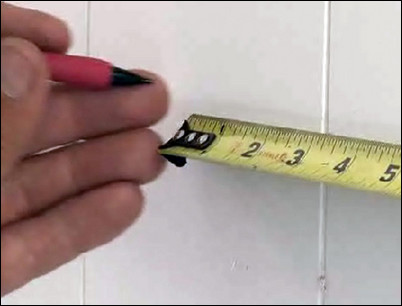
Step 4: Mark the location of the wall clips.
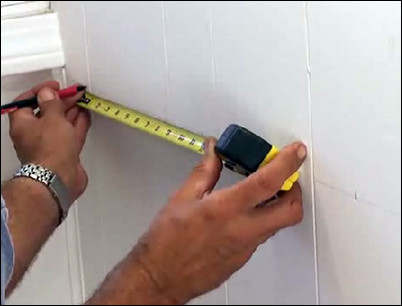
After marking the location of the studs, follow your layout and the kit’s instructions and measure the location for each of wall clips that will be used to fasten the shelves to the wall.
Measure and mark the location of the wall clips.
Step 5: Use a level to keep the wall clip line level.
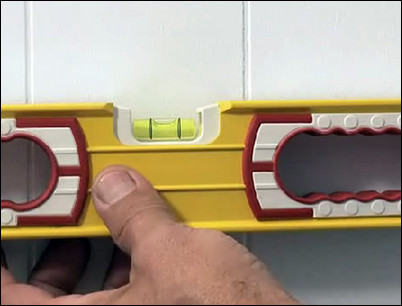
As you lay out the line of wall clips, check with a level to make sure that line of wall clips are even. Often, on an old house, you will find the floor is not level due to the house settling over time. Adjust the measurement along the line for each shelf until the wall clips’ locations are both correctly spaced and exactly level.
Use a level for the wall clip line.
Step 6: Take time when marking the wall clip locations.
Continue to lay out a level line for the location of each shelf, and then carefully mark the location of each wall clip spaced according to the directions that came with the organizing system. The more time and care you put into laying out the system on the wall, the faster the installation will be.
Mark each wall clip location.
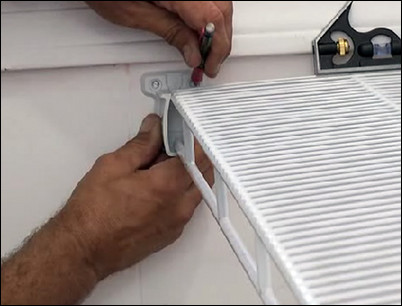
Step 7: Complete the layout with individually mounted objects.
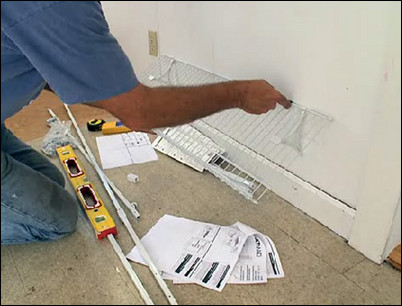
Complete the layout by finishing with the small, individually mounted objects like a shoe rack. Roughly mark the location for the mounting brackets for the rack.
Mark the location of the shoe rack brackets.
Step 8: Use a level to make the shoe rack straight.

Using a level, adjust the location of each mounting point so that they are exactly level.
Draw a line for the shoe rack mounting points using a level.
Step 9: Drill pilot holes for each mounting point.
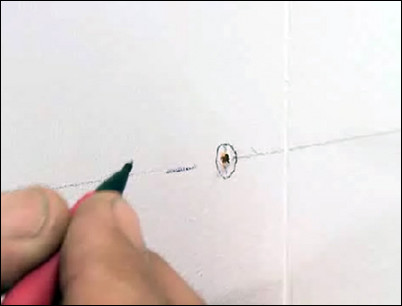
It’s a good idea to drill a pilot hole for each mounting point you have marked on the wall. Using a one-eighth-inch drill bit, drill a hole at the mounting point. If the wall is hollow, mark the hole with an “O.” For these holes, you will use an expansion fastener to hold the bracket. If you drill a pilot hole and hit a stud, mark the hole with an “X.” We will use common screws to fasten these brackets to the wall.
Drill pilot holes and mark with an “O” or an “X.”
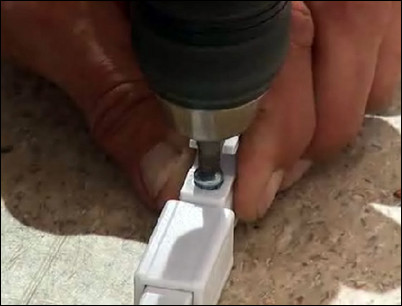
Step 10: Use a toggle fastener for plywood walls.
Because this is a one-quarter-inch plywood wall, we will attach the wall clips with toggle fasteners. Select a drill bit that is just slightly wider than the folded toggle. Drill a hole for each toggle.
Use a drill bit slightly wider than the folded toggle.
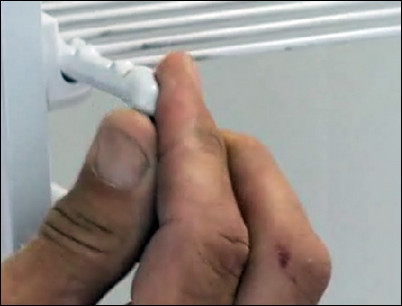
Step 11: Insert the toggle into the hole.
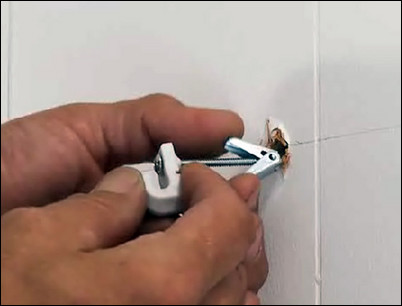
When the hole is drilled, slide the screw for the toggle fastener through the wall clip and into the toggle. Folding the toggle, slip it through the hole until the toggle open.
Fold the toggle and slide it into the hole until the toggle opens.
Step 12: Screw the toggle fastener and wall clip into place.
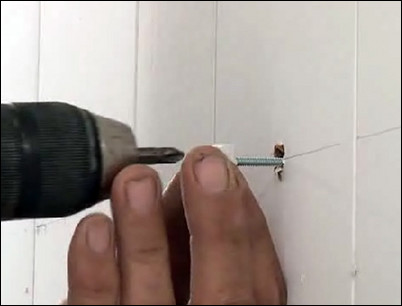
Pull back gently on the fastener until you feel the toggle against the back of the wall. Then, using a screw gun, slowly screw the fastener until the wall clip is exactly aligned with the marks on the wall. Then, tighten it to the wall.
Use a drill to screw and tighten the wall clip to the wall.
Step 13: Use a common wood screw for holes with studs.
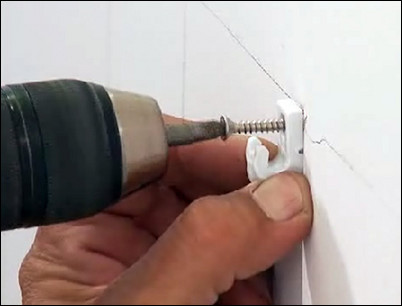
For a bracket that is located over a stud, simply use a common wood screw and screw the bracket into the stud behind the wall. Continue to drill the toggle bolts as needed for every wall clip that will be mounted over a hollow wall. Be sure to fasten one mounting clip for every fastening point that you have marked on the wall until all the mounting clips are fastened in place.
Use a common wood screw for wall clips fastened to the stud.
Step 14: Attach the mounting clips to the poles.
Next, screw the mounting clips into the poles at the height to support the outside of each shelf.
Screw mounting clips to the poles.
Step 15: Attach the plastic caps to the ends of each support pole.
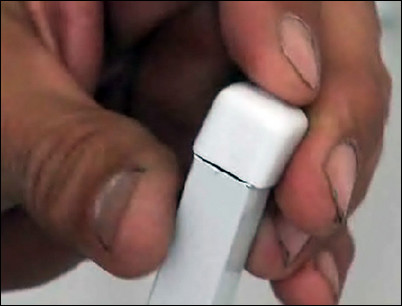
Slide the plastic caps over the ends of each of the vertical support posts.
Slide the cap over the pole ends.
Step 16: Mark the location for any end wall clips.
Some shelves will be supported by an end wall as well as vertical posts. Temporarily clip the shelves that will also be supported by an end wall into place. Resting a level on the shelf, swing the shelf until it is level and mark the location of the mounting holes on the wall bracket.
With the shelf temporarily clipped into place, mark the location for the end wall clip mounting holes.
Step 17: Drill pilot holes and attach the end wall brackets into place.

Remove the shelf and drill pilot holes into the wall to determine which type of fasteners you will need. Fasten all the wall brackets in place with the appropriate fastener. With these brackets in place, you are ready to assemble the organizer system.
Screw all the end wall brackets into place.
Step 18: Begin to assemble the organizer system.
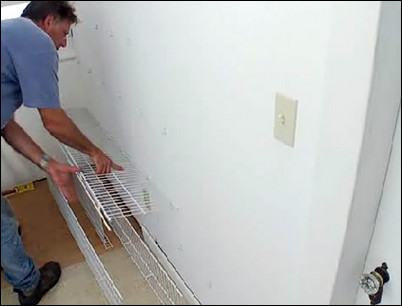
Starting in the corner, snap the shelves onto the wall clips and into the end wall brackets.
Snap the shelves into the wall clips and end brackets.
Step 19: Clip the support poles to the shelves.
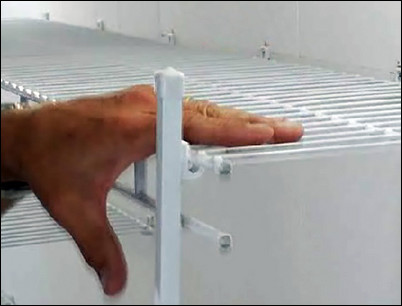
Line up the vertical support posts in front of the shelves and clip the shelves in place.
Clip the shelves to the wall poles.
Step 20: Attach the shoe rack last.
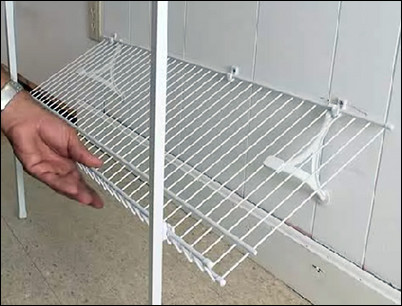
The shoe rack goes in last and clips into the wall clips; the vertical post clips exactly the same way.
Attach the shoe rack.
Step 21: Slide plastic caps over the shelf ends.
As a final touch, slide the plastic caps over the ends of the shelves. These are not only a nice touch, but they cover sharp edges that might have resulted from cutting a shelf to a specific size.
Slide the cap over the shelf end.
Step 22: Fill up your installed closet organizer.
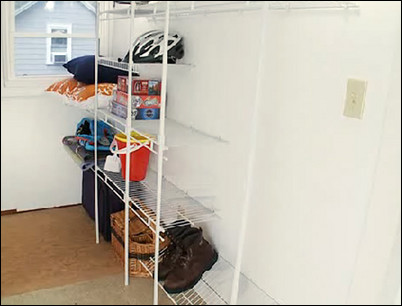
With the closet organizer system installed, it’s time to fill it. You’ll be surprised by how much you can store and how orderly and easily accessible it makes your belongings. These systems can be installed virtually anywhere, making useful storage space for the clutter throughout your home.
Store your belongings on the finished shelves.


