A roof system is designed to shed water, but it takes the right materials and careful workmanship to build a roof that is durable and leak proof. Start with a solid deck made of plywood, OSB sheathing, or 1×6 boards; any wood that is not sound must be removed and replaced before you begin roofing. If you live in a snowy climate, plan for an ice and water barrier, which is an asphalt-backed plastic membrane that stops leaks at the eaves. Next come asphalt paper, the drip edge, the shingles (with flashing and counter-flashing as needed), and the hip and ridge caps. All combine to make your roof impervious to water.
 |
|
|
Roofing jobs require attention to detail. When properly installed, a quality roof can last the life of a home. Installed improperly, a roof can cause a wide range of problems.
|
|
Estimating the Project
Whether you hire out or do it yourself, the first step is to measure the roof and estimate the materials. Roof area is calculated by dividing the total area into rectangles and squares. Roofers generally add another 10 percent for simple roofs, and 15 percent for roofs with hips and valleys. The shingles themselves are sold by the "square," which is 100-square-feet. Eighty shingles will cover one square. Make sure, however, to add the 10 to 15 percent "waste" allowance.
You’ll also need four nails per shingle (six in tornado or high wind country). These are sold by the pound. Asphalt roofing paper and eaves membrane are sold by the roll, but measured in lineal feet. Flashing can be purchased in rolls or in pre-folded squares. Valleys typically require 16-inch-wide flashing, while dormers and sidewall junctions use one 6×6 or 8×8 inch square of step flashing per course of shingles. Don’t forget to add extra shingles for hip and ridge caps, along with drip edge and ridge vent. Now you have a fairly clear idea of what your roof will cost, minus the labor.
Working From the Deck Up
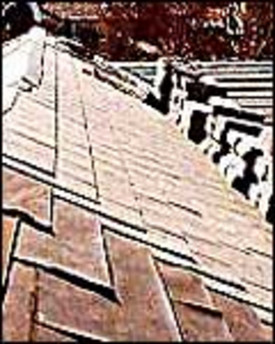
Once you’ve determined that the deck is sound and well fastened, you’ll need to prep it for roofing. Think of a roof as a fish with scales, where each new layer overlaps the first to keep the water out. First comes the drip edge, which is nailed along the perimeter of the roof. Next apply an ice and water barrier membrane to overlap the drip edge. Asphalt roofing paper then covers the whole deck, followed by metal flashing in the valleys. Next come the shingles (with step flashing applied as you go around chimneys and skylights), and finally caps for the hips and ridges made with folded pieces of shingle. If you need ridge vents, put them on after the shingles but before the ridge caps, following the manufacturer’s instructions.
Charting Your Course
|

For a clean look, it’s good to lay out your courses before you begin to shingle. Use a chalk line![]() to mark straight lines for your courses all the way up the roof. Begin by measuring one shingle’s width up the roof at each gable end. Snap a line to join the two and proceed up the roof, snapping lines every 5 inches. This allows you to set the top edge of each shingle to the line as you go up the roof, and maintain a 5-inch shingle reveal all the way. Vertical lines spaced every 3 or 6 feet also help you to keep your tabs lined up. Start your first course with the shingle edge flush with the drip edge. As you step your courses up the roof, follow the chalk lines to make sure you are maintaining a nice, straight pattern.
to mark straight lines for your courses all the way up the roof. Begin by measuring one shingle’s width up the roof at each gable end. Snap a line to join the two and proceed up the roof, snapping lines every 5 inches. This allows you to set the top edge of each shingle to the line as you go up the roof, and maintain a 5-inch shingle reveal all the way. Vertical lines spaced every 3 or 6 feet also help you to keep your tabs lined up. Start your first course with the shingle edge flush with the drip edge. As you step your courses up the roof, follow the chalk lines to make sure you are maintaining a nice, straight pattern.
Details, Details, Details
There are many details that impact the look and performance of your roof. Shingling the valleys properly and providing adequate flashing and water shedding detail is a must. Depending on your climate and precipitation levels, side walls may need higher flashing or extra membrane protection. Chimneys, vents, and skylights must be flashed and counterflashed to keep water out. Shingle courses must be cut on an angle along roof hips. Ridges and hips must be capped to prevent water from entering where two courses or adjacent roof angles meet. Ridge vents, which allow the roof to breathe in warm weather, are recommended in many climates. Local codes will tell you how much roof venting you need.
Credit: Renovate Your World


