
Materials:
Step 1: Measure for the new doors
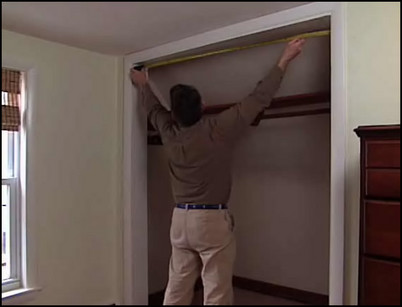
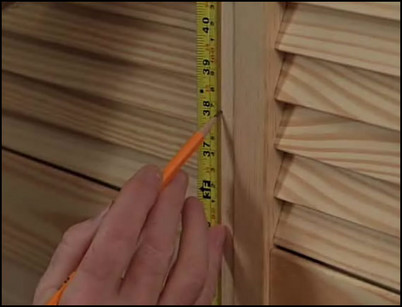
Start by measuring the height and width of the door opening. Doors are typically 80 inches tall but can be cut down to fit. Make sure to read the instructions that came with the door before you begin.
Measure the width and height of the door opening.
Step 2: Install the header track
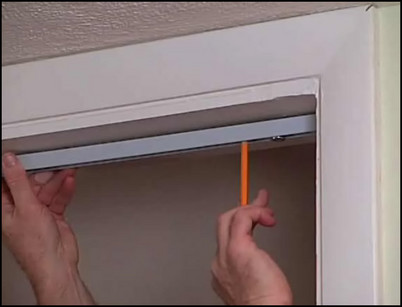
Center the track in the top of the opening. Mark the screw holes with a pencil. Some two-door sets have a track for each door, which you will need to line up along the casing. Use a drill bit one size smaller than the installation screws to make pilot holes where the screws will go. Line up the header rack and screw it in place.
Center the header track in the top opening and mark the screw locations with a pencil.
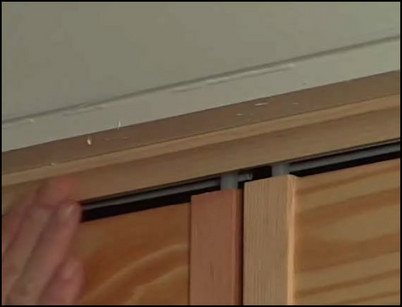
Step 3: Set the pivot brackets in place
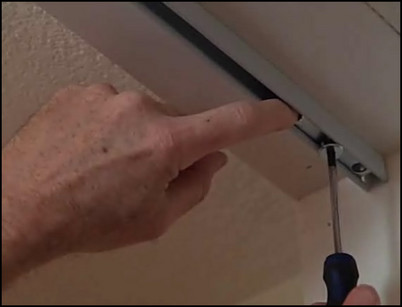
Follow the installation guidelines as you slide the pivot brackets into place within the header track, setting them 1/4 inch away from the door frame. Use a plumb bob to set the bottom pivot bracket in place directly below the top bracket.
Slide the pivot brackets along the header track until they are 1/4 inch away from the frame.
Step 4: Installing lower pivot brackets on a carpeted floor
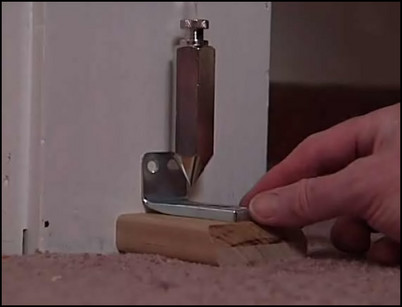
Wall-to-wall carpeting is not sturdy enough to support the lower pivot bracket for a bifold door so you will need to install a wooden pad for bracing. First, use a plumb blob to line up the location for the pad and the lower bracket centered on top with the pivot bracket at the top of the door frame. Mark the location of the bracket on the pad and the location of the wooden pad on the carpet. Using a utility knife, cut away the carpet and pad under the location for the wood support. Fit the wood support into the hole and secure it to the floor underneath with a wood screw. Install the pivot bracket on top of the wood block, double checking its position with a plumb bob, marking and drilling pilot holes, and screwing it in place.
Use a plumb bob to mark the location for the lower bracket.
Step 5: Insert the guide pins and adjustable pivots
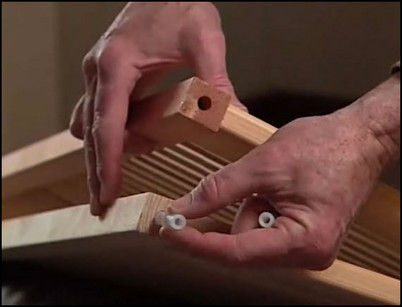
Insert the nylon guide pins in the holes at the top of the door. Gently tap them into the holes with a hammer. On the bottom of the door are pre-drilled holes for the adjustable pivots. Insert them into the holes and tap them into place.
The nylon guide pins fit into pre-drilled holes in the top of the door.
Step 6: Hang the doors

Hang the bifold doors in the track by folding them in half and fitting the guide pin in the upper track. Next, lift the door to fit the adjustable pivots into the pivot brackets at the bottom of the door.
Insert the guide pin into the hole in the header track.
Step 7: Position the lower pivot
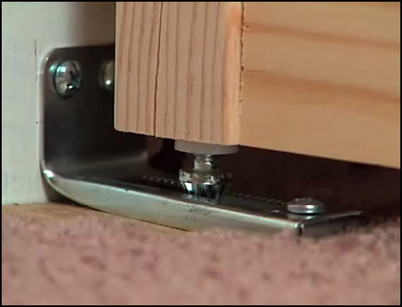
Set the pivot out 1/4 inch from the door frame so that the door will have room to swing. Make the same adjustment on both sides. The pivot can be screwed tighter or looser to adjust the height of the door and help you align the doors.
Set the lower pivot out 1/4 inch from the door jamb.
Step 8: Set the doorknobs
Mark the position for the doorknobs in the middle of the edge piece, at a comfortable height from the floor. Drill a hole that is the size of the door fastener. Make sure the hole goes through the door completely. From the back side of the door, insert the screw to hold the doorknob. Attach the knob to the screw and tighten by turning.
Mark the location for the doorknob in the middle of the edge piece at a comfortable height off the floor.
Step 9: Install alignment brackets
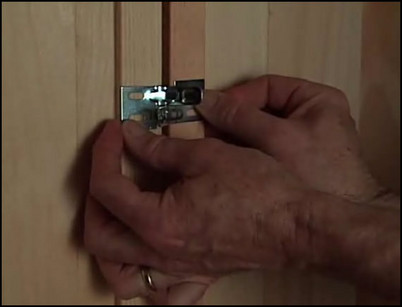
With four-section bifold doors, alignment brackets are installed on the back side of the doors, 18 inches off the floor, to keep the doors aligned when they are closed. Screw one bracket to the edge of each inside door so that they interlock when closed.
Alignment brackets interlock when the door is closed to keep the doors in line.
Step 10: Install molding as a valance over the header track
As a finish step, you can install a piece of molding cut to fit over the length of the header track. Simply cut the molding and glue or tack in place in front of the track. Then paint or stain the doors and trim.
A piece of wood molding can be tacked or glued in front of the header track for a finished look.


