
Materials:
Step 1: Select a texture patch that matches your finish

To repair a hole in a textured wall, purchase a texture patch repair kit. There are many different types of texture paint. The patch repair kit contains a variety of textures. Select a texture patch that matches your finish or will blend in the best.
Choose a patch that matches the texture of your wall.
Step 2: Mark the patch and cut it to size
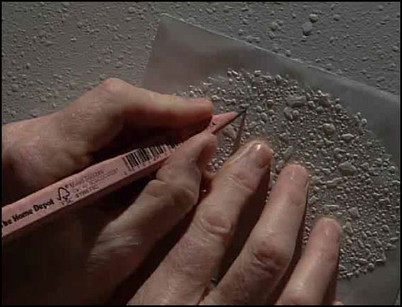
Hold the patch in place over the hole and mark the area to cut. Trace the area around the hole with a pencil, leaving at least 1/2 inch all the way around the outside of the hole. Cut out the patch, being careful to cut around the pieces of texture. Leaving the texture pieces complete will allow the patch to blend in better with the texture on the wall.
Cut the patch, making sure to cut around the texture spots.
Step 3: Prepare the wall for the patch
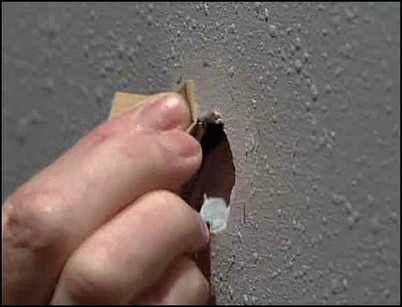
Use a pencil to trace around the patch and mark the location on the wall. Next use 120-grit sandpaper to sand smooth the area under the patch. Use a damp sponge to wipe down the area around the hole and remove any dust.
Sand off the texture around the edge of the hole.
Step 4: Position the patch
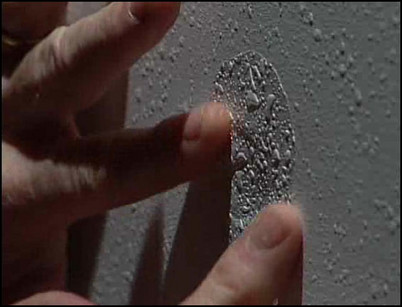
Once the wall is completely dry and dust-free, peel the backing paper off the back of the patch and place it over the hole. Rub the edges of the patch to make it adhere, but do not press on the area over the hole.
Position the patch over the hole and press firmly on the edges to make it stick.
Step 5: Prime and paint the patch to match the finish
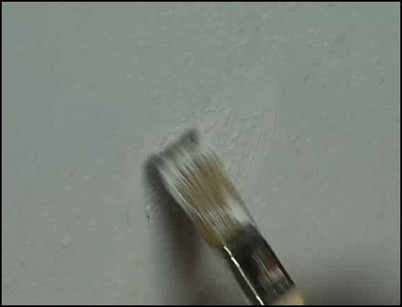
Once the patch is in place, prime and paint the patch to blend it into the surrounding finish.
Prime and paint the patch to help it blend in.


