
Materials:
Step 1: Collect and understand the parts.
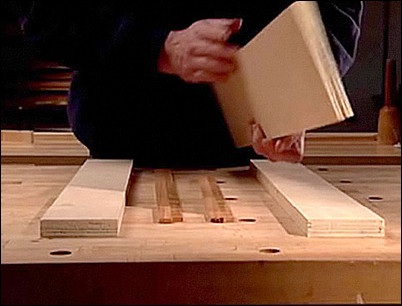
The miter box will consist of three lengths of wood to form a base and two sides. The base of the box will rest on two lengths of scrap wood, elevating the box by a 1/4-inch. This will allow the legs to stabilize the box during sawing.
The base will rest on two lengths of scrap wood.
Step 2: Mark the center of the elevated base.
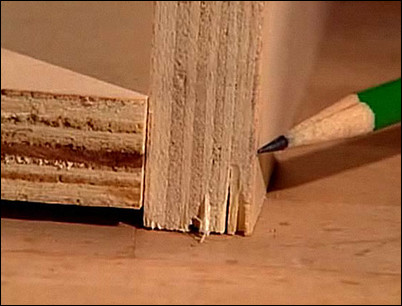
With the miter box parts resting in their appropriate positions, use a pencil to mark the center of the elevated base. Mark this location in the outside of both pieces of wood that will act as the legs of the miter box.
Use a pencil to mark the center.
Step 3: Strike a line down the length of each leg.
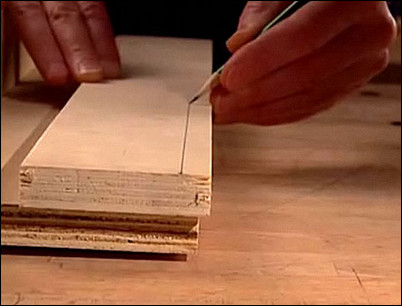
Using your finger as a gauge, strike a line with a pencil down the length of wood that will act as a side to the miter box. This line will extend the marking that locates the center of the elevated base. Avoid pressing too hard and causing splinters. Repeat this step on the other side of the miter box.
Use your finger as a gauge to strike the line.
Step 4: Drill pilot holes along the line.
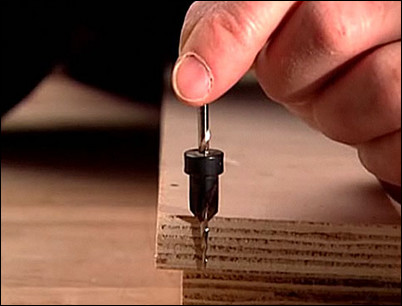
To drill pilot holes for the screws, use a tapered drill bit with a countersinking collar. This will allow the screw to rest flush with the side of the miter box. The pilot holes will be drilled into the miter box sides, along the line that marks the center of the elevated base. Drill as many holes as needed, depending on the length of the box.
Use a tapered drill bit with a countersinking collar.
Step 5: Fasten screws to the base.
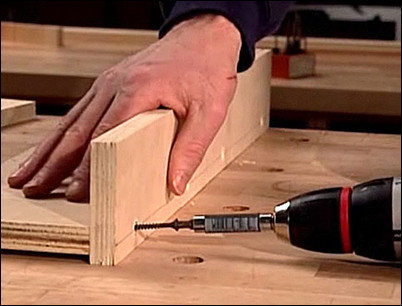
Align the side of the box against the base. Fasten the screw into the pilot hole, pulling the base tight to the side. Continue for every pilot hole, and repeat for the other side of the box. Be sure to hold the pieces steady as you insert the screw.
Hold the pieces steady as you insert the screw.
Step 6: Mark the location for the center guide slot.
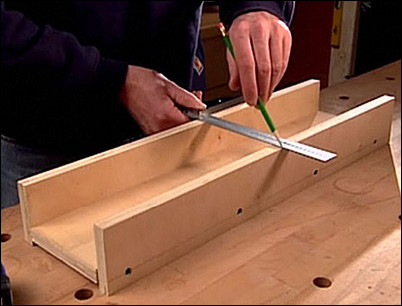
Use a tape measure to locate the center of the box. Now, use a combination square to draw a 90-degree line across the center mark on both sides of the box. Use the combination square to continue the line down the inside and then the outside of both sides of the box. Take time to make sure the line is square and straight.
Use a combination square to mark a perfect 90-degree line.
Step 7: Mark the location of the 45-degree angle guide slots.
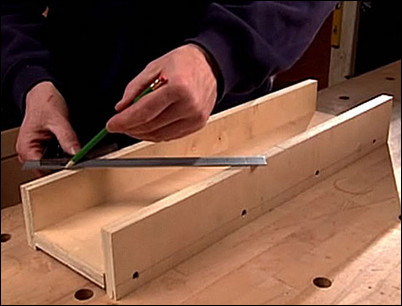
Use the 45-degree angle on the combination square to mark the location of the 45-degree guide slots on the top of the sides of the box. Now, use the right angle guide to carry the marks down the inside and outside of both sides of the box. Follow this entire step for the other side of the miter box to mark another 45-degree guide slot.
Use the 45-degree guide to mark the slot locations.
Step 8: Cut the guide slots.
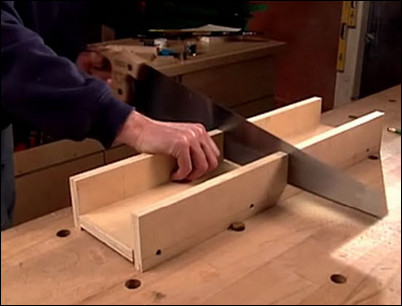
Using a hand saw, start a cut following the center guide slide pencil markings. Pull the saw back along the line on both sides of the box. Cut slowly and make sure to follow the lines on both sides of the box. Continue the 90-degree cut until the saw just touches the bottom of the miter box, then stop. Repeat this entire step to cut the guide slots for both of the 45-degree angle locations.
Carefully cut along the lines on both sides of the miter box.
Step 9: Make practice cuts.

Insert stock wood into the miter box. Hold the wood tightly against the side of the miter box. Insert the saw into the 45-degree guide slot, and cut the stock wood. Now, follow the same steps for another piece of stock on the opposing angle. If the miter box was cut correctly, the two pieces of cut stock should fit together perfectly.
Hold the stock tight to the side while making the cut.


