
Materials:
Step 1: Understand the qualities of a sharp chisel.
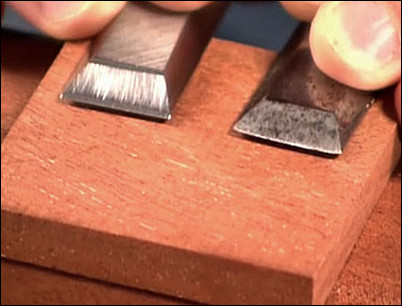
A sharpened chisel has three important qualities: the bottom must be ground flat, the facing edge must be square and the top edge is hollow-ground to a keen edge.
Note the differences between the sharpened chisel on the left and the dull one on the right.
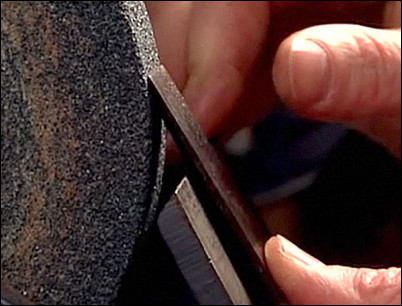
Step 2: Square the edge of the chisel end.
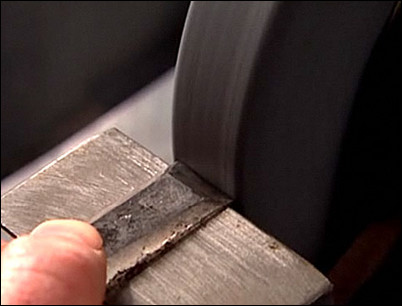
Hold the end of the chisel square to a medium grit grinding wheel. Gently grind the end of the chisel until it is flat and straight and ready for sharpening.
Hold the chisel end square to the grinding wheel.
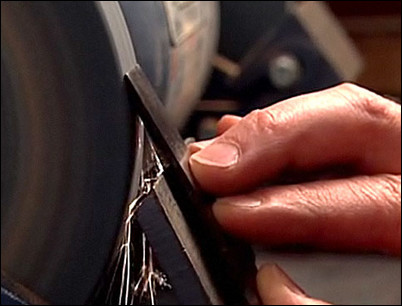
Step 3: Sharpen the end of the chisel.
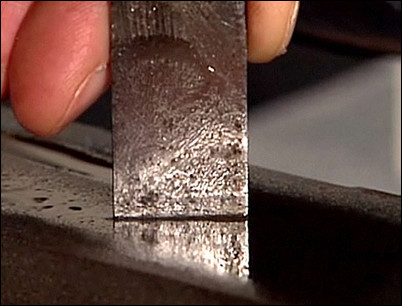
Apply oil to the sharpening stone. Hold the end of the chisel square and perpendicular to the stone. Drag the chisel across the stone until the end is ground completely square and smooth.
Drag the end across the stone.
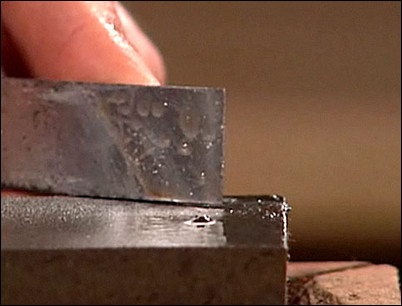
Step 4: Measure the angle of the chisel.
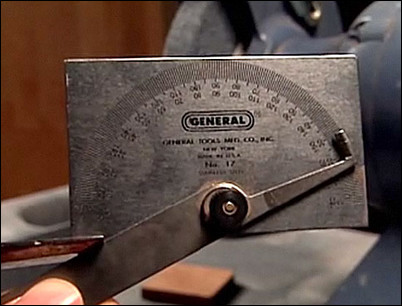
Measure the angle of the chisel. Most American chisels have an angle of 25 degrees.
Check the angle of the chisel.
Step 5: Test the angle on the grinder.
Set the support of the grinder to the angle of the chisel. Be sure to set the support close to the grinding wheel. Check the angle by turning the grinding wheel and looking at the marks made by the wheel. Adjust the support until the marks are on the center of the chisel.
The marks should be on the center of the face.
Step 6: Grind the face of the chisel.
With the angle set properly, bring the face of the chisel against the spinning grinding wheel. Work the chisel back and forth until the front face of the chisel is evenly ground. This is called hollow-ground.
Work the chisel back and forth across the wheel.
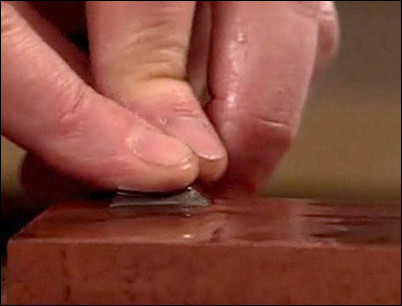
Step 7: Polish the bottom of the chisel.
Apply oil to a flat stone. Hold the bottom of the chisel firmly against the stone and work it across the stone. Polish the bottom of the chisel in this way until it is smooth to a mirror finish.
Polish to a smooth, mirror finish.
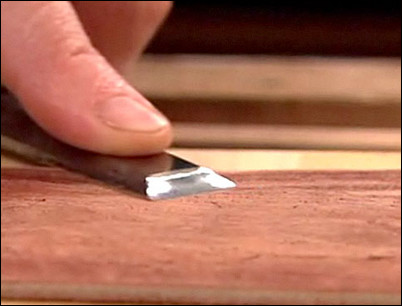
Step 8: Remove burrs from the cutting edge.
You can remove any burrs from the cutting edge of the chisel by placing the chisel flat against the stone and making a few gentle passes.
Place the cutting edge flat on the stone to remove burrs.
Step 9: Remove the final rolled edge.
Oil the finishing side of the stone. Using the same methods as in Step #8, place the cutting edge flat against the stone and make enough gentle passes until the burred edge is gone.
Pass the cutting edge along the finishing side of the stone.
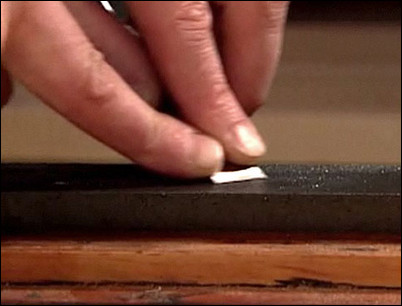
Step 10: Hone the chisel on a piece of leather.
The final step is to hone the chisel on a piece of leather to remove any “micro-burrs.” This will create a razor-sharp edge. Hold the chisel against the leather and pull it toward you to hone the edge. The result will be a chisel that works like new.
Pull the chisel toward you across the leather.


