
Materials:
Step 1: Choose the right blade.
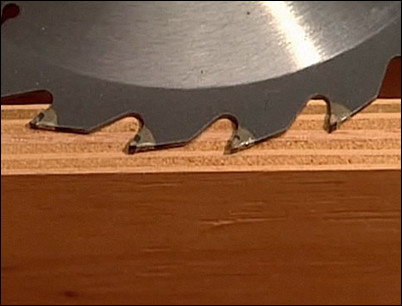
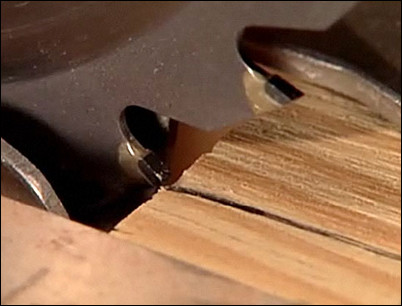
It is important to match the correct blade to the material to be cut. For framing plywood, decking, and general purpose construction, use a 24 tooth combination carbide blade. The carbide tip will laster longer than a cut steel blade. For general framing stock, use a 24 tooth framing blade. For finish stock and trim, a 60 tooth carbide blade is recommended. For thin wood and finish work use a fine tooth cross cut saw.
Use a 24 tooth combination carbide blade for framing plywood and decking.
Step 2: Prepare to change the saw blade.

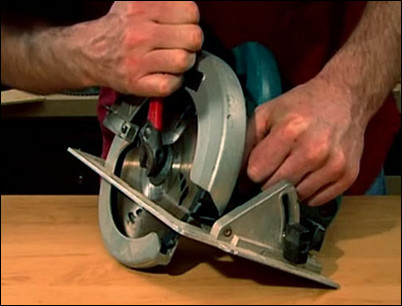
If it is necessary to change the saw blade before cutting, first unplug the saw. You should never change a saw blade unless the tool is unplugged. Locate the blade lock on your saw. Press down on the blade lock to prevent the blade from turning.
Press down on the blade lock.
Step 3: Remove the blade.
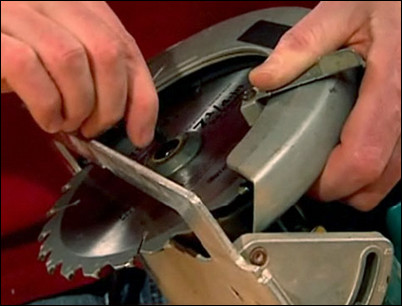
Use a wrench to loosen the bolt that holds the blade in place. With the bolt loose, continue turning counter-clockwise by hand until it is removed. Remove the washer. Slide the blade guard out of the way and remove the blade.
Use a wrench to loosen and remove the bolt.
Step 4: Attach the replacement blade.
Look for the graphic symbol on the new blade the indicates the direction of the blade’s rotation. A circular saw turns counter-clockwise. Open the blade guard and insert the blade with the teeth closest to the front of the saw pointing up and the graphics on the face of the blade facing out. Replace the washer first, and then the bolt. Hand-tighten the bolt and then use a wrench to turn it a quarter-turn more, or until it is snug.
Hand-tighten the nut. Notice the orientation of the blade teeth.
Step 5: Prepare the material and saw for the cut.
To cut a straight line on a board, first strike a line on the board you wish to cut. With the circular saw still unplugged, release the blade depth lever and set the depth of the blade so that it just clears the depth of the board. Tighten the blade depth lever.
Set the blade depth just below the depth of the board.
Step 6: Line the blade up properly.
Line the blade up so that it rests on the “scrap side” of your cut line, or just outside that line.
Line the blade up just outside the cut line.
Step 7: Mark the width of the saw plate.
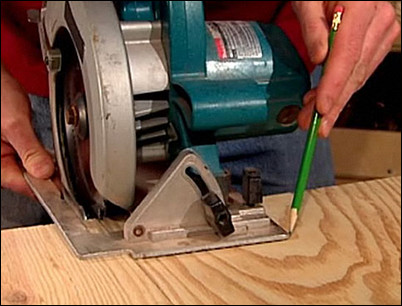
With the saw blade still resting just outside the cut line, mark the width of the saw plate on the other side of the saw. Measure the distance between the cut line and this new line marking the outside of the saw plate.
Use a pencil to mark the width.
Step 8: Set the guide board in place.
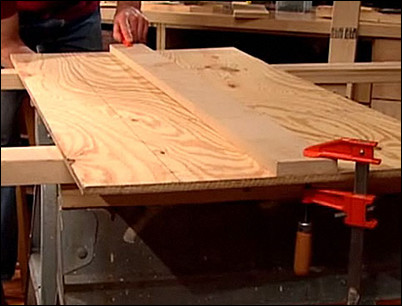
Transfer the measurement taken in Step #7 to the other end of the board that you will cut. Mark the same line that marks the width of the saw plate. Using those marks, line up a guide board the length of the board that you wish to cut. Firmly clamp the guide board in place.
Clamp the guide board in place at both ends.
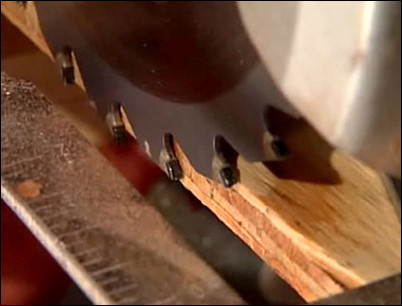
Step 9: Make the cut.
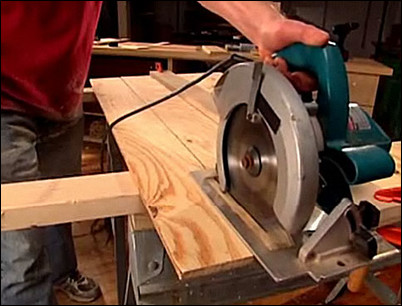
Before cutting, be sure that you are wearing appropriate eye and ear protection. Plug in the circular saw. Place the plate of the circular saw against the guide board. Verify that the saw blade is just outside the cut line mark. Start your cut. Slide the saw along the guide until the cut is complete.
The plate of the saw should be placed up against the guide board.


