
Materials:
Step 1: Disconnect the spark plug.
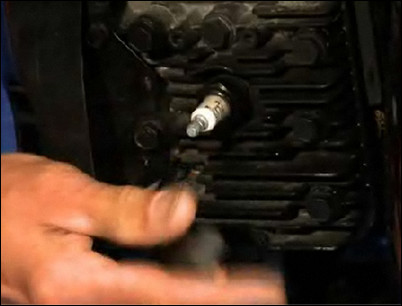
First, disconnect and move the spark plug wire away from the spark plug. This will eliminate any chance of the mower starting while you are working on the blade.
Disconnect the spark plug.
Step 2: Flip the mower on its side.
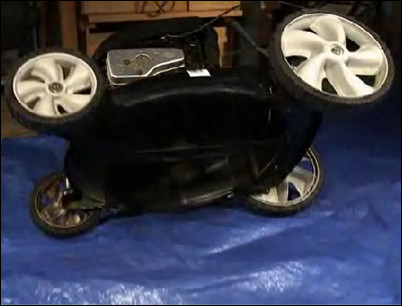
Flip the mower on its side, being careful not to spill gas and oil from the engine. You can use a tarp underneath the mower to contain any mess. Flip the mower so that the oil breather tube is on high side of the engine and the oil doesn’t leak. The best time to do this is when the gas tank is almost empty.
Flip the mower on its side with the oil breather tube facing up.
Step 3: Brace the mower blade.
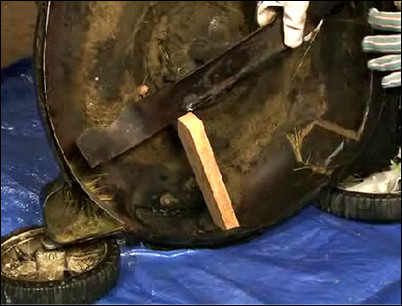
Next, clamp or brace a block of wood against the mower blade to prevent the rotary blade from moving as you remove the bolt.
Use a wood block to brace the mower blade.
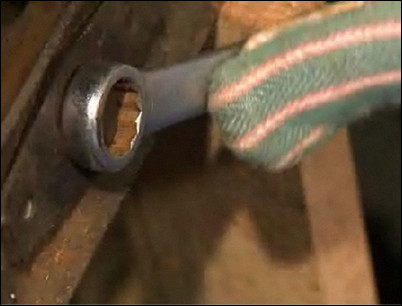
Step 4: Remove the blade.
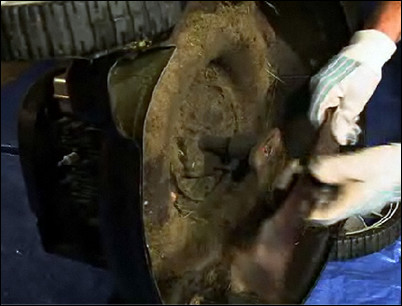
Wearing gloves to protect your hands, loosen the bolt with a wrench. Remove the bolt, the washer and the blade.
Remove the bolt, washer and blade.
Step 5: Inspect the blade for damage.
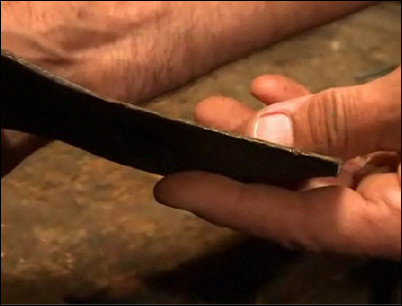
Inspect the blade for damage. If the blade is dull but does not have serious dings or nicks, it’s a candidate for sharpening. If the blade is even slightly bent or you discover any sign of metal fatigue, such as a hairline crack, replace the blade with a new one of the same length.
Inspect the blade for metal fatigue or cracks.
Step 6: Prepare the bench grinder.

Set the rest on the bench grinder to the angle taken from the blade. This will help you to guide the blade so that the angle remains the same across the length of the cutting area. Wear safety glasses during the grinding process, and make sure the shield of the bench grinder is set in place.
Set the rest and the shield of the bench grinder.
Step 7: Grind the blade to sharpen.
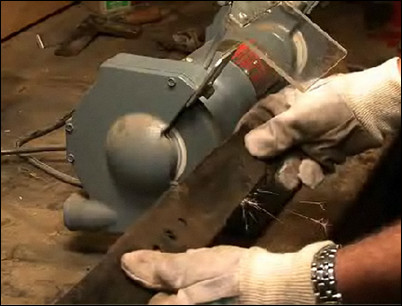
Find an area where the blade is dull but the cutting angle is still clearly visible. Making multiple passes, slowly grind the entire length of each side of the blade evenly. It is not necessary to grind out every nick. It’s more important that the blade remain balanced.
Slowly grind the entire length of each side of the blade.
Step 8: Check that the blade is balanced.
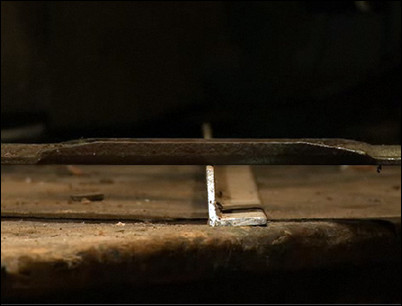
From time to time, stop sharpening and check the balance of the blade. A small piece of angle iron can serve as a fulcrum. The weight of each arm of the blade must remain the same because an out-of-balance blade, spinning at high speeds, can cause severe vibration that will damage your mower. If one side is a little heavy, grind a little more metal off the entire length of the heavy side. When you are sharpening, be careful not to overheat the blade. If the blade starts to get hot, dip it in a pail of water. Overheating the blade ruins the temper or hardness of the blade, which is dangerous because the blade becomes brittle and can break.
Use a piece of angle iron to make sure the blade is balanced.
Step 9: Clean the engine shaft.
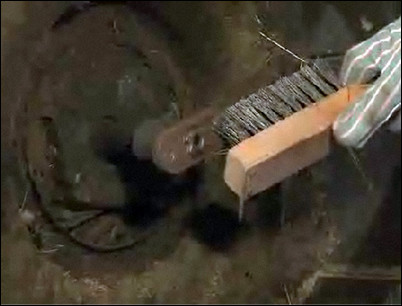
When the blade is evenly sharpened, clean the engine shaft with a wire brush to remove any debris or dried clippings.
Use a wire brush to clean the engine shaft.
Step 10: Brace the blade and replace the washer and nut.
Place the blade back into position. Use the wooden block to brace the blade on the opposite side. Replace the washer, and use a wrench to screw the nut back on. Tighten the bolt to manufacturer’s suggested torque. Then, tip the mower back up. Don’t forget to reconnect the spark plug. Your mower is now ready for another season of use.
Brace the blade to screw the nut back on.


