
Materials:
Step 1: Mask the work area.
Before grouting and caulking the new tile, use masking tape to mask off the areas surrounding the new tiles.
Mask off the areas surrounding the new tile.
Step 2: Prepare and mix the grout.
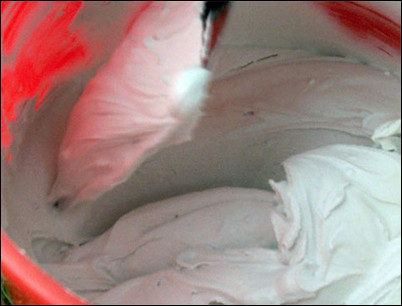
When applying grout, it is important to get everything lined up beforehand so you can move smoothly from one step to the next. Depending on the temperature, you have approximately 30 minutes before the grout hardens, so you have to move quickly through the next steps. Following the directions on the grout containers, measure and place un-sanded tile grout into a bucket and then pour in the recommended amount of grout enhancer. Stir the grout and the enhancer with a wood stirrer, getting all the lumps out of the mix. Keep mixing until the grout is smooth and has the consistency of peanut butter.
Stir until the grout is smooth and has the consistency of peanut butter.
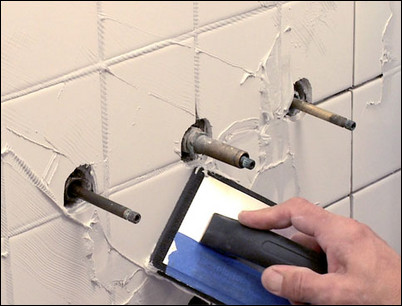
Step 3: Use a rubber float to push grout into the joints.
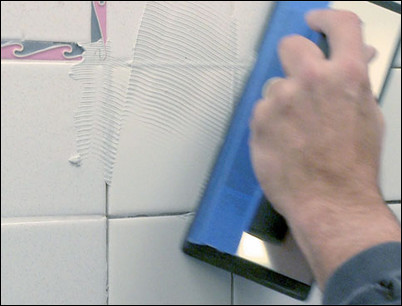
Using a trowel, place a small amount of grout on a rubber grout float. Starting in the upper corner, hold the grout float at a 60-degree angle and use sweeping motions to push the grout with the edge of the float across the tiles and into the joints. The goal is to get as much grout as you can into the joints and leave as little as possible on the surface of the tiles.
Sweep the float across the tiles at a 60-degree angle.
Step 4: Use a trowel to push grout into the corners.
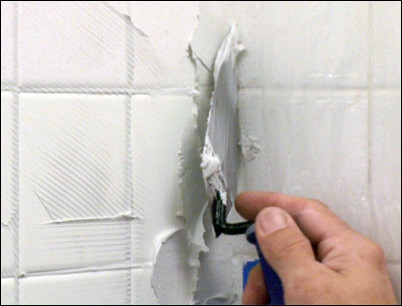
Use a trowel to distribute grout into the corner, then use the float to push the grout into the joint.
Distribute grout into the corners with a trowel. Smooth it out with the float.
Step 5: Trowel the joints around the valve stems.
As in the previous step, use the trowel to distribute grout into the joints around the valve stems. Follow up with the float to push the grout firmly into the joints.
Use the trowel for the joints around the valve stems.
Step 6: Use a grout sponge to remove grout from the face of the tiles.
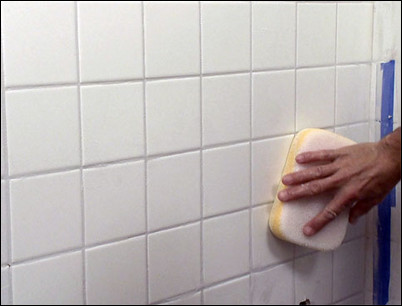
Before the grout has a change to harden, wipe the tiles lightly at an angle with a grout sponge dampened with water. Rinse the sponge in cool water frequently. Always work at an angle, and make as few passes as possible to avoid pulling the grout out of the joints. The goal is to level and smooth the grout in the joints and to remove as much grout from the surface of the tiles as possible. Allow the grout to dry for about four hours or as recommended by the manufacturer.
Lightly wipe the tiles with a dampened grout sponge.
Step 7: Use grout haze remover to thoroughly clean the tiles.
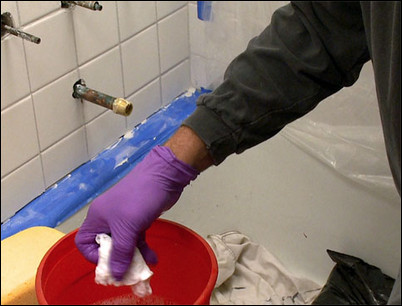
As soon as the grout is dry, follow the manufacturer’s directions to mix together a small amount of grout haze remover and water. Dampen a cotton cloth or chamois with the haze remover and wipe the wall at an angle to remove the remaining haze from the surface of the tiles.
Use a cotton cloth with grout haze remover to clean the surface of the tiles.
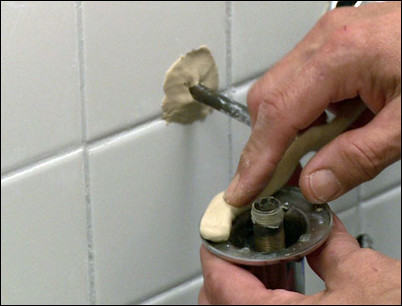
Step 8: Use plumber’s putty around the valve stem openings.

To prevent future leakage of water behind the wall, seal the valve stem openings with plumber’s putty. Knead it into shape, and press it into place. Plumber’s putty is easily removed for plumbing repairs if they are needed in the future.
Press the kneaded putty into place.
Step 9: Use plumber’s putty behind the valve stem cover.
Place a bead of plumber’s putty behind the valve stem cover to prevent water from getting behind the cover and into the wall. Plumber’s putty can be neatly trimmed by pulling away the excess.
Put a bead of putty around the back of the valve stem cover.
Step 10: Reassemble the handles and bath tub spout.
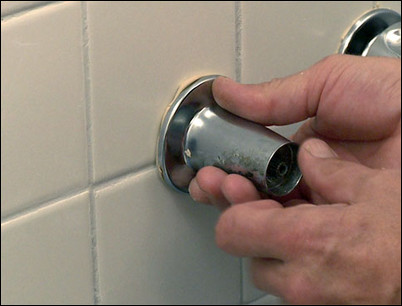
Clean up and reinstall the valve stem handles and bath tub spout. In this project, new replacement handles and a spout were purchased so that the plumbing would look as good as the new tiles.
Use a screwdriver to reattach the handle.
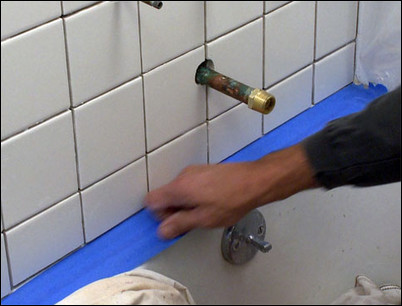
Step 11: Apply caulk to the joint between the tub and the tiles.
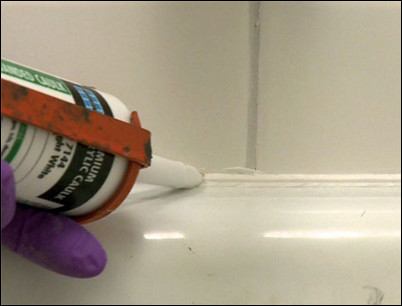
Using a caulking gun, apply a bead of high-quality caulk to the joint between the bathtub and the new tiles. Steadily squeeze the caulking gun handle to lay out an even bead of caulk.
Lay out an even bead of caulk.
Step 12: Smooth out the bead of caulk with your finger.
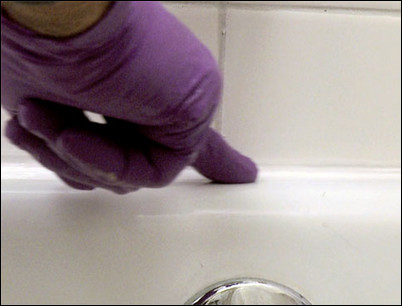
You can smooth the bead of caulk by dipping your finger in water and then running your wet finger lightly along the joint.
Run your wet finger lightly along the joint.
Step 13: Enjoy the look of the new tile and grout.

In just two days, the project is complete, transforming a broken tile replacement project into a tile repair that will last for decades.
The finished project looks and functions great.


